Embedded OTP with Generic HTTP Connectors
This article will teach you how to utilize embedded OTP codes for authenticating users when sending customized notifications with your messaging connectors within Descope. This use case is applicable when you want to utilize a messaging tool which Descope does not yet provide an out-of-the-box connector for. For instance, if you are in a region which our connectors may be slow due to networking or inspection during the travel, you could configure a generic HTTP connector to use for sending your OTP messages during the flow execution.
Create the Messaging Connector
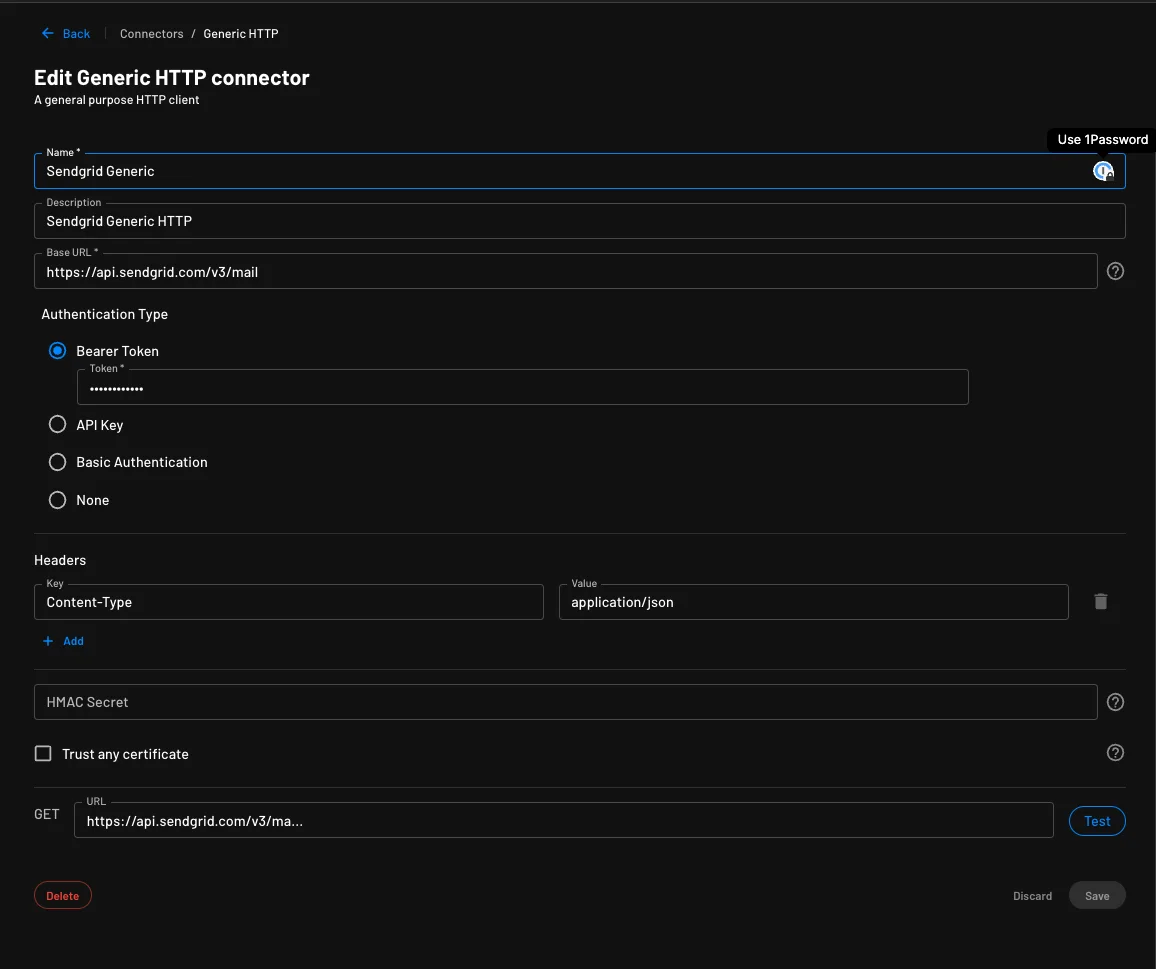
The network connectors guide covers the generic details about connectors and the use of Descope's generic HTTP connectors. You will need to ensure that you have the details necessary for the messaging tool you'll be using. Essentially, you will need the API routes as well as the necessary credentials.
This is a generic example of an HTTP connector which is connected to an email messaging tool.
Create the Applicable Flow
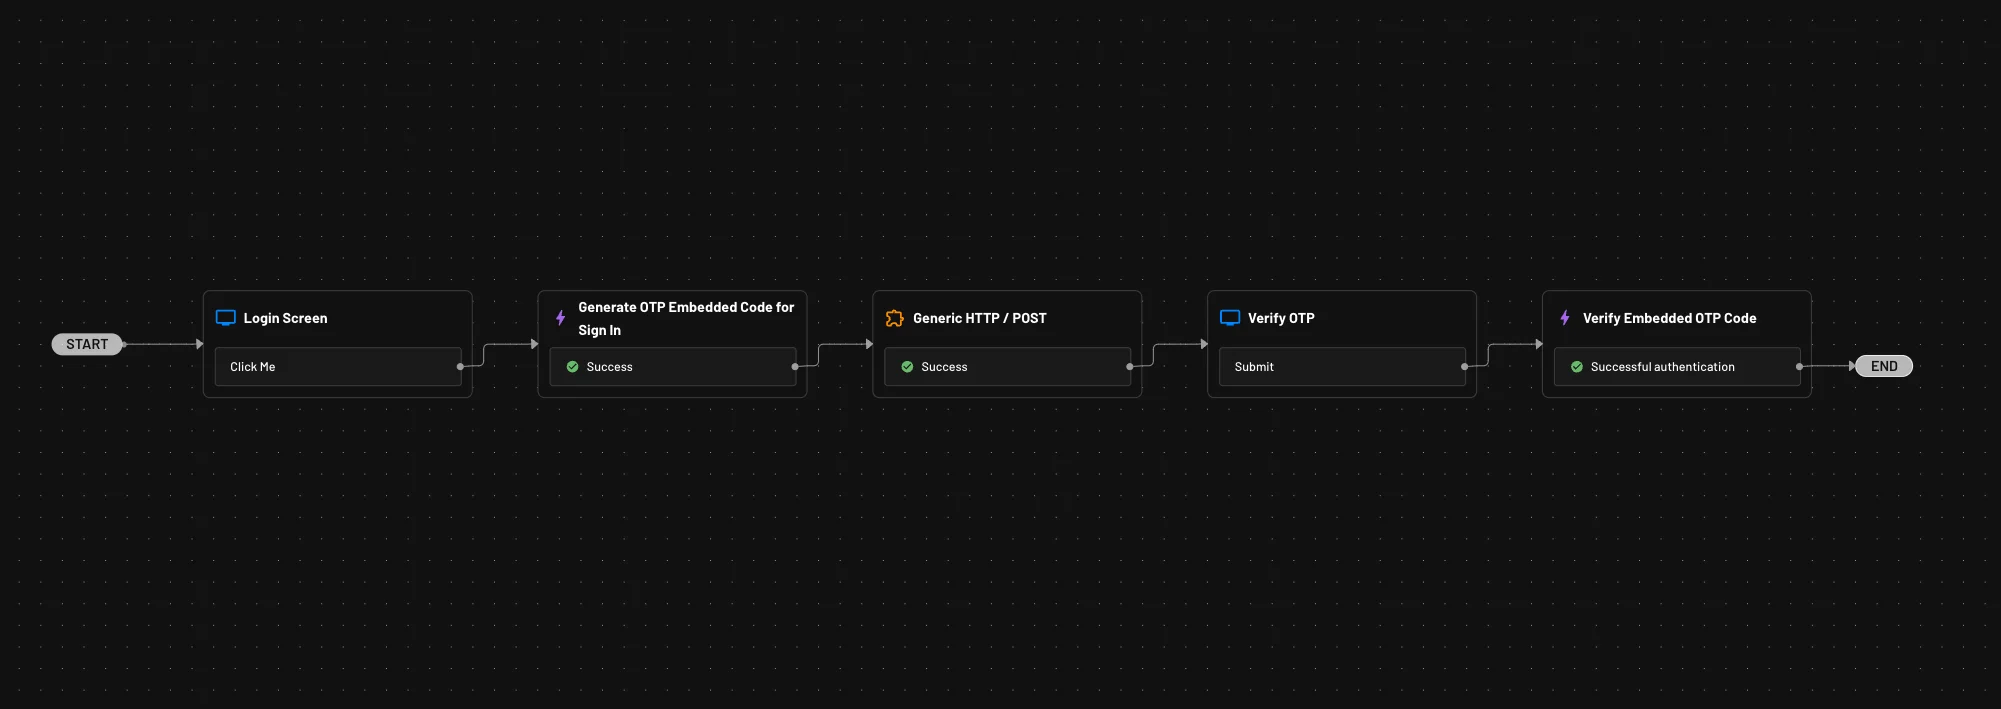
Once you've configured the generic HTTP connector, you must make the applicable flow. The below is an example of a completed flow. The next sections will cover how to add the related embedded OTP actions and the HTTP post action to the flow.
OTP Actions
The flow will require the Generate OTP Embedded Code action; Descope supports sign-up, sign-in,
sign-up-or-in, update-user-email, and update-user-phone actions for generating this code. To add them click
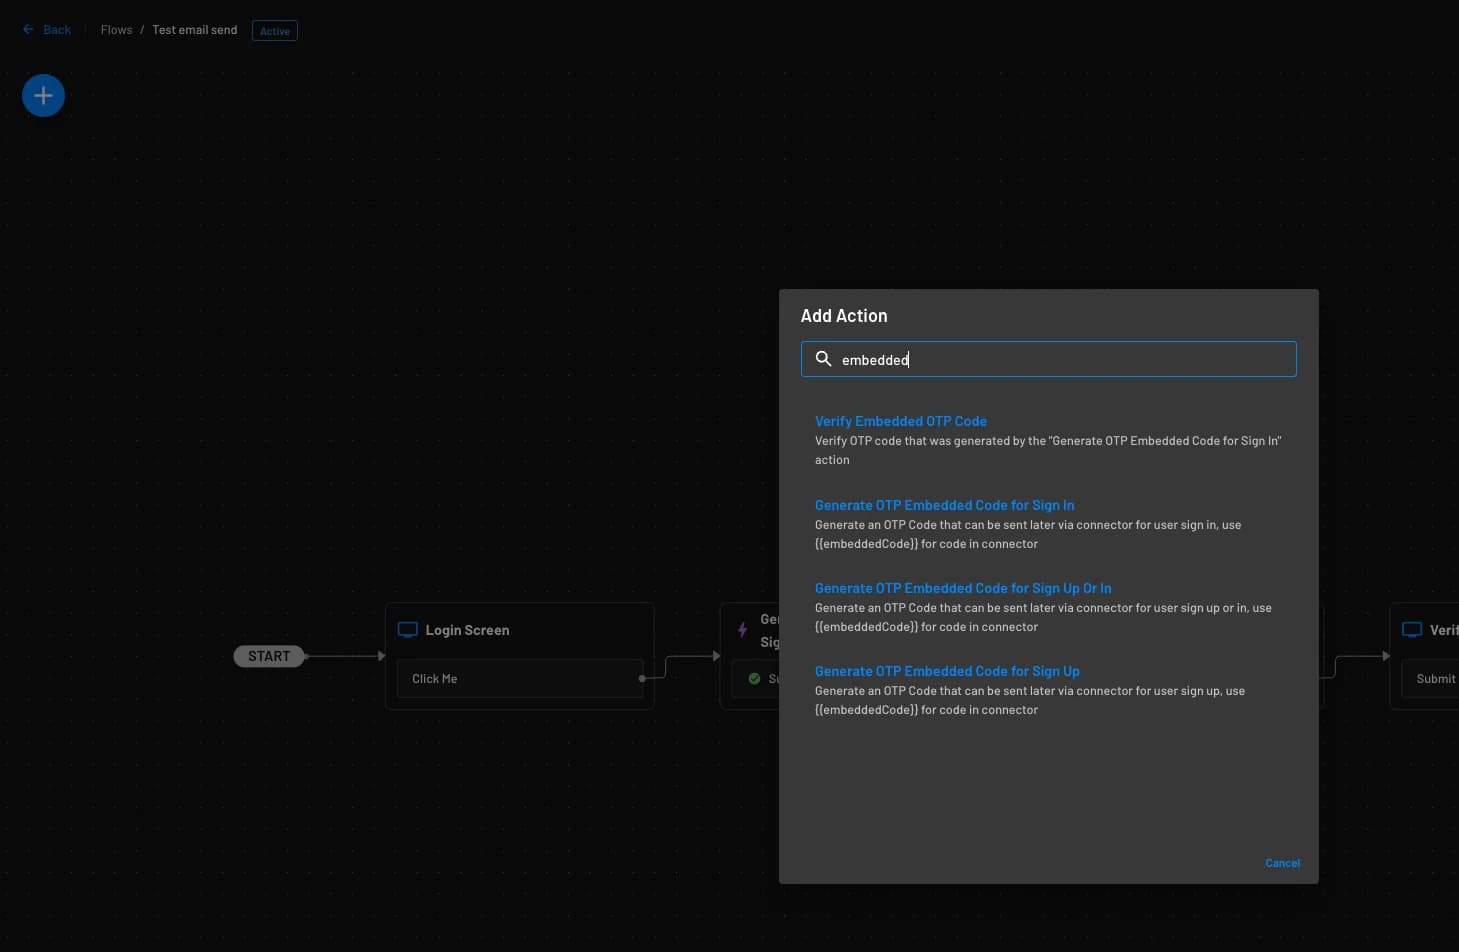
the blue + icon at the top left of the flow builder, and search for embedded then add the desired action based.
You will then also need to add the Verify Embedded OTP Code action. Below is an example of the actions displayed
when searching the actions.
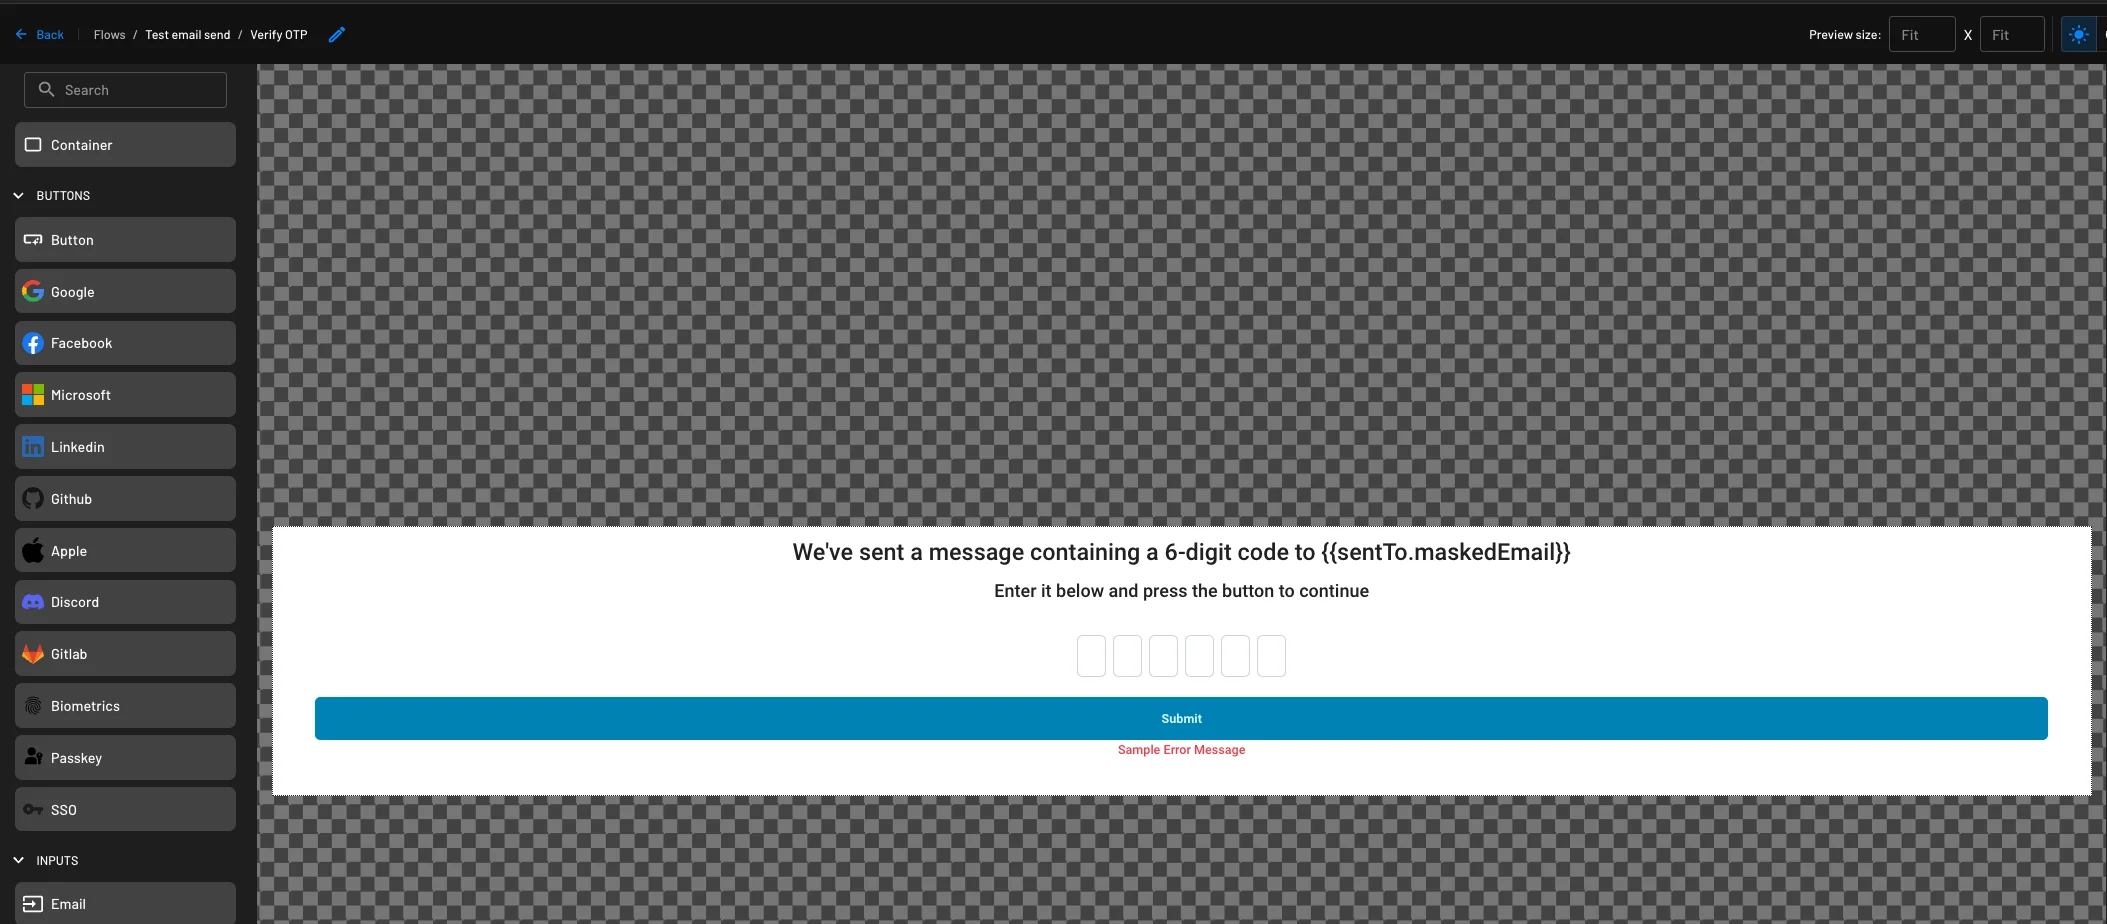
Verify OTP Screen
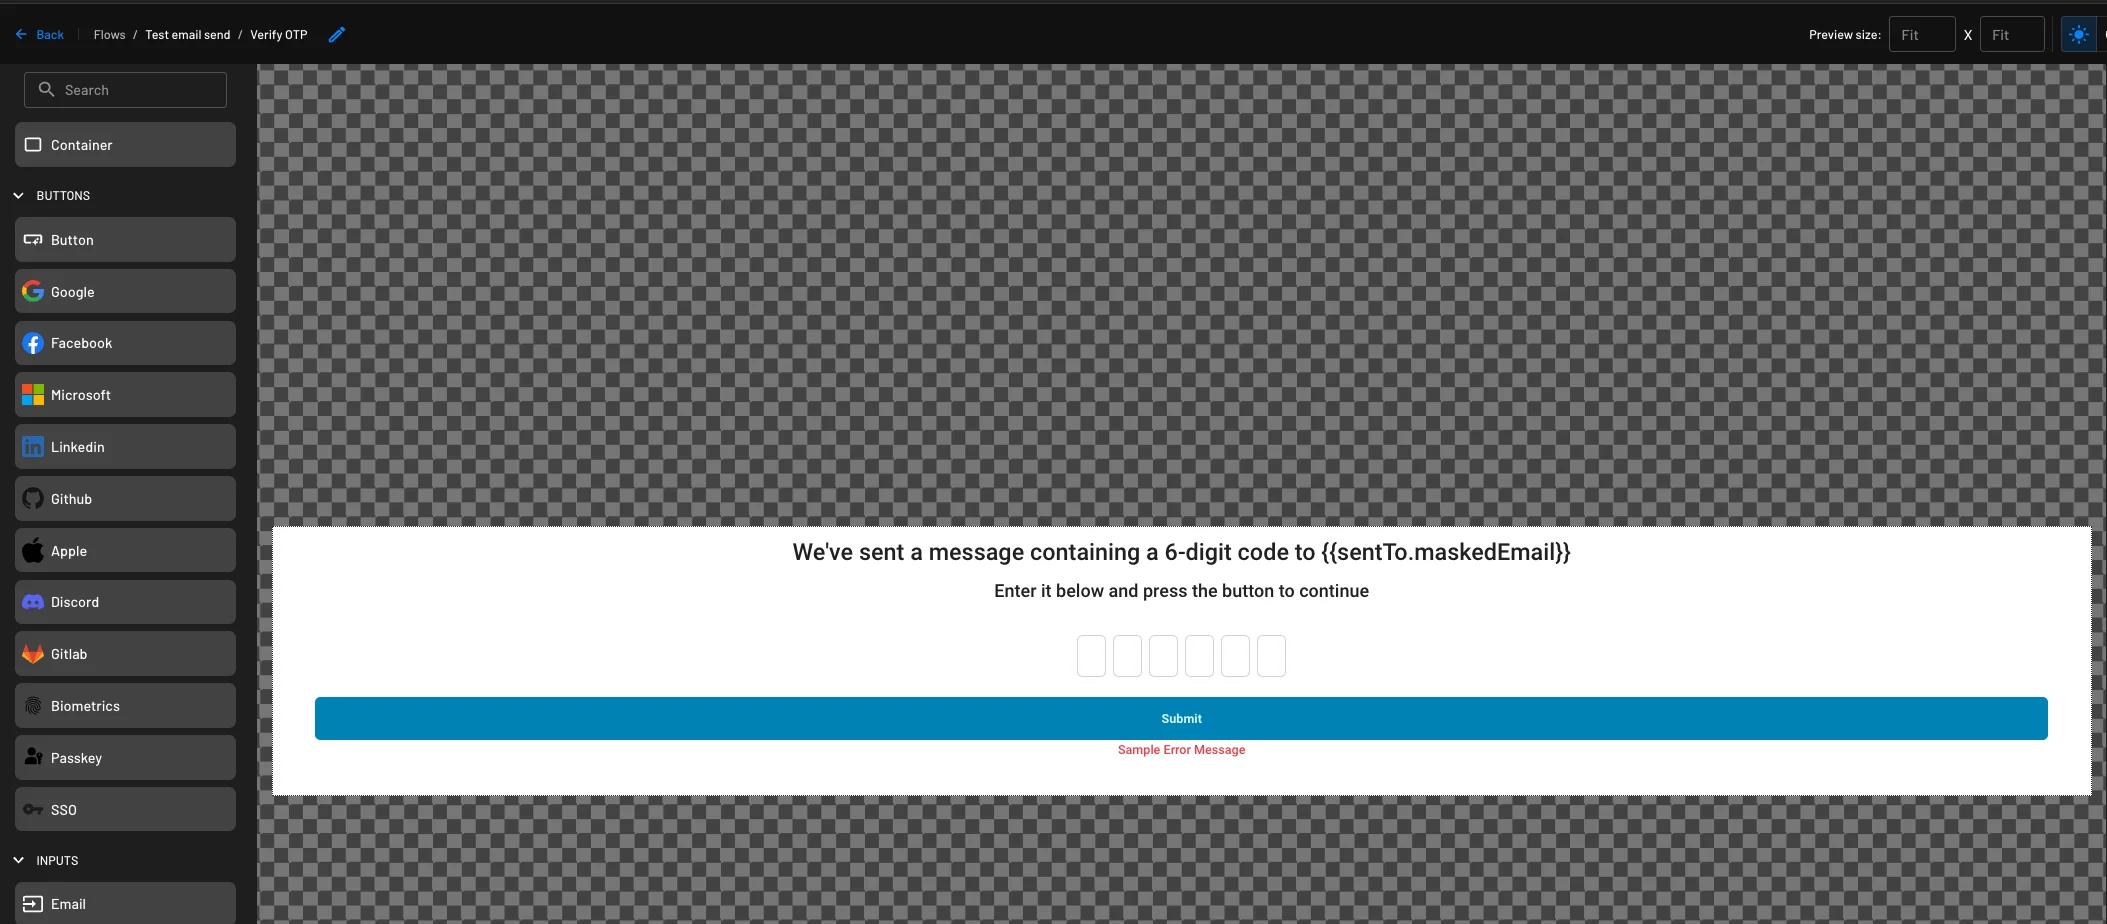
You will also need to add a screen which captures the OTP code from the user. This screen would go between the
Generate OTP Embedded Code and Verify Embedded OTP Code actions. After successful verification, the user's
email or phone will be verified within the user's details. Below is an example of that screen.
Generic HTTP / Post Action
You will then click the blue + sign at the top left of the flow builder screen and click Connector and then
select the Generic HTTP / Post Action to add to your flow. When configuring the payload, you will add the
embeddedCode wrapped in curly braces {{}}. The below example is for sending an email with the embeddedCode
and is sent to the email given during the Login Screen.
{
  "personalizations": [
    {
      "to": [
        {
          "email": "{{form.email}}"
        }
      ]
    }
  ],
  "from": {
    "email": "email@company.com"
  },
  "subject": "Your Code for login is {{embeddedCode}}",
  "content": [
    {
      "type": "text/plain",
      "value": "Your Code for login is {{embeddedCode}}"
    }
  ]
}
You'll also need to configure which connector you wish to use as well as the endpoint for completing the HTTP
post call. The below is an example of a configured Generic HTTP / Post Action for this flow. Once added, your
flow actions should be in a similar order to
the above example.
Updating a User's Email or Phone
The update-user-email and update-user-phone actions generate a code for a user who already exists. Use them when
you want a user to verify a new email address or phone number and you need the code delivered through your own
messaging tool. The action needs a user the flow already knows about, so the user should authenticate earlier in the
flow, or the flow should fetch them with the Load User action.
Build the flow the same way as the one above: generate the code, send it with your connector, collect it on a screen,
then verify it with Verify Embedded OTP Code. The outcome is what differs. Once the user verifies the code, Descope
writes the new email or phone to the existing user's details instead of creating a new user.
Double-click the action to configure it:
- Mark provided email as verified marks the address as verified on the user record once the user verifies the
code. The
update-user-phoneaction offers the equivalent option for phone numbers. - Add to login IDs keeps the user's current login ID and adds the new email or phone as an additional one instead of replacing it. See Link User Identities Across Different Auth Methods for how the merge behaves when attributes conflict.
Your connector builds the request body, so the payload can carry whatever else your messaging tool expects alongside
{{embeddedCode}}, such as an identifier for the user from your own system or a field marking the message as a
verification code.