Deploy to Production
This document outlines the key considerations and steps for deploying Descope in a production environment.
Note
If your company runs a private cloud deployment of Descope, start with that guide for environment-specific base URLs, networking, and feature enablement.
The checklist below still applies, but CNAME targets, static IPs, and some feature URLs differ from public SaaS.
Pre Deployment Checklist - Project Level
This section of the pre-deployment checklist covers configurations that should be done at the Descope project level.
1. Set Up Custom Domain
Configure your custom domain, including creating a DNS record, updating base & base static url in your code, etc. For more details on how to set up a custom domain, check out our custom domain guide.
2. Configure Approved Domains
In project settings, set up your list of approved domains that are allowed for redirect. If the value is left empty, the application will not perform validation, which could allow malicious actors to exploit vulnerabilities in your application.
Descope also automatically protects against cross-company domain misuse by validating that flows are not running on domains belonging to other companies. This security feature works automatically without any configuration.
For more details on how to set up approved domains and understand cross-company domain protection, refer to this doc.
3. Configure SMS/Email Messaging Connectors
Descope provides the first 100 SMS messages and used for authentication messages per month. In order to prevent authentication issues when this limit is reached, it is critical to set up messaging connectors before deploying to production. Additionally, setting up messaging connectors for both SMS messages and emails allows you to create custom messaging templates with your own branding.
4. Disable Static OTP Codes
If you have enabled static OTP codes for your test users, disable them before deploying to production to prevent unauthorized access using test credentials.
If you must have static OTP enabled in production for mobile review purposes, you should track audit events for usage of static OTP to prevent malicious users from authenticating with it.
5. Configure Custom OAuth Providers
Descope comes pre-configured with a default Descope OAuth app for Google to make developing and testing easier. We also provide the first 100 OAuth logins per month with the default app for testing. All other OAuth providers require your own OAuth app.
However, you cannot customize the Google sign-in page with your branding when using the default app, nor can you use the default app in production.
Therefore, it's important to make sure to set up your own OAuth apps to use in your production environment.
6. Configure Your Cookie Policy
Configure your cookie policy, as described in our cross-site cookie policy guide, to ensure cookies are handled the best way for your use case.
7. Block Self-Registration Sign Up
Block user sign up if your application wants to restrict users from creating accounts on their own. Instead, users will be able to sign in only after they have been invited, or if they are part of a domain that has self-registration enabled on the tenant level.
8. Configure Audit Log Streaming
Audit events are only stored in Descope for 30 days. Generally speaking, if you want to store your audit events for longer than 30 days, you should configure an Audit connector to send events to a third-party service.
We offer an generic audit webhook connector to send audit events to your own api, as well as default connectors for services like Sumo Logic, Datadog, AWS S3, and more.
9. Create Production Project
Typically, you want to have separate Descope projects for your development, staging, and production environments. To learn how to clone your development project and set up additional environments, check out our managing environments doc.
10. Review Your Access & Management Keys
If you are utilizing access keys or management keys, make sure that you use the expiry mechanism and rotate the keys regularly. Consider limiting the scopes of your keys by setting permitted IPs and roles.
11. Disable Descope Components Not In Use
When you are not actively using a Flow or an authentication method in Descope, you can disable it from the Console.
To disable a flow, navigate to the Flows tab of the Descope console, and select disable next to the relevant flow.
To disable a widget, navigate to the Widgets tab of the Descope console, and select disable next to the relevant widget.
12. Restrict API and SDK Access to Authentication Methods
By default, every authentication method can be called directly through the Descope APIs and client SDKs, not only from your Flows. Anyone who has your Project ID can call a method such as OTP or password sign-up directly, which skips the checks your Flows enforce, such as requiring MFA or other conditions and steps you've built into the Flow.
To close that gap, open each authentication method in the Console and set its Trigger Method to Disable API & SDK. Your Flows keep working, because this setting only blocks direct API and SDK calls.
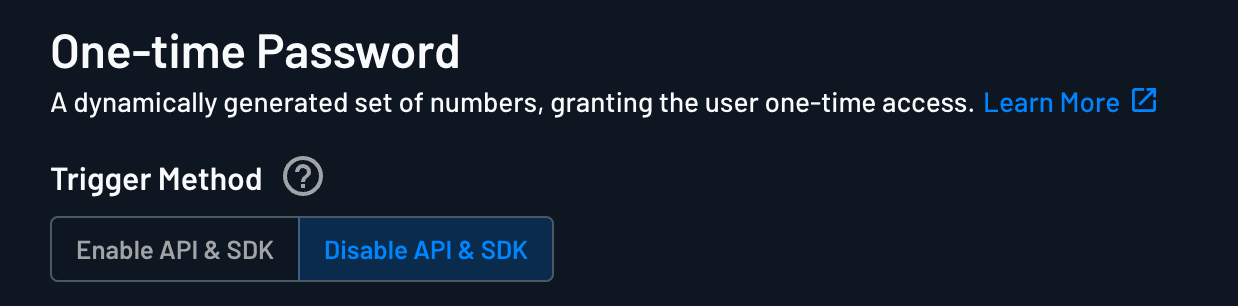
Which methods you can disable depends on how your application calls Descope:
- If you only use Flows, you can disable API and SDK access for every authentication method.
- If your frontend calls an authentication method directly with a client SDK, you need to keep API and SDK access enabled for that method.
- If your backend calls an authentication method with a server SDK, you can still disable API and SDK access, as long as your backend sends an auth management key with its requests.
Calling Disabled Authentication Methods from Your Backend
A management key overrides the Disable API & SDK setting. When a request to an authentication API includes a management key with the Authentication or Full Access role, Descope accepts it even though API and SDK access to that method is disabled. Requests without that key are rejected.
Each server SDK has a dedicated setting for this key, called the auth management key. The SDK sends it with every authentication request and never with management requests. The regular management key works the other way around, and is never sent with authentication requests.
Use a separate key for authentication
Create a separate management key with only the Authentication role for this purpose, rather than reusing the key you use for management APIs. That way, a key that is exposed through your authentication code path can't also be used to manage users, tenants, or project settings.
You can set the auth management key in the SDK configuration. Some SDKs also read it automatically from an environment variable when you don't pass it in:
| SDK | Configuration field | Environment variable read by the SDK |
|---|---|---|
| Node.js | authManagementKey | Not supported |
| Python | auth_management_key | DESCOPE_AUTH_MANAGEMENT_KEY |
| Go | AuthManagementKey | DESCOPE_AUTH_MANAGEMENT_KEY |
| Java | authManagementKey | DESCOPE_AUTH_MANAGEMENT_KEY |
| Ruby | auth_management_key | DESCOPE_AUTH_MANAGEMENT_KEY |
| PHP | authManagementKey | Not supported |
| .NET | AuthManagementKey | Not supported |
Each quickstart shows how to pass the key when you initialize the client.
13. Preventing User Enumeration
Make sure your authentication flows do not leak information that could help attackers guess whether or not specific user accounts exist.
To mitigate this risk, you can follow the steps in our preventing user enumeration guide.
Pre Deployment Checklist - Application Level
This section of the pre-deployment checklist covers configurations that should be done at your application level.
1. Remove Console Log Messages
Make sure all console log messages are removed to ensure no critical information like emails or passwords is leaked. The logger component in Descope SDKs contains these messages and can be set to ignore the info logs.
2. Limit API Calls
To avoid hitting the API rate limit, ensure your app is optimized to make the least number of requests possible based on the need. Consider using Descope SDKs, which have a higher rate limit, to make requests wherever possible. To learn more about rate limits, refer to our rate limit doc.
3. Set Up Automated Testing
Ensure that you have thoroughly tested all essential use cases of your application and integrations across all devices that your end users may utilize. We have guides for automated testing with Cypress and Playwright.