Lokalise Connector
Descope's Lokalise connector powers automatic localization within your authentication flow, allowing for the adaptation of language in your product to users' specific country or region.
Note
When localization is performed, Descope will take the primary attribute and drop the region-specific part. For example, a user in the es-MX locale will only load es, and Descope will translate for the user based on this locale.
Setup
Navigate to Connector
- Go to your Descope Console
- Navigate: Dashboard → Connectors
- Choose "Lokalise"
Configure the Connector
Get your Lokalise API Token and Project ID by setting up Lokalise here.
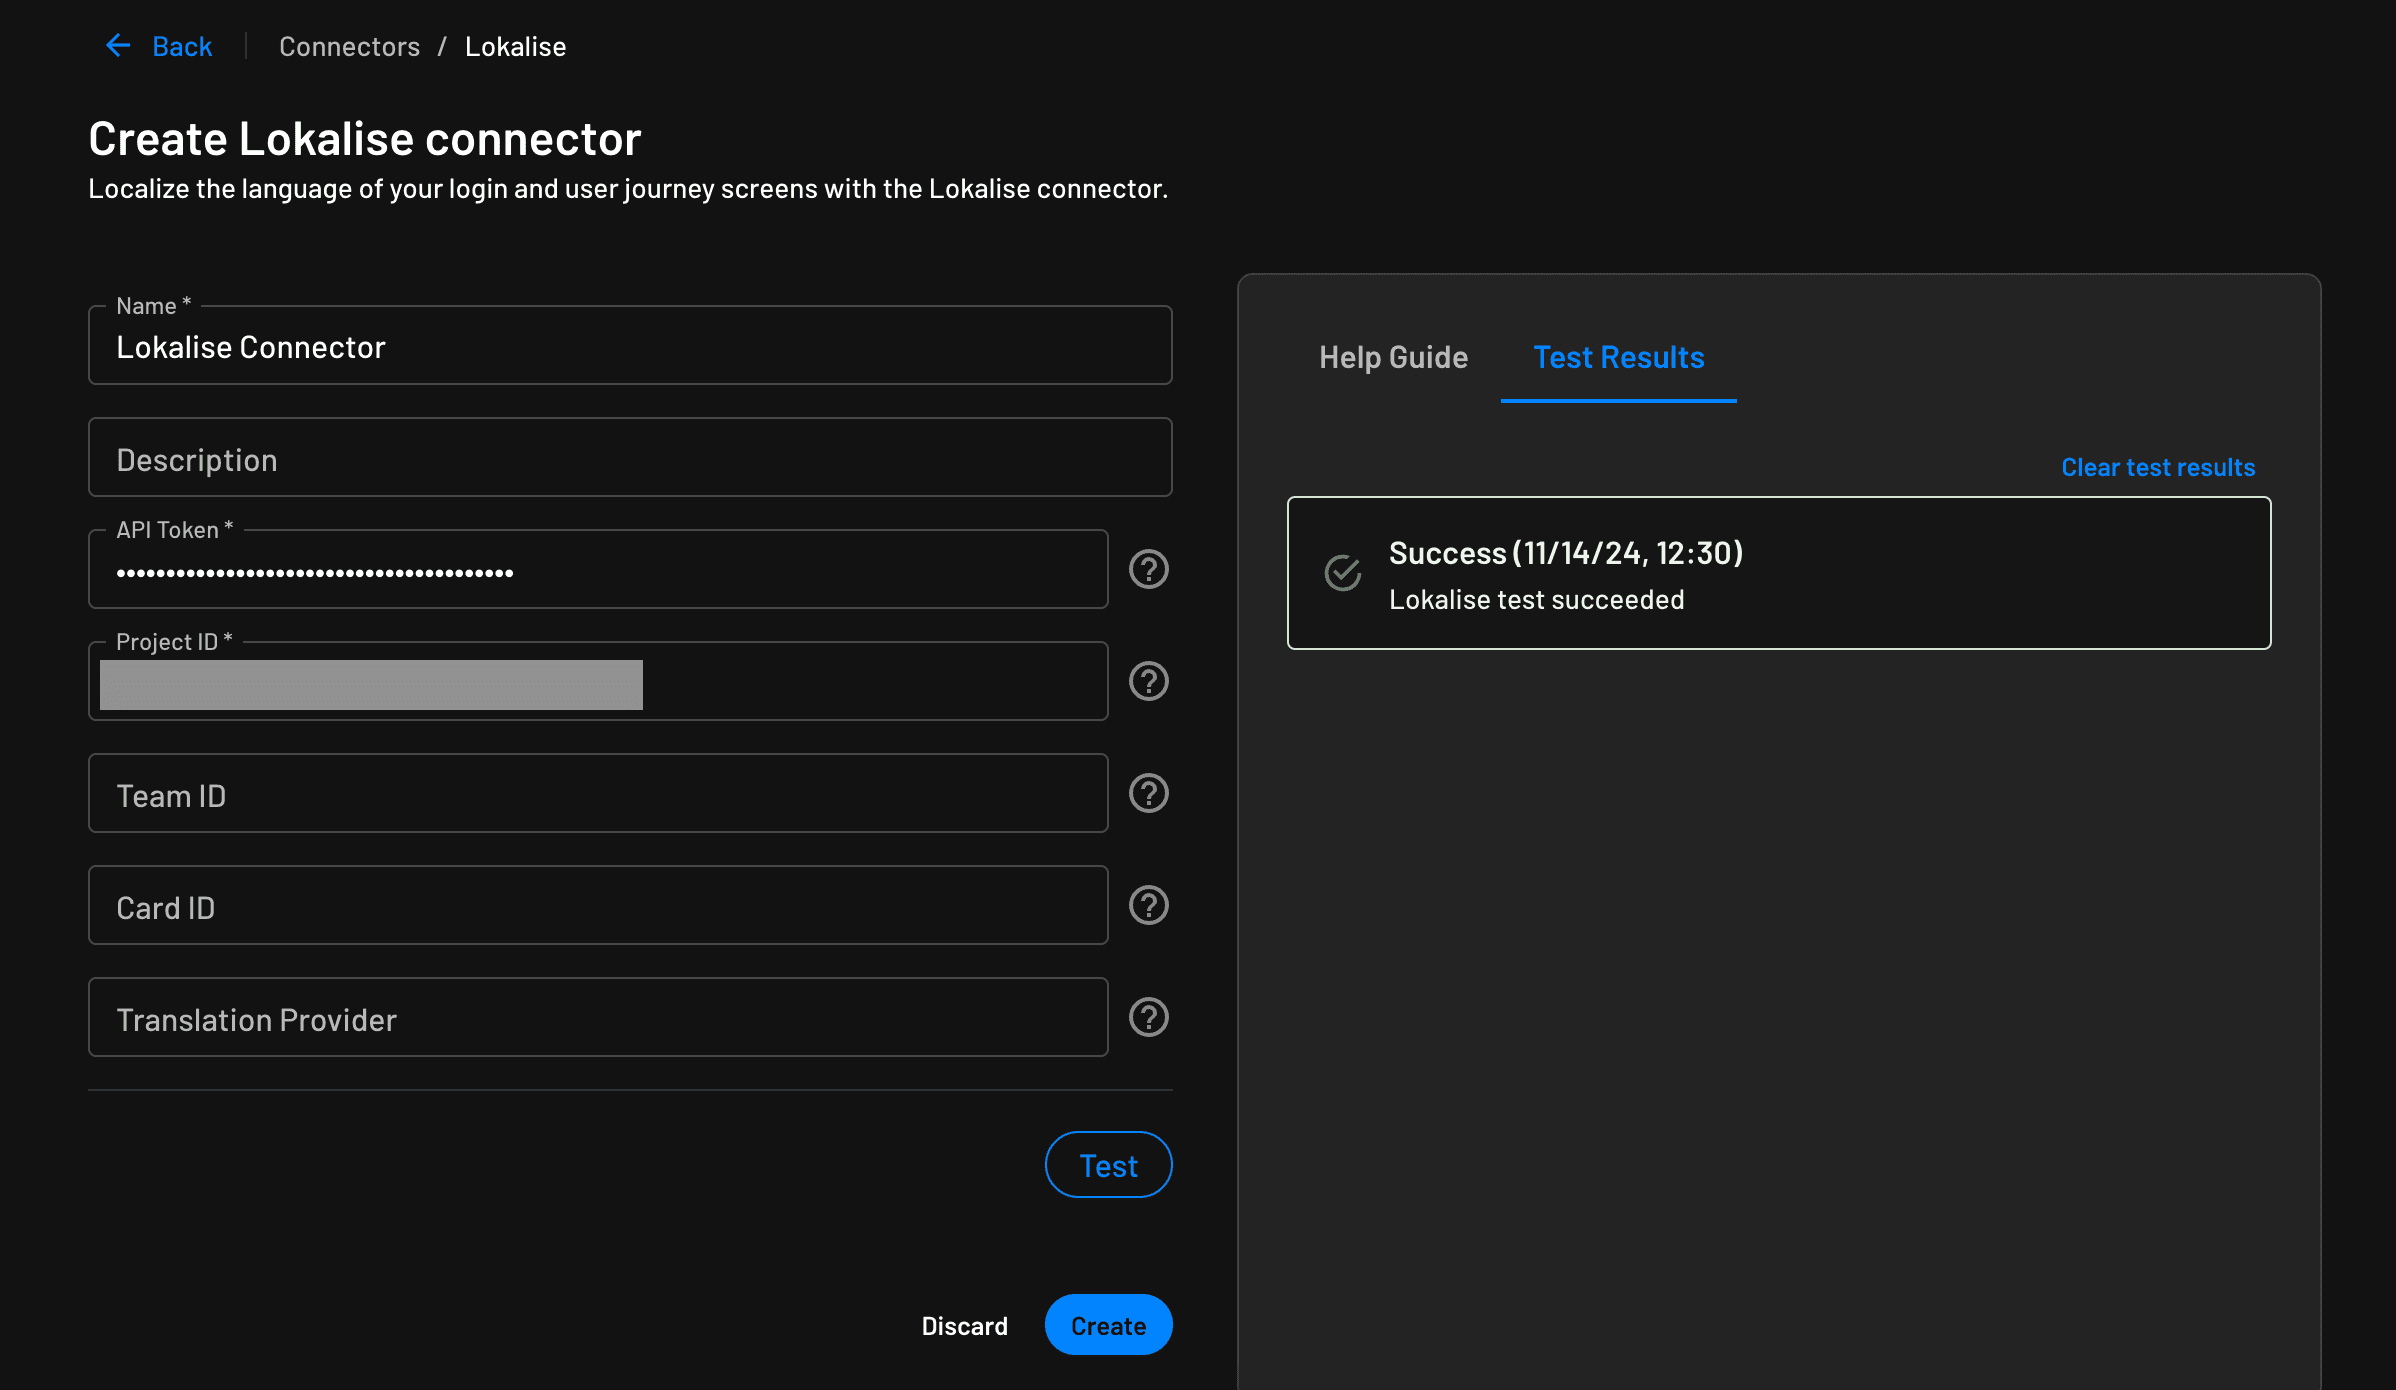
Complete the required fields:
- Connector name: Custom name for your connector. This will come in handy when creating multiple connectors from the same connector template.
- (Optional) Connector description: Describe what your connector is used for.
- API Token: Lokalise API token. You can find it in your Lokalise Profile Settings under "API tokens" tab.
- Project ID: Lokalise project ID. You can find it in the project settings tab.
- (Optional) Team ID: Lokalise team ID. If not provided, the oldest available team will be used. Currently, the team ID is not displayed in the Lokalise UI, but you can find it in the list all teams API response.
- (Optional) Card ID: The ID of the payment card to use for translation orders. If not provided, the team credit will be used. Currently, the card ID is not displayed in the Lokalise UI, but you can find it in the list all cards API response.
- (Optional) Translation Provider: The translation provider to use ('gengo', 'google', 'lokalise', 'deepl'), default is 'deepl'.
Test & Save
- You can test if your connector's configuration is working properly by hitting the
Testbutton and viewing theTest Resultspanel. - Finalize and save by clicking
Create.
Activating the Connector
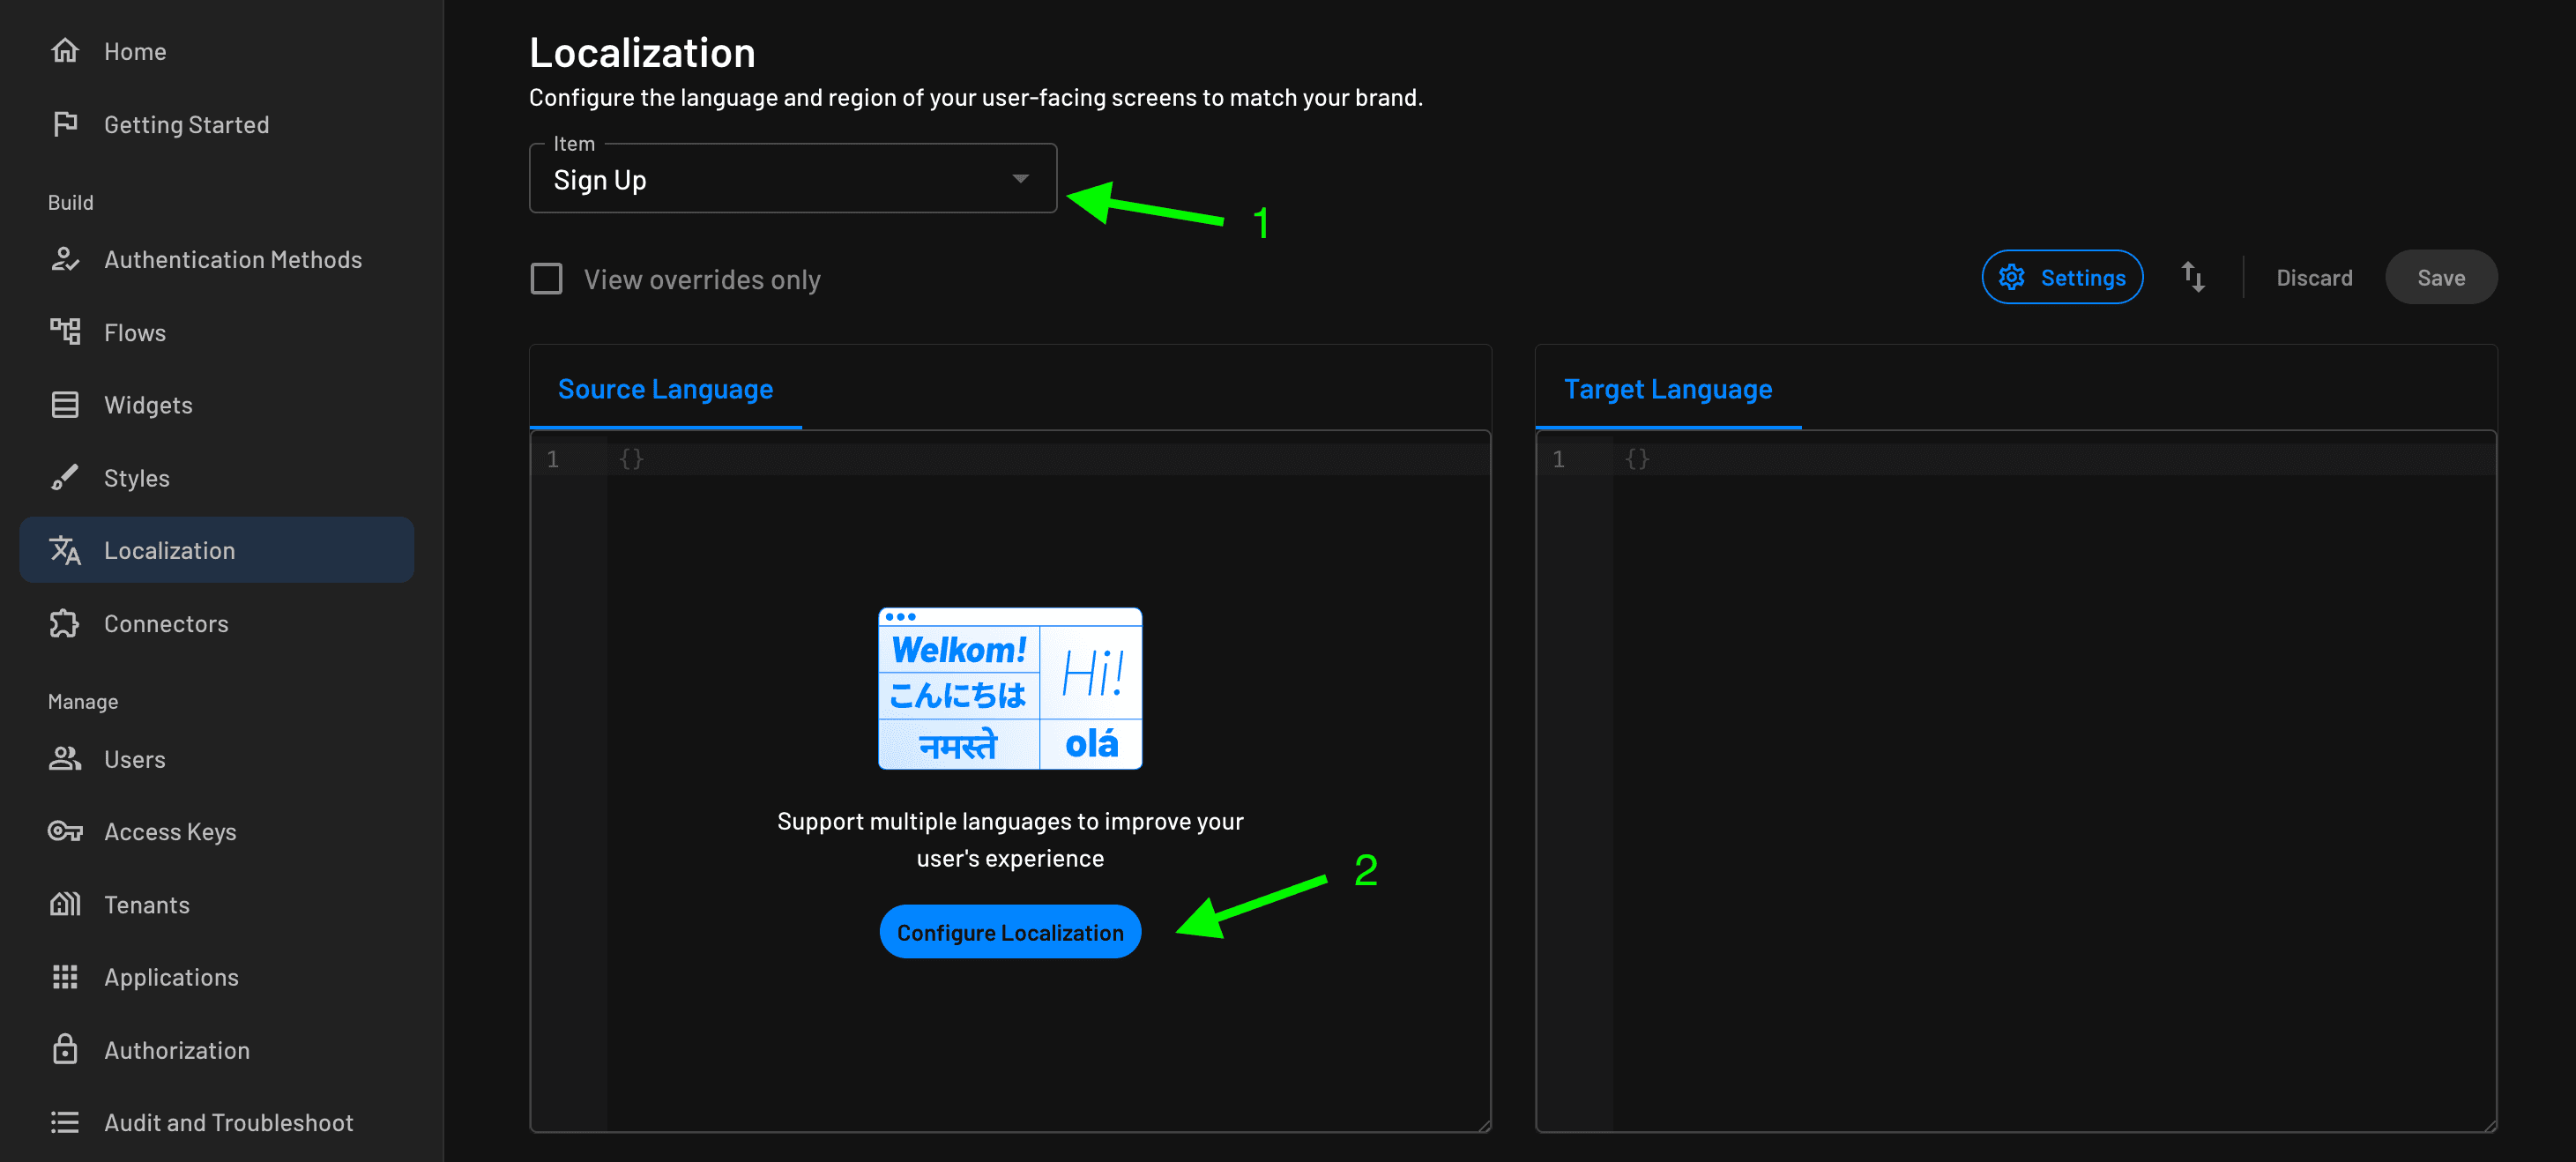
Navigate to Localization
- Navigate to the Localization section within the Descope console.
- Select the applicable flow you want to localize from the dropdown, then click
Configure Localization.
Configuration
Once you have clicked Configure Localization, you will be prompted to select the connector, source language, and target languages.
When you select the dropdown for Connector, choose the Lokalise connector that you previously set up. Additionally, you have the option to specify which Target languages you want to support for your user base, determining the languages your content will be translated into.
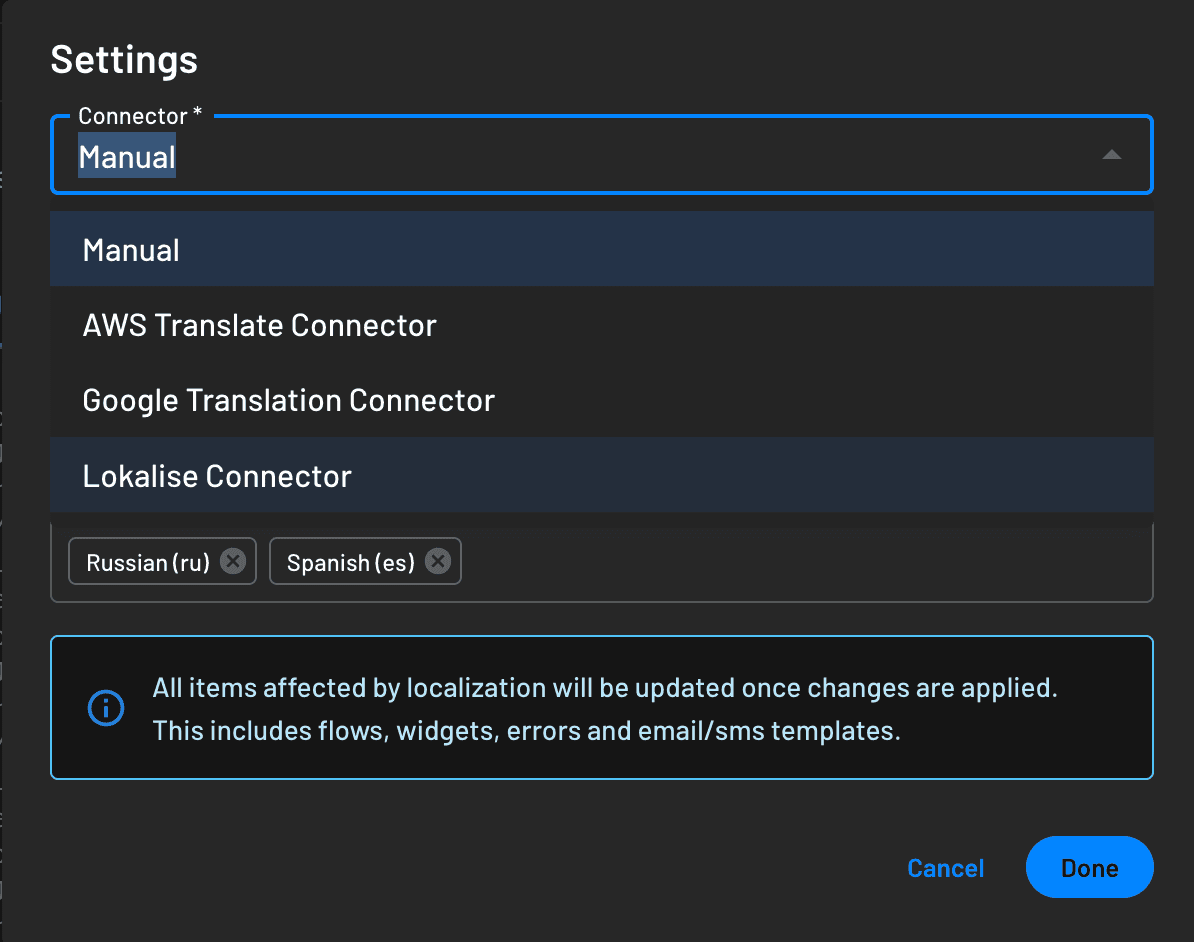
Once you have clicked Done, the localization will automatically be generated for the flow based on the returned translation.

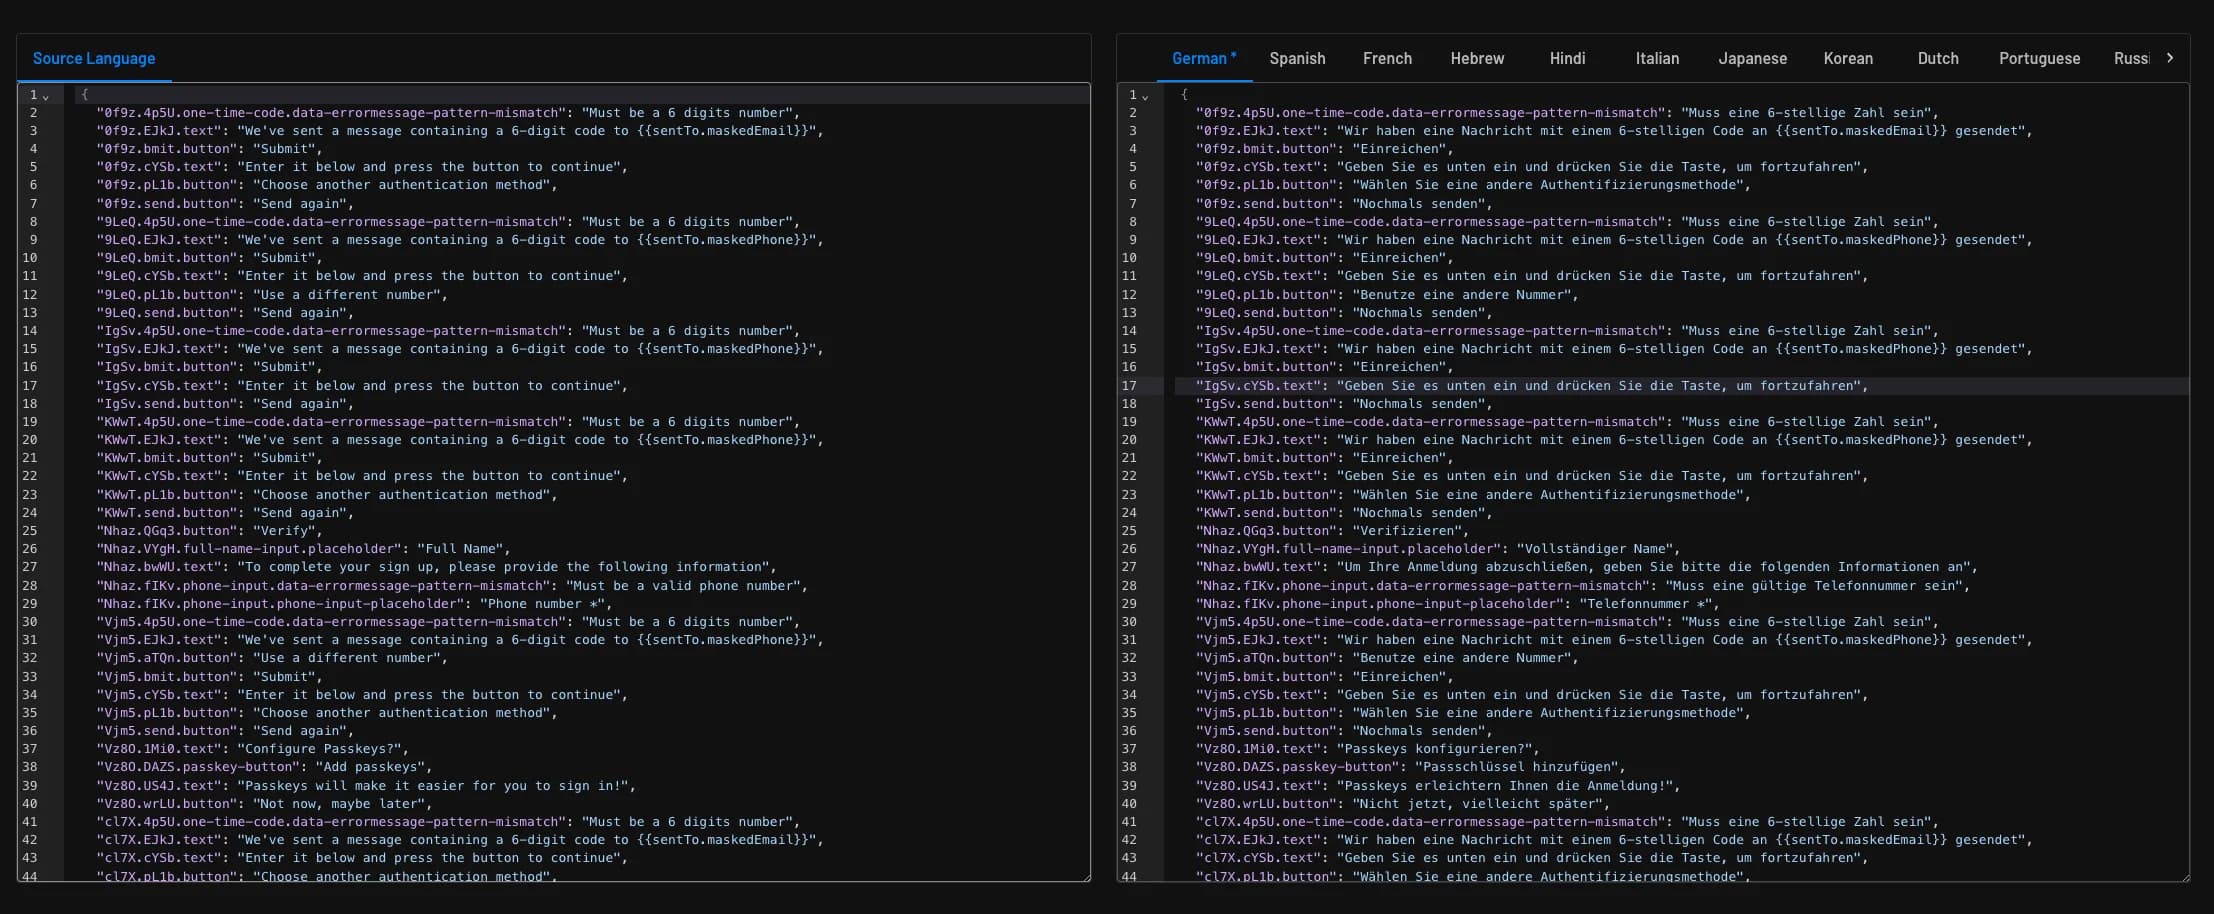
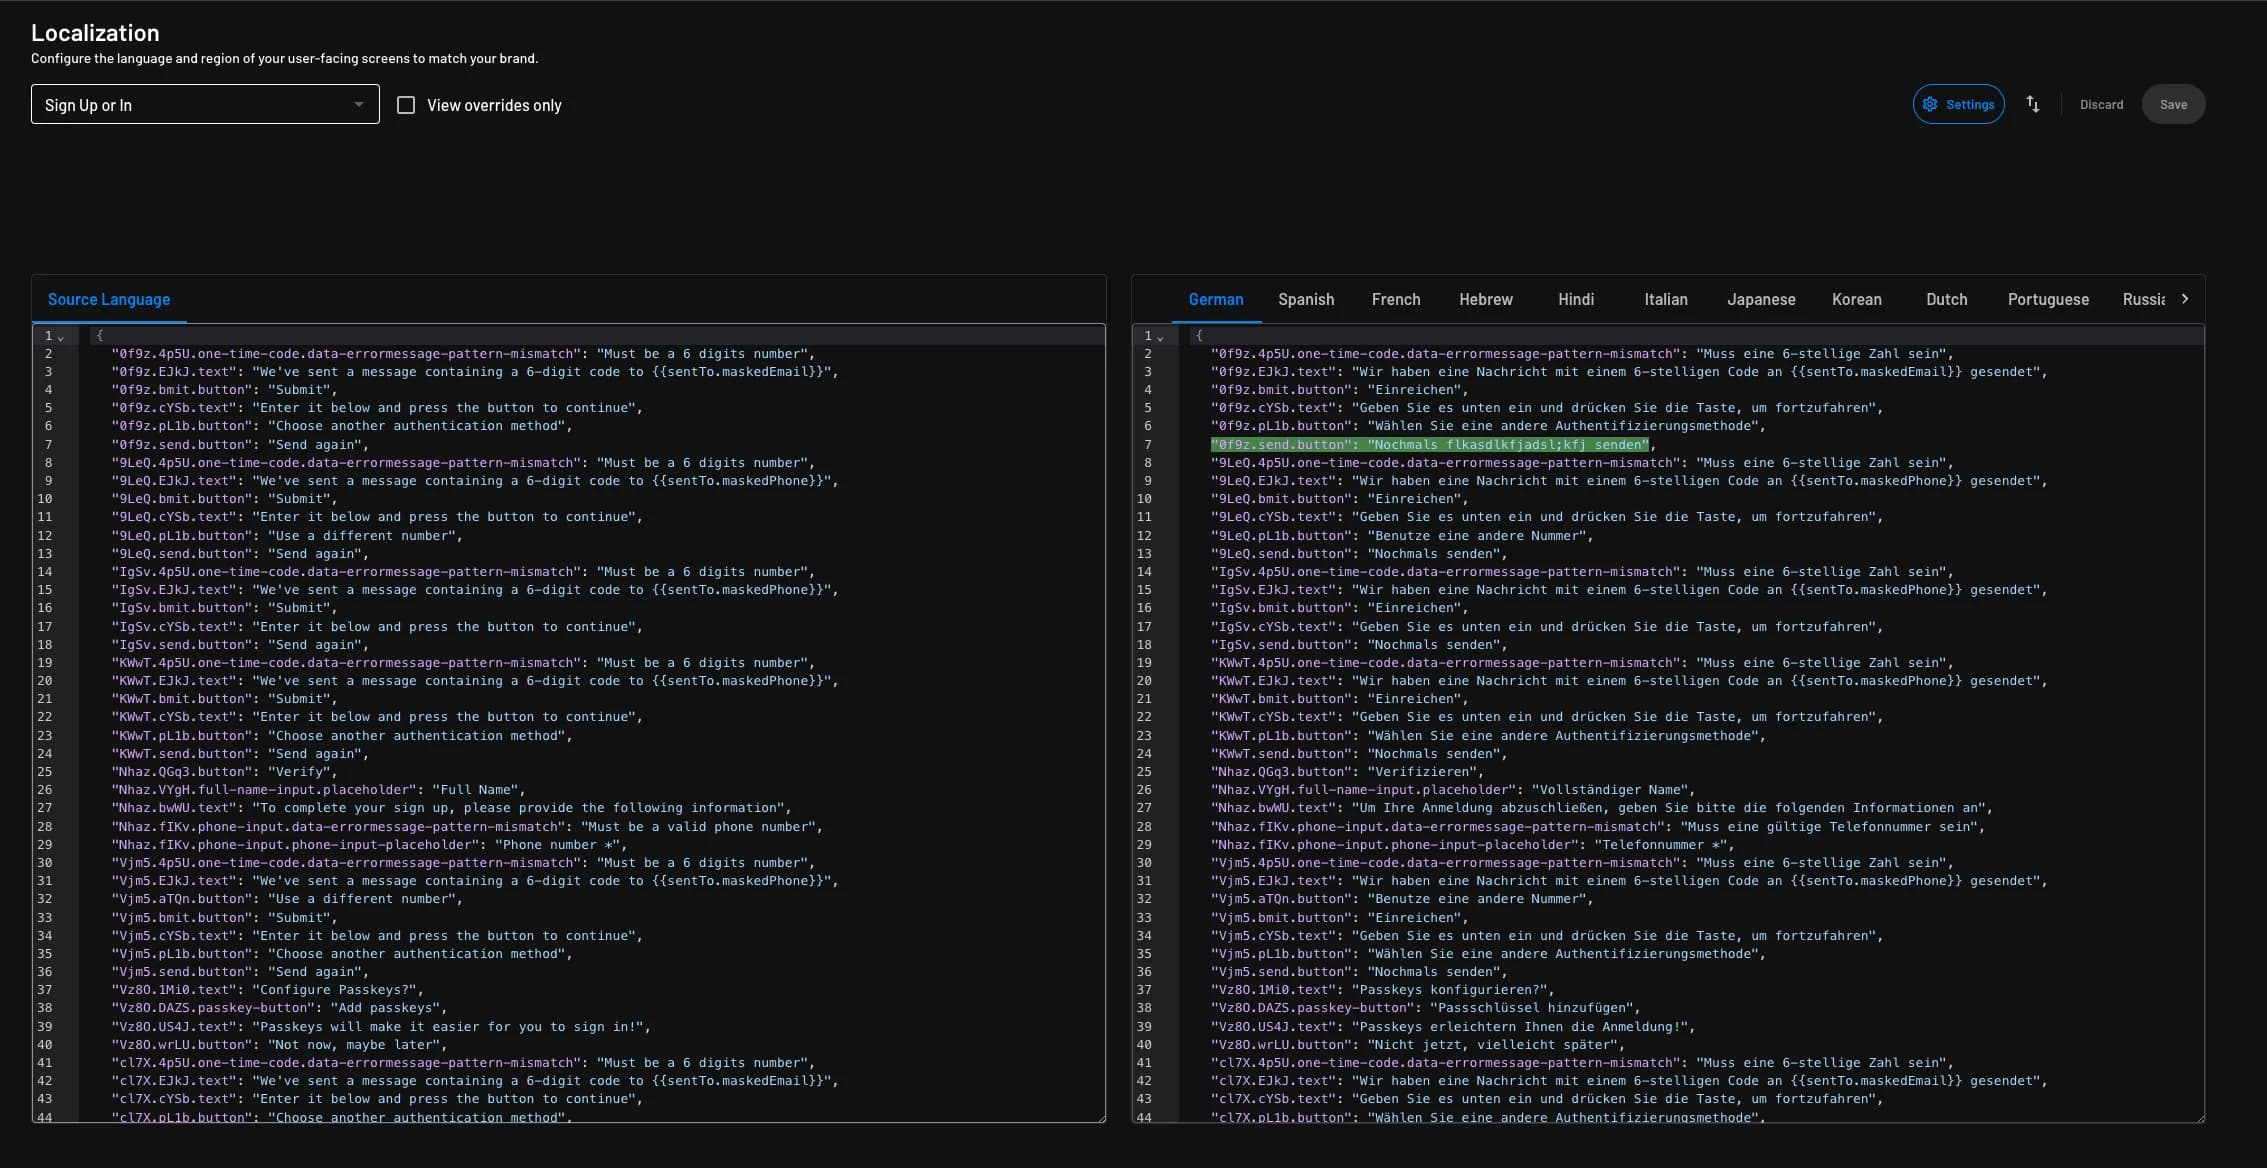
Manually Overriding Translations
When you configure localization with a connector, you can manually override the translation. When you override the translation, you will see the override highlighted like the below example.
Testing & Customization
If you'd like to test your translation, you can either simply change the language in your browser settings or configure the locale within the Descope component.
This is an example of an updated Descope flow component to include locale:
<descope-wc
  project-id="__ProjectID__"
  flow-id="<flow-id>"
  base-url="<base-url>"
  locale="<locale>"
  debug="true"
></descope-wc>
You can learn more in the Web Component SDK README.
All supported locales are accessible in your dashboard, specifically within each flow's settings where localization was enabled earlier.
