Flow Inputs
This guide will cover how to utilize flow inputs within your application using Descope flows. Passing inputs into your flow allows you to change certain behaviors within your flow.
To send data the other way, from the flow back to your app when it completes, see Flow Output on the End action.
Using Flow Inputs
Types of Flow Inputs
form: Used to pass flow inputs, such as email addresses, names, etc., from the app's frontend to the flow. These form inputs can be used within flow screens, actions, and conditionals.client: Arbitrary metadata passed from your app into the flow. You can pass any JSON-serializable value—such as app versions or referral codes—and reference it in screens, actions, or conditions using{{client.<key>}}.tenant: Used for associating a user to a tenant. This input does not assign the tenant to a user, but rather used as a hint and will populate thedctclaim.
Example:
// to get the browser name and version
import { browserName, browserVersion } from "react-device-detect";

<Descope
  flowId="sign-up-or-in"
  form={{ 'email': 'predefinedname@domain.com', 'customAttribute.test': '12' }}
  client={{ 'browserName': browserName, 'browserVersion': browserVersion }}
  tenant="<tenantId>"
/>
Using Flow Inputs in Widgets
The form and client inputs work the same way when your flows run inside Descope Widgets. Pass them as props (React/Next.js) or attributes (Web Component) on the widget and they will be forwarded into every flow the widget runs:
import { UserProfile } from '@descope/react-sdk';

<UserProfile
  widgetId="user-profile-widget"
  form={{ cookieName: 'my-refresh-cookie' }}
  client={{ myKey: 'myValue' }}
/>
See Passing Flow Inputs to Widgets for details on supported widgets, SDK availability, and merge behavior.
Flow Inputs in Native Mobile Flows
The Descope mobile SDKs can pass client inputs into a flow running natively in your app. A native flow renders a hosted flow page inside a webview, so the SDK forwards the values you provide into that page when the flow initializes. Note that these inputs must be valid, non-null JSON types, and cannot be updated dynamically once the flow has started. Once the flow is running, those values resolve as {{client.<key>}} within flow screens, actions, and conditions, exactly as they do on the web.
Mobile supports client inputs only
The form and tenant input types are not available in the mobile SDKs. On mobile, pass your values as client inputs and reference them in the flow editor as {{client.<key>}}.
Set the inputs on the flow object or flow configuration before running the flow:
let flow = DescopeFlow(url: "https://example.com/myflow")

flow.clientInputs = [
  "appVersion": "3.2.1",
  "referral": "in-app-banner",
]

let flowViewController = DescopeFlowViewController()
flowViewController.delegate = self
flowViewController.start(flow: flow)
With the example above, a text component on a flow screen that references {{client.referral}} renders in-app-banner, and a condition can branch on {{client.appVersion}} to show a different screen to users on an older build of your app.
To learn more about how flows run inside a native mobile app, see Native Flows.
Display Form Data in screens
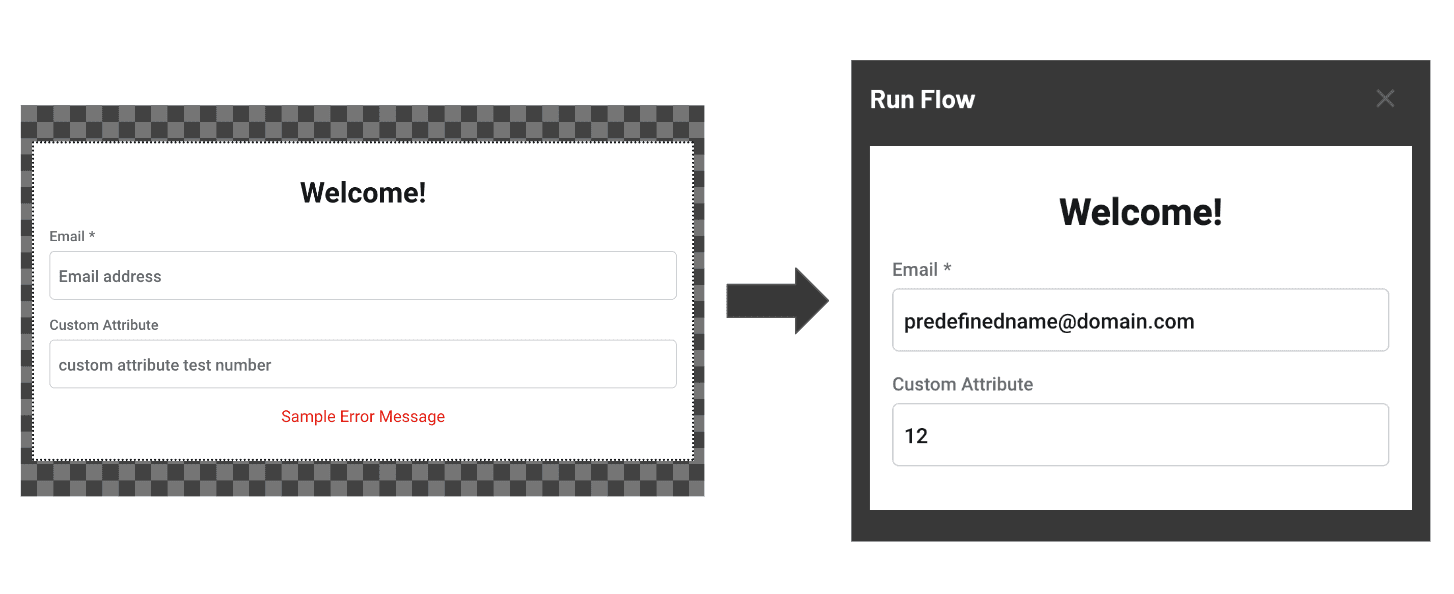
Once the form is populated, the data passed to the flow under the
form field will populate within the screens for the items you display on the screen. Below is an example
of a configured screen and how it appears within the application with the form inputs.
Note
These items can also be utilized within actions and conditions within Descope flow.