Buttons
Button components allow users to interact with your flows through actions like submitting forms, navigating between screens, or initiating authentication processes. This guide covers how to configure and customize button components in your flow screens.
Generic Button
"Submit Upon Enter"
Enable users to submit forms by pressing the Enter key instead of clicking a button. For example, in a login screen with multiple buttons, you can configure the Sign In button to respond to the Enter key while leaving other buttons (like Sign Up or Forgot Password) as click-only.
To configure, simply select the button and toggle Submit upon enter. This can only be configured on one button on the screen.

Adding Icons to Buttons
You can enhance button components by adding icons. Icons can be displayed alongside text or as standalone elements without any text.
To add an icon:
- Select the button component in your flow screen
- Upload an icon file
- Choose whether to display the icon with text or as icon-only
![]()
Sign In Buttons
Descope provides pre-configured sign-in buttons for common authentication methods. These include:
- Social login options (Google, Facebook, Apple, etc.)
- Biometric authentication and passkeys
- Single Sign-On (SSO) providers
These buttons are automatically styled and configured for their respective authentication methods.
Last Used Badge
You can display a Last used badge on a button to indicate the authentication method the user most recently signed in with. This helps returning users quickly identify their preferred login option.
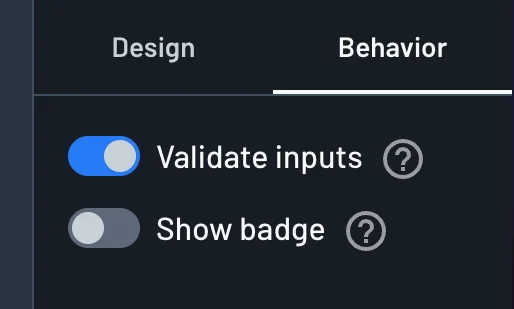
To enable or disable the badge, select the button, open the Behavior tab, and toggle Show badge.
![]()
To customize the badge appearance, open the Styles page in the Descope Console and edit the Last used badge component under the Components tab.
Input Validation
Generic buttons, as well as most sign-in buttons, can be configured to validate required input fields before proceeding to the next step in the flow. This ensures that users provide valid information before submission.
To enable or disable input validation, select the button, open the Behavior tab, and toggle Validate inputs.
Timer Button
You can add a timer button that becomes temporarily disabled after it is clicked. This button is commonly connected to actions like Resend Magic Link / OTP to prevent repeated submissions in a short period.
When the button is clicked, it enters a countdown state, and becomes active again once the timer expires. You can configure the timeout duration (in seconds) in the button's behavior settings.

Interaction IDs
Each transition to the next step in a flow is assigned a unique Interaction ID. Interaction IDs are typically tied to a button click or a state change (such as a timer expiring), and they identify which action triggered the flow to advance.
You can find the Interaction ID for a screen component in the screen editor. This value is editable, and can be changed to something more human-readable.

Interaction IDs are useful when you need to distinguish between multiple exit paths from a single screen — for example, a screen that has both multiple social login buttons. The last Interaction ID can be retrieved dynamically in the flow's context as {{interactionId}}, and can be referenced in subsequent flow screens and conditions.


Tooltip
You can enable a tooltip on a button component so that extra text-based context appears on hover. This is useful for abbreviations, short definitions, or adding text-based detail to components without cluttering the screen.
To configure a tooltip, start by selecting the text component in the Screen Builder and enabling the tooltip option in the component settings. Then, enter the Tooltip text, keeping it brief—ideally one or two short sentences.
Next, choose the Tooltip position to control where the tooltip appears relative to the text. You can also optionally set the Hover delay and Hide delay to adjust how quickly the tooltip appears on hover and how long it takes to hide after the pointer leaves.
