Agent Governance
Agent Governance gives your employees a self-service way to request a client for an internal agent they're building. They describe the agent and the permissions it needs in a portal called the Agentic Governance Suite.
Review the request in the Descope Console. Once you approve the request, Descope creates the client with only the access you signed off on.
This page covers agents your own developers build, including an MCP client they write when the server doesn't allow CIMD or DCR. The developer requests a client for that Resource, or for the gateway in front of it.
Your customers' agents will typically register through external MCP Auth instead.
Note
Agent Governance is an enterprise feature.
Work with your Descope CSE or Descope Support to enable this feature.
Why Use Agent Governance
Say an engineer on your data team is building an agent that summarizes customer accounts every morning. The agent needs read access to your customer API and to the team's Salesforce Connection. Without Agent Governance, the engineer usually has two options.
They can file a ticket and wait while someone creates a client, writes a policy, and sends over credentials. Or they can paste their personal API key into the agent. That works right away, but Descope never sees the agent. The only way to stop it later is to revoke the engineer's own key.
With Agent Governance, the engineer describes the agent in the portal and asks for the specific access it needs. You approve or adjust the request in one place, and Descope records who made the decision and why. If the request falls within a policy you've already written, Descope can approve it without waiting on you.
Note
Policies control what goes into a client's tokens each time it requests one. Agent Governance controls which clients exist in the first place, who owns each one, and who approved it.
Your policies define the access employees can get without a review, and the portal is where they request that access.
How It Works
Every request moves through the same four stages, from the policies you write up front to the client Descope creates at the end.
- You write policies for common access. When a request matches an existing policy, Descope marks it as pre-cleared.
- An employee requests a client. In the portal, they name the agent, explain what it's for, and pick its client type, targets, scopes, and grant types.
- You review the request. The request appears on the Access Requests tab, where you approve, modify, or deny it. If you turn on auto-approval, Descope approves pre-cleared requests without sending them to you. Requests that no policy covers still come to you for review.
- Descope creates the client. The client gets only the access you approved. The employee finds its client ID and secret on the Agents tab in the portal. You manage the client on the Clients page like any other client.
With those policies in place, the review queue only fills with requests that go beyond them.
Setting Up Agent Governance
You'll find Agent Governance on the Governance page, under the Agentic Identity Hub section of the Descope Console. The page has two tabs: Access Requests, where requests arrive, and Settings, where you configure the portal.
Decide what employees can get without review
Write policies for access you're comfortable granting without discussing it first. Requests that match those policies count as pre-cleared. Everything else goes to your review queue, so you don't have to anticipate every request before you start.
A narrow first policy works best. Read-only scopes on internal APIs make a good starting point. Keep write scopes and third-party Connections behind manual review until you've seen how employees use the portal.
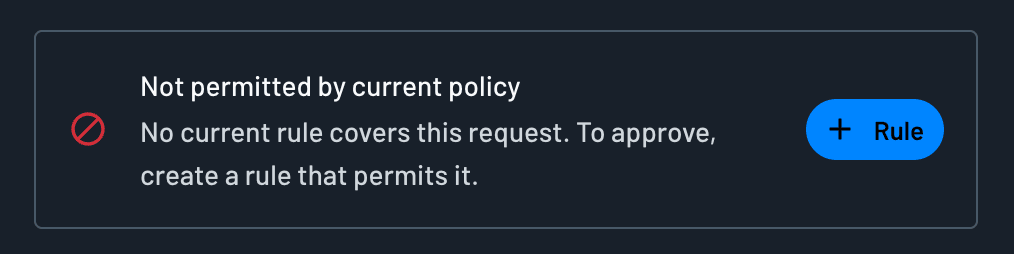
When no policy permits a request, the request shows Not permitted by current policy. You can't approve it until you add a rule that permits it.
Share the portal URL
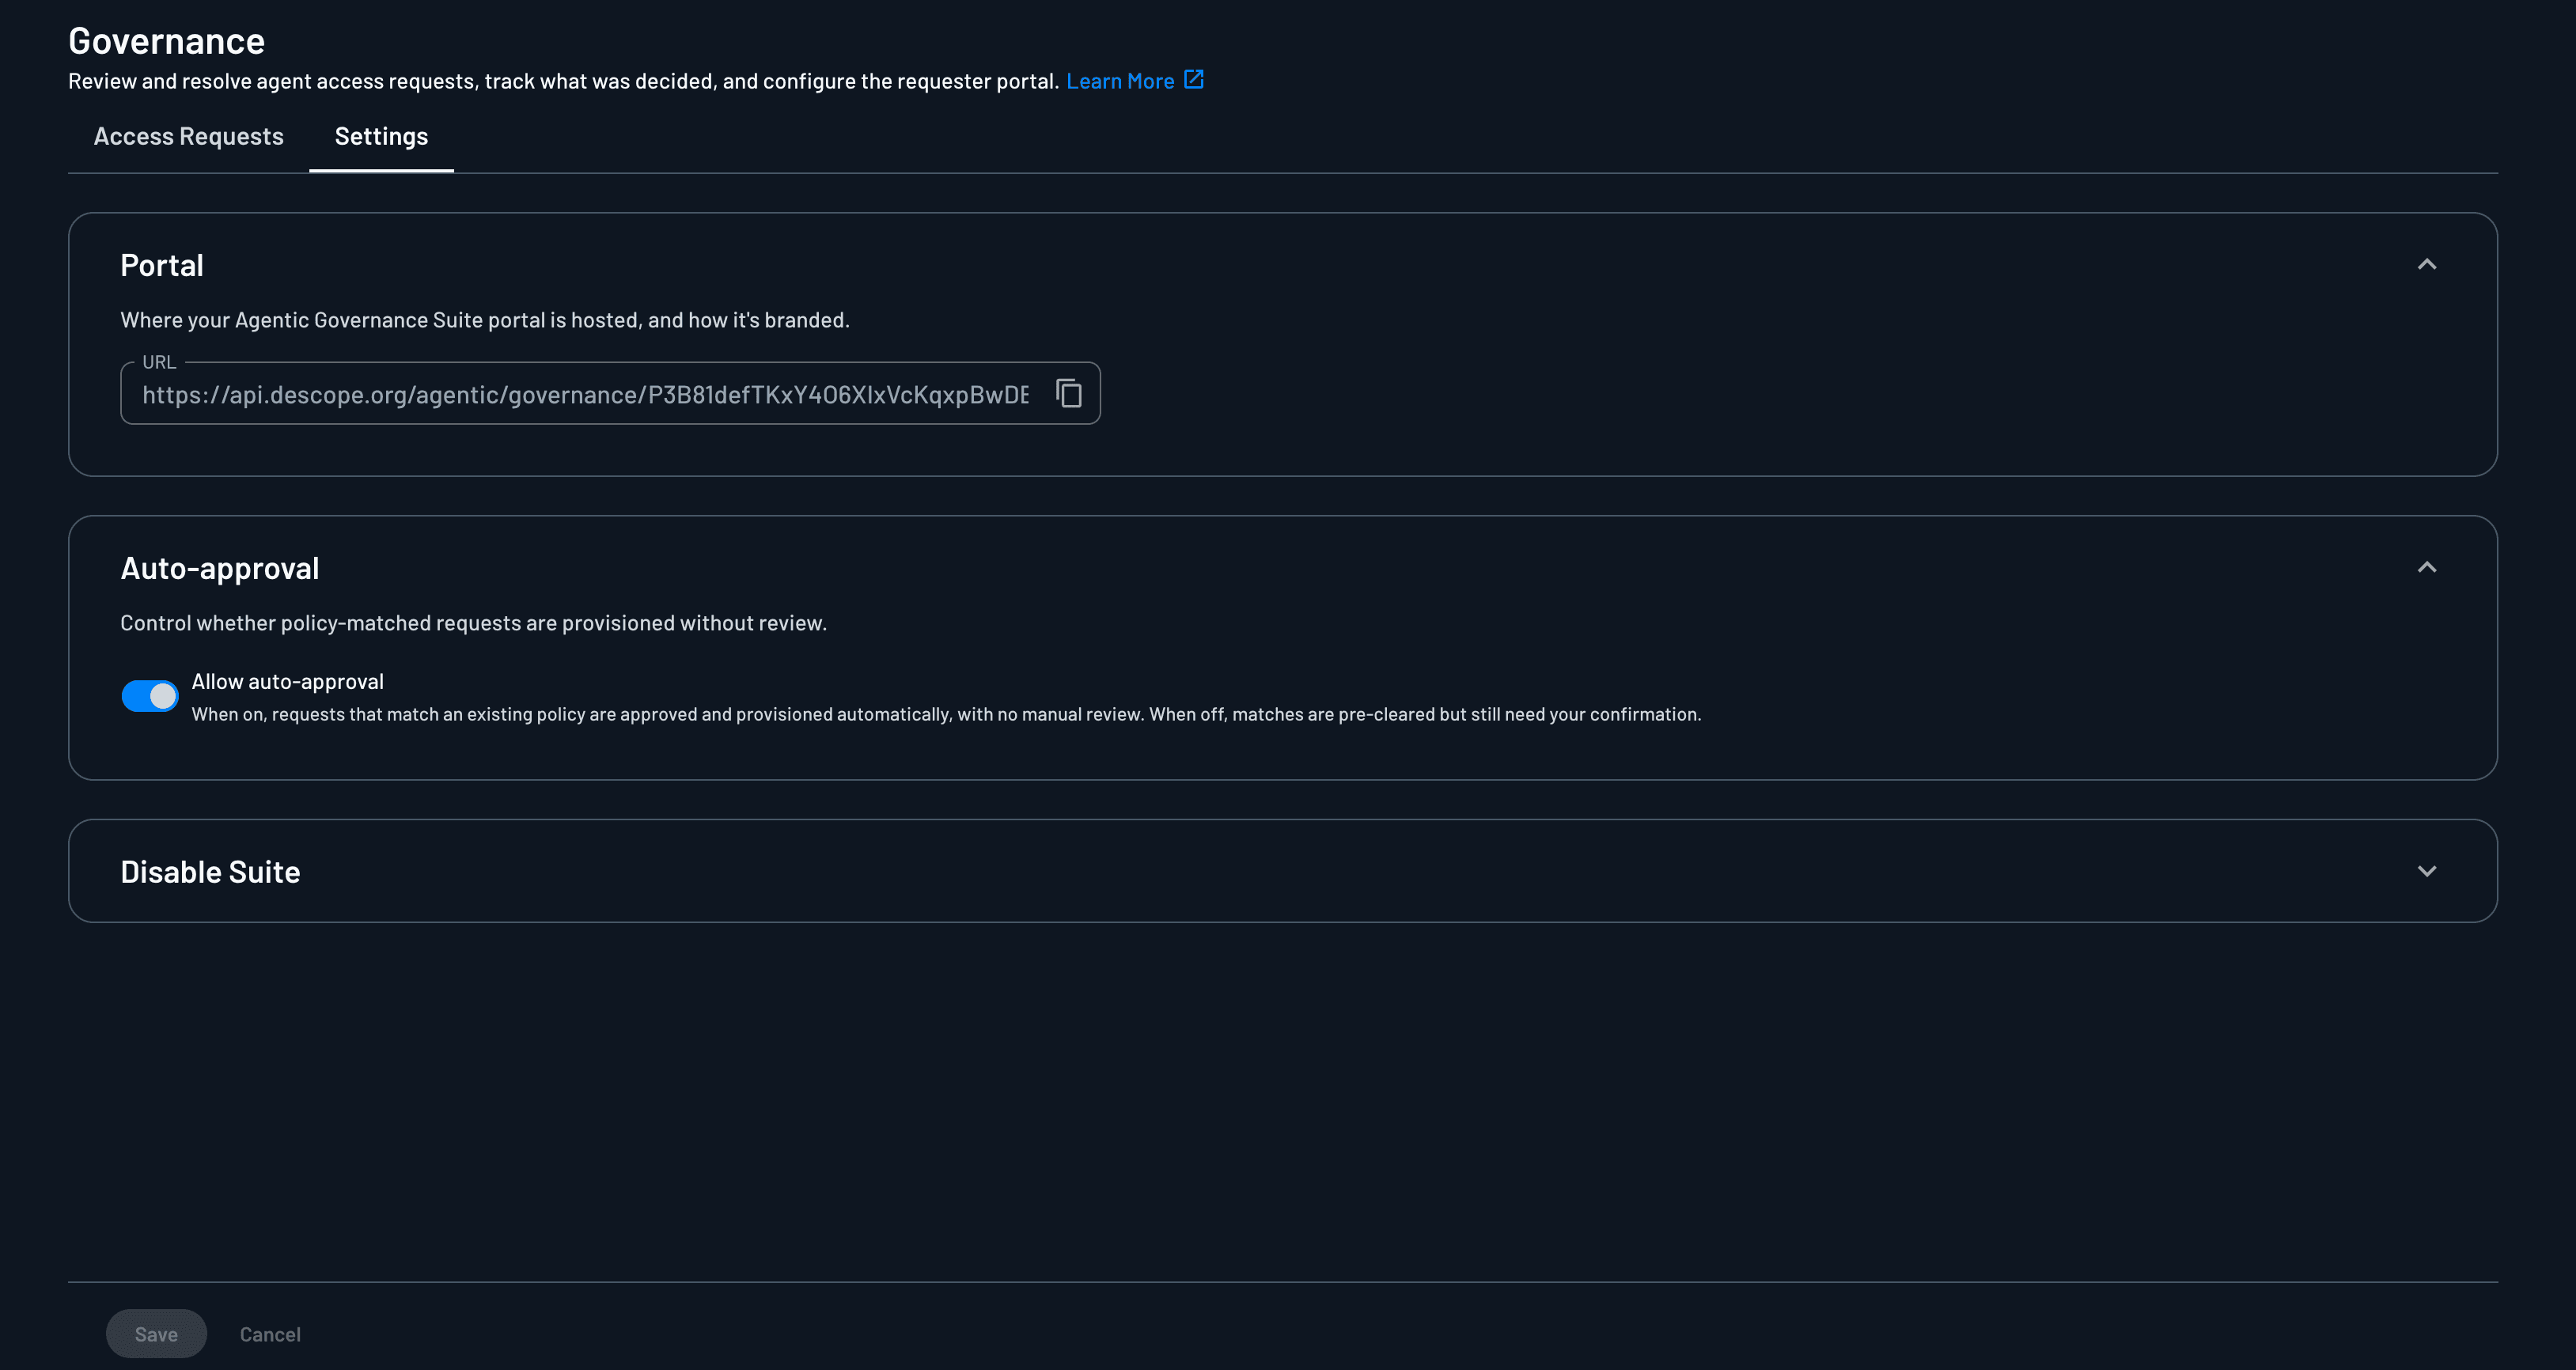
Copy the portal URL from the Portal section of the Settings tab. It looks like __BaseURL__/agentic/governance/__ProjectID__. Share it where your engineers already look, such as your developer docs or onboarding guide.
Choose whether to auto-approve
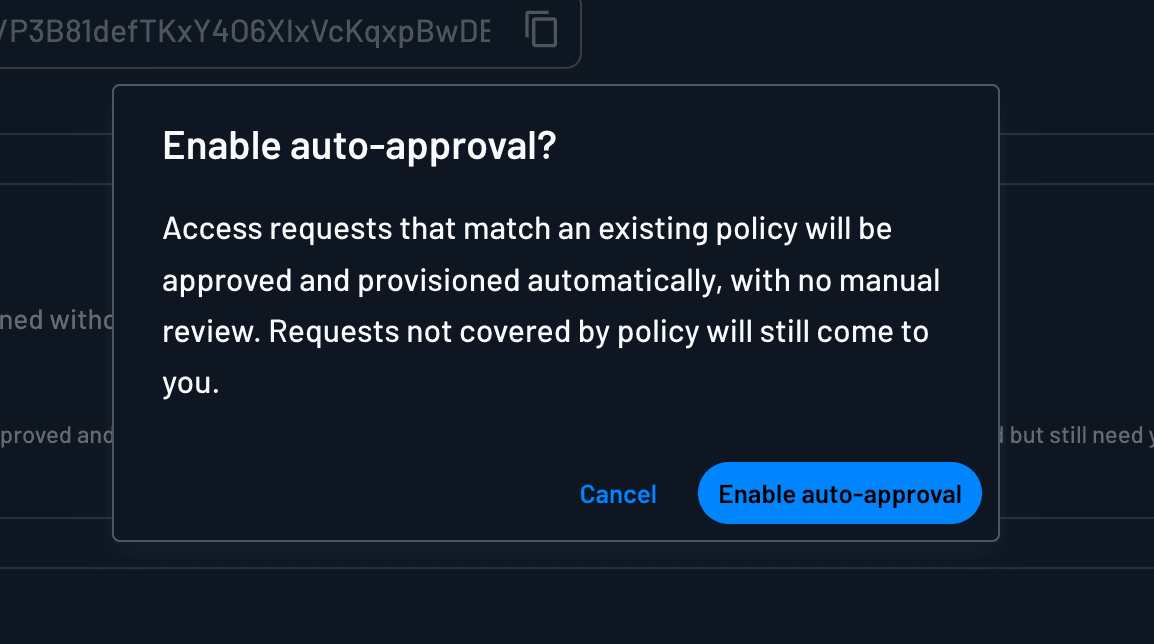
The Allow auto-approval setting controls what happens to pre-cleared requests. With it on, Descope approves a pre-cleared request and creates its client right away. With it off, pre-cleared requests wait in your queue like any other request.
When you turn the setting on, the Console asks you to confirm. Click Enable auto-approval to apply it.
Review your policies before turning on auto-approval
When Descope auto-approves a request, it creates the client without anyone reviewing it. If a policy grants more than you intended, every request that matches it gets that access automatically. Review the policies that pre-clear requests before you turn this on. Descope never auto-approves a request that no policy covers.
Requesting an Agent
Employees open the portal URL and sign in to Agentic Governance. Sign-in uses a flow similar to signing in to the Descope Console. The employee must already be a Descoper on the project. Add Descopers manually, or provision them with SCIM.
Descope includes three default Descoper roles for the portal: Agentic Hub Requestor, Agentic Hub Approver, and Agentic Hub Admin.
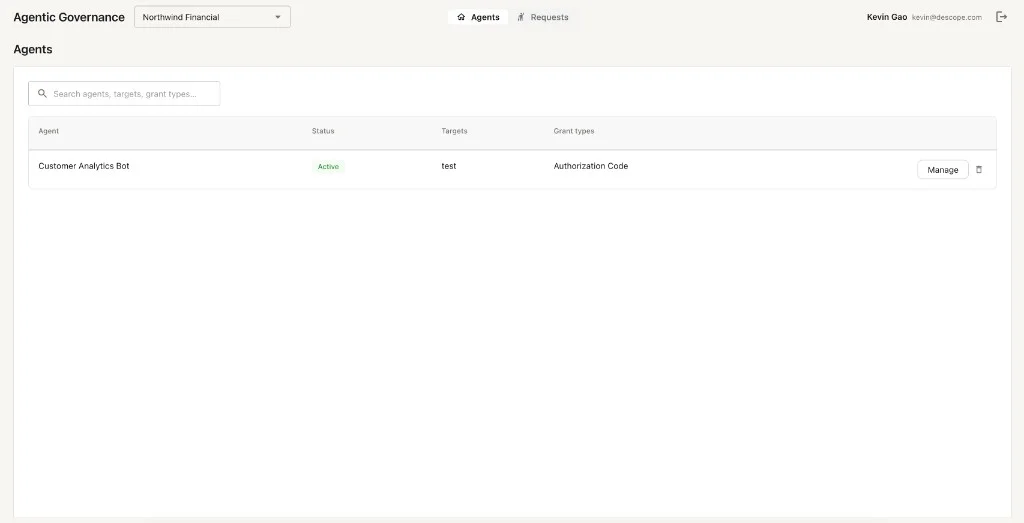
The portal has two tabs: Agents lists the agents they already have, and Requests lists the requests they've submitted. The selector next to the portal title switches between projects in your company. An employee who belongs to more than one Descope company can also switch between companies there.
Filling In the Request Form
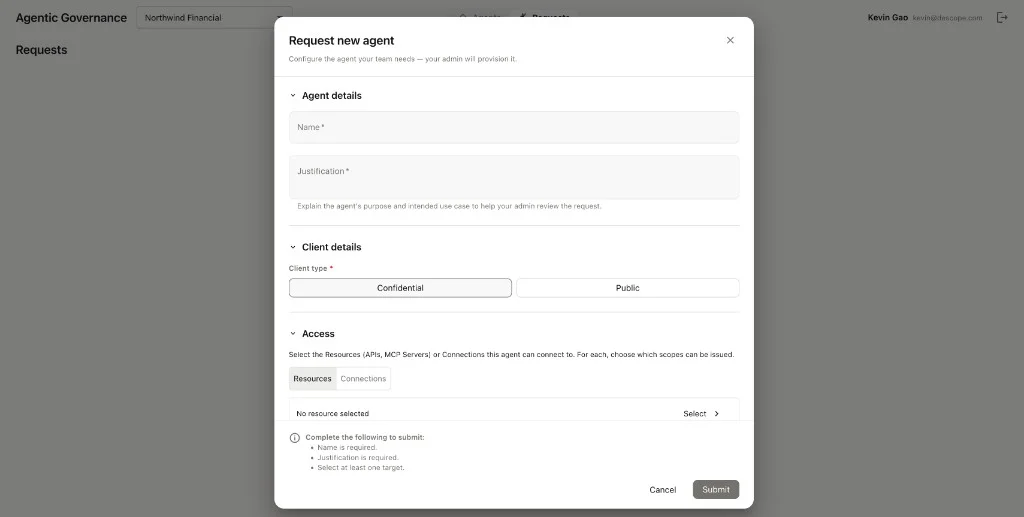
To start a request, the employee clicks New request. The form has four sections:
- Agent details: A Name and a Justification, both required. You read the justification when you review the request, so encourage employees to describe what the agent does and why it needs each target.
- Client details: The client type. Confidential fits an agent that runs on a server and can store a secret safely. Public fits an agent that can't, such as a CLI or desktop app, because anyone with a copy of the app can pull the secret out of it. Public clients use PKCE instead of a secret.
- Access: The targets the agent needs, meaning the Resources (APIs and MCP servers) and Connections it calls, along with the scopes for each. Every request needs at least one target.
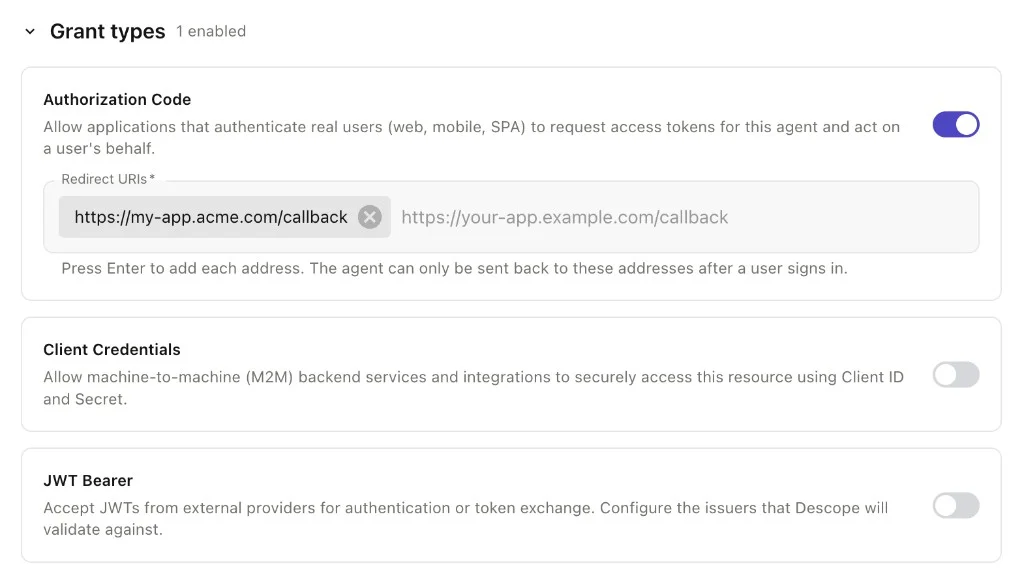
- Grant types: The ways the agent can get tokens. The options match the ones you see when you create a client. Every request needs at least one.
- Authorization Code: The agent acts on behalf of a signed-in user. The employee adds the Redirect URIs where Descope can send the user after sign-in.
- Client Credentials: The agent runs on its own as a backend service and authenticates with a client ID and secret.
- JWT Bearer: The agent presents JWTs from an external identity provider. The employee lists the issuers Descope should trust.
If the employee leaves a required field empty, the form lists the missing fields above Submit.
Tracking a Request
After the employee submits a request, it appears on their Requests tab with the status Pending Review. The request's Details show its Targets and Grant types. The employee can withdraw the request with Delete request.
When an admin decides, the status becomes Approved by or Denied by, followed by that admin's name. On an approved request, Delete request becomes Manage agent, which opens the same agent page as Manage on the Agents tab.
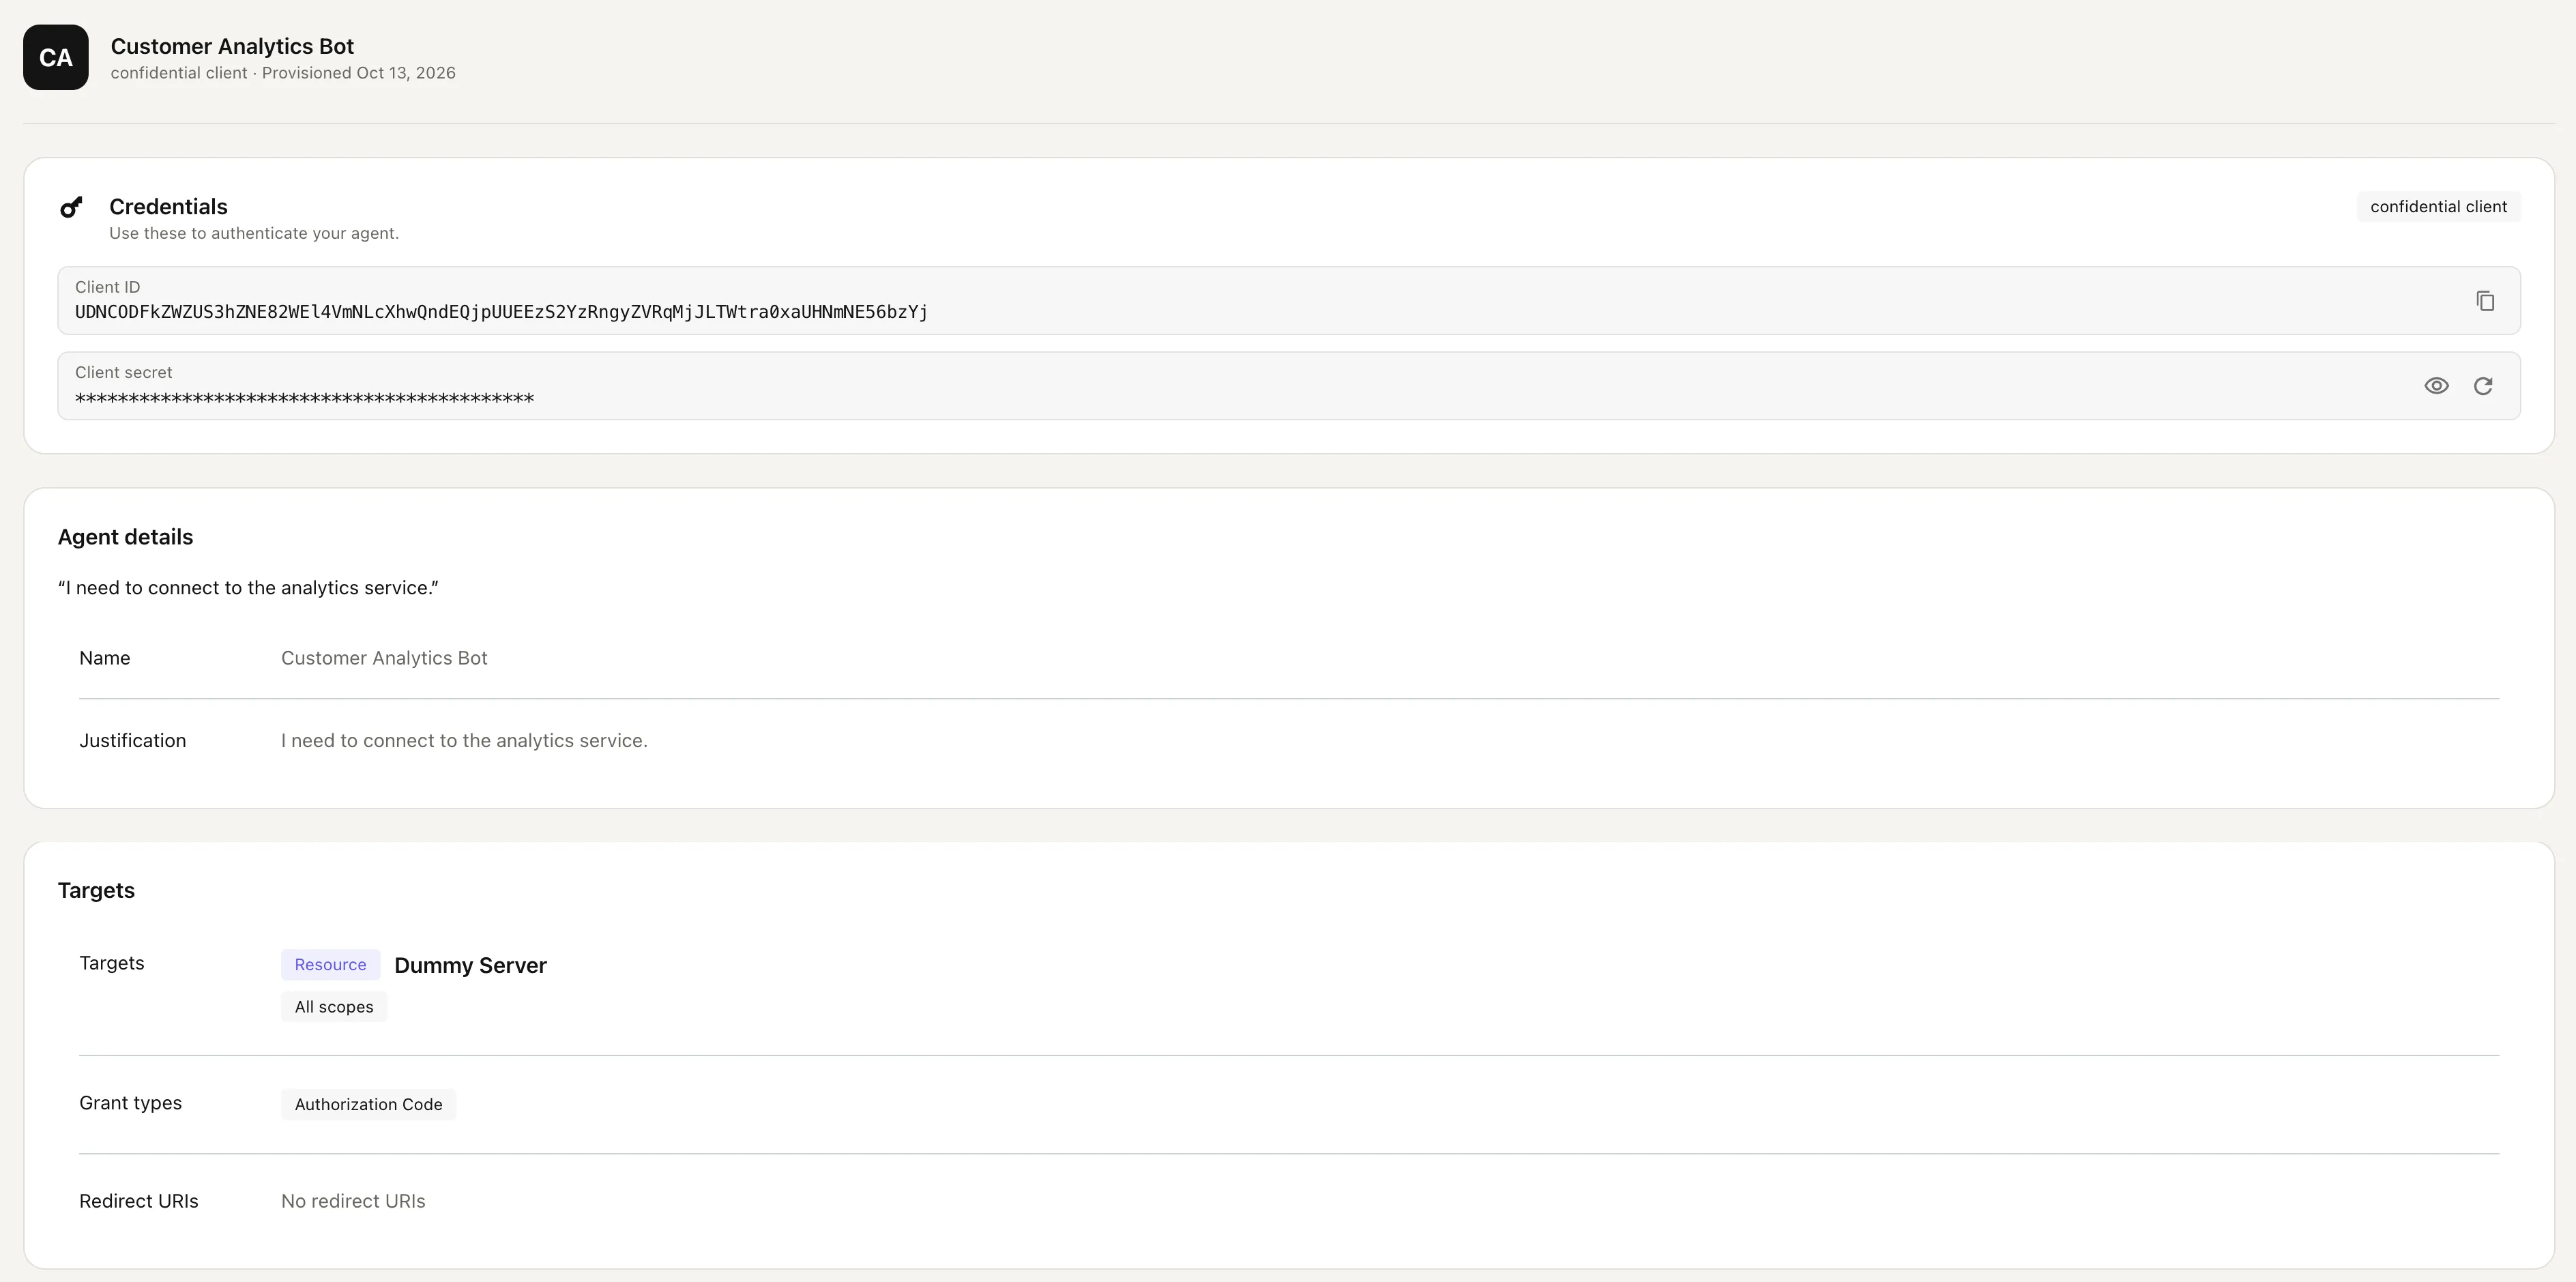
After you approve the request, the agent also appears on the employee's Agents tab with the status Active. The tab lists its Targets and Grant types. The employee opens it with Manage.
Manage shows the client's Client ID and Client secret, and the employee can rotate the secret from there. It also shows the Agent details, which are the name and justification from the request, the Targets with their scopes, the grant types, and any redirect URIs.
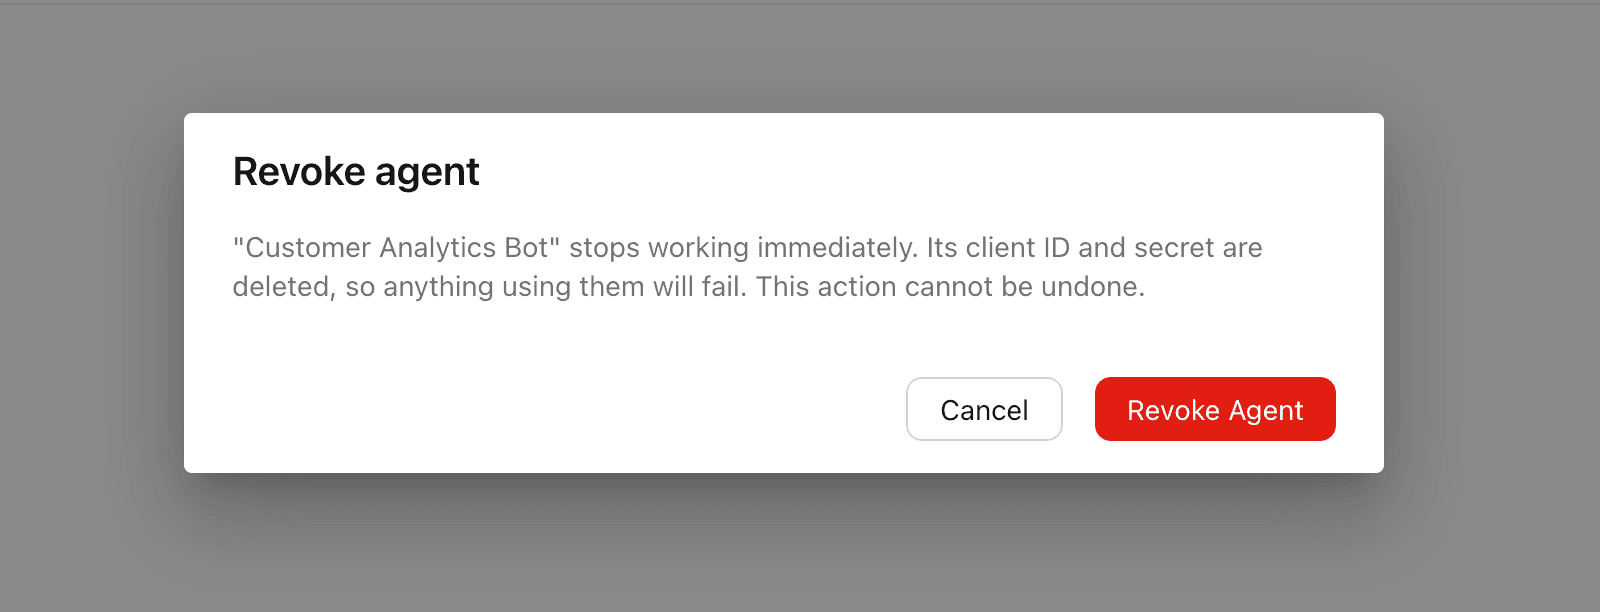
The delete icon next to Manage opens Revoke agent. Confirming it stops the agent immediately and deletes its client ID and secret, so anything using them fails. The action can't be undone.
Reviewing Access Requests
The Access Requests tab lists every request along with its outcome. Use Search and Filter to find the requests still waiting on you.
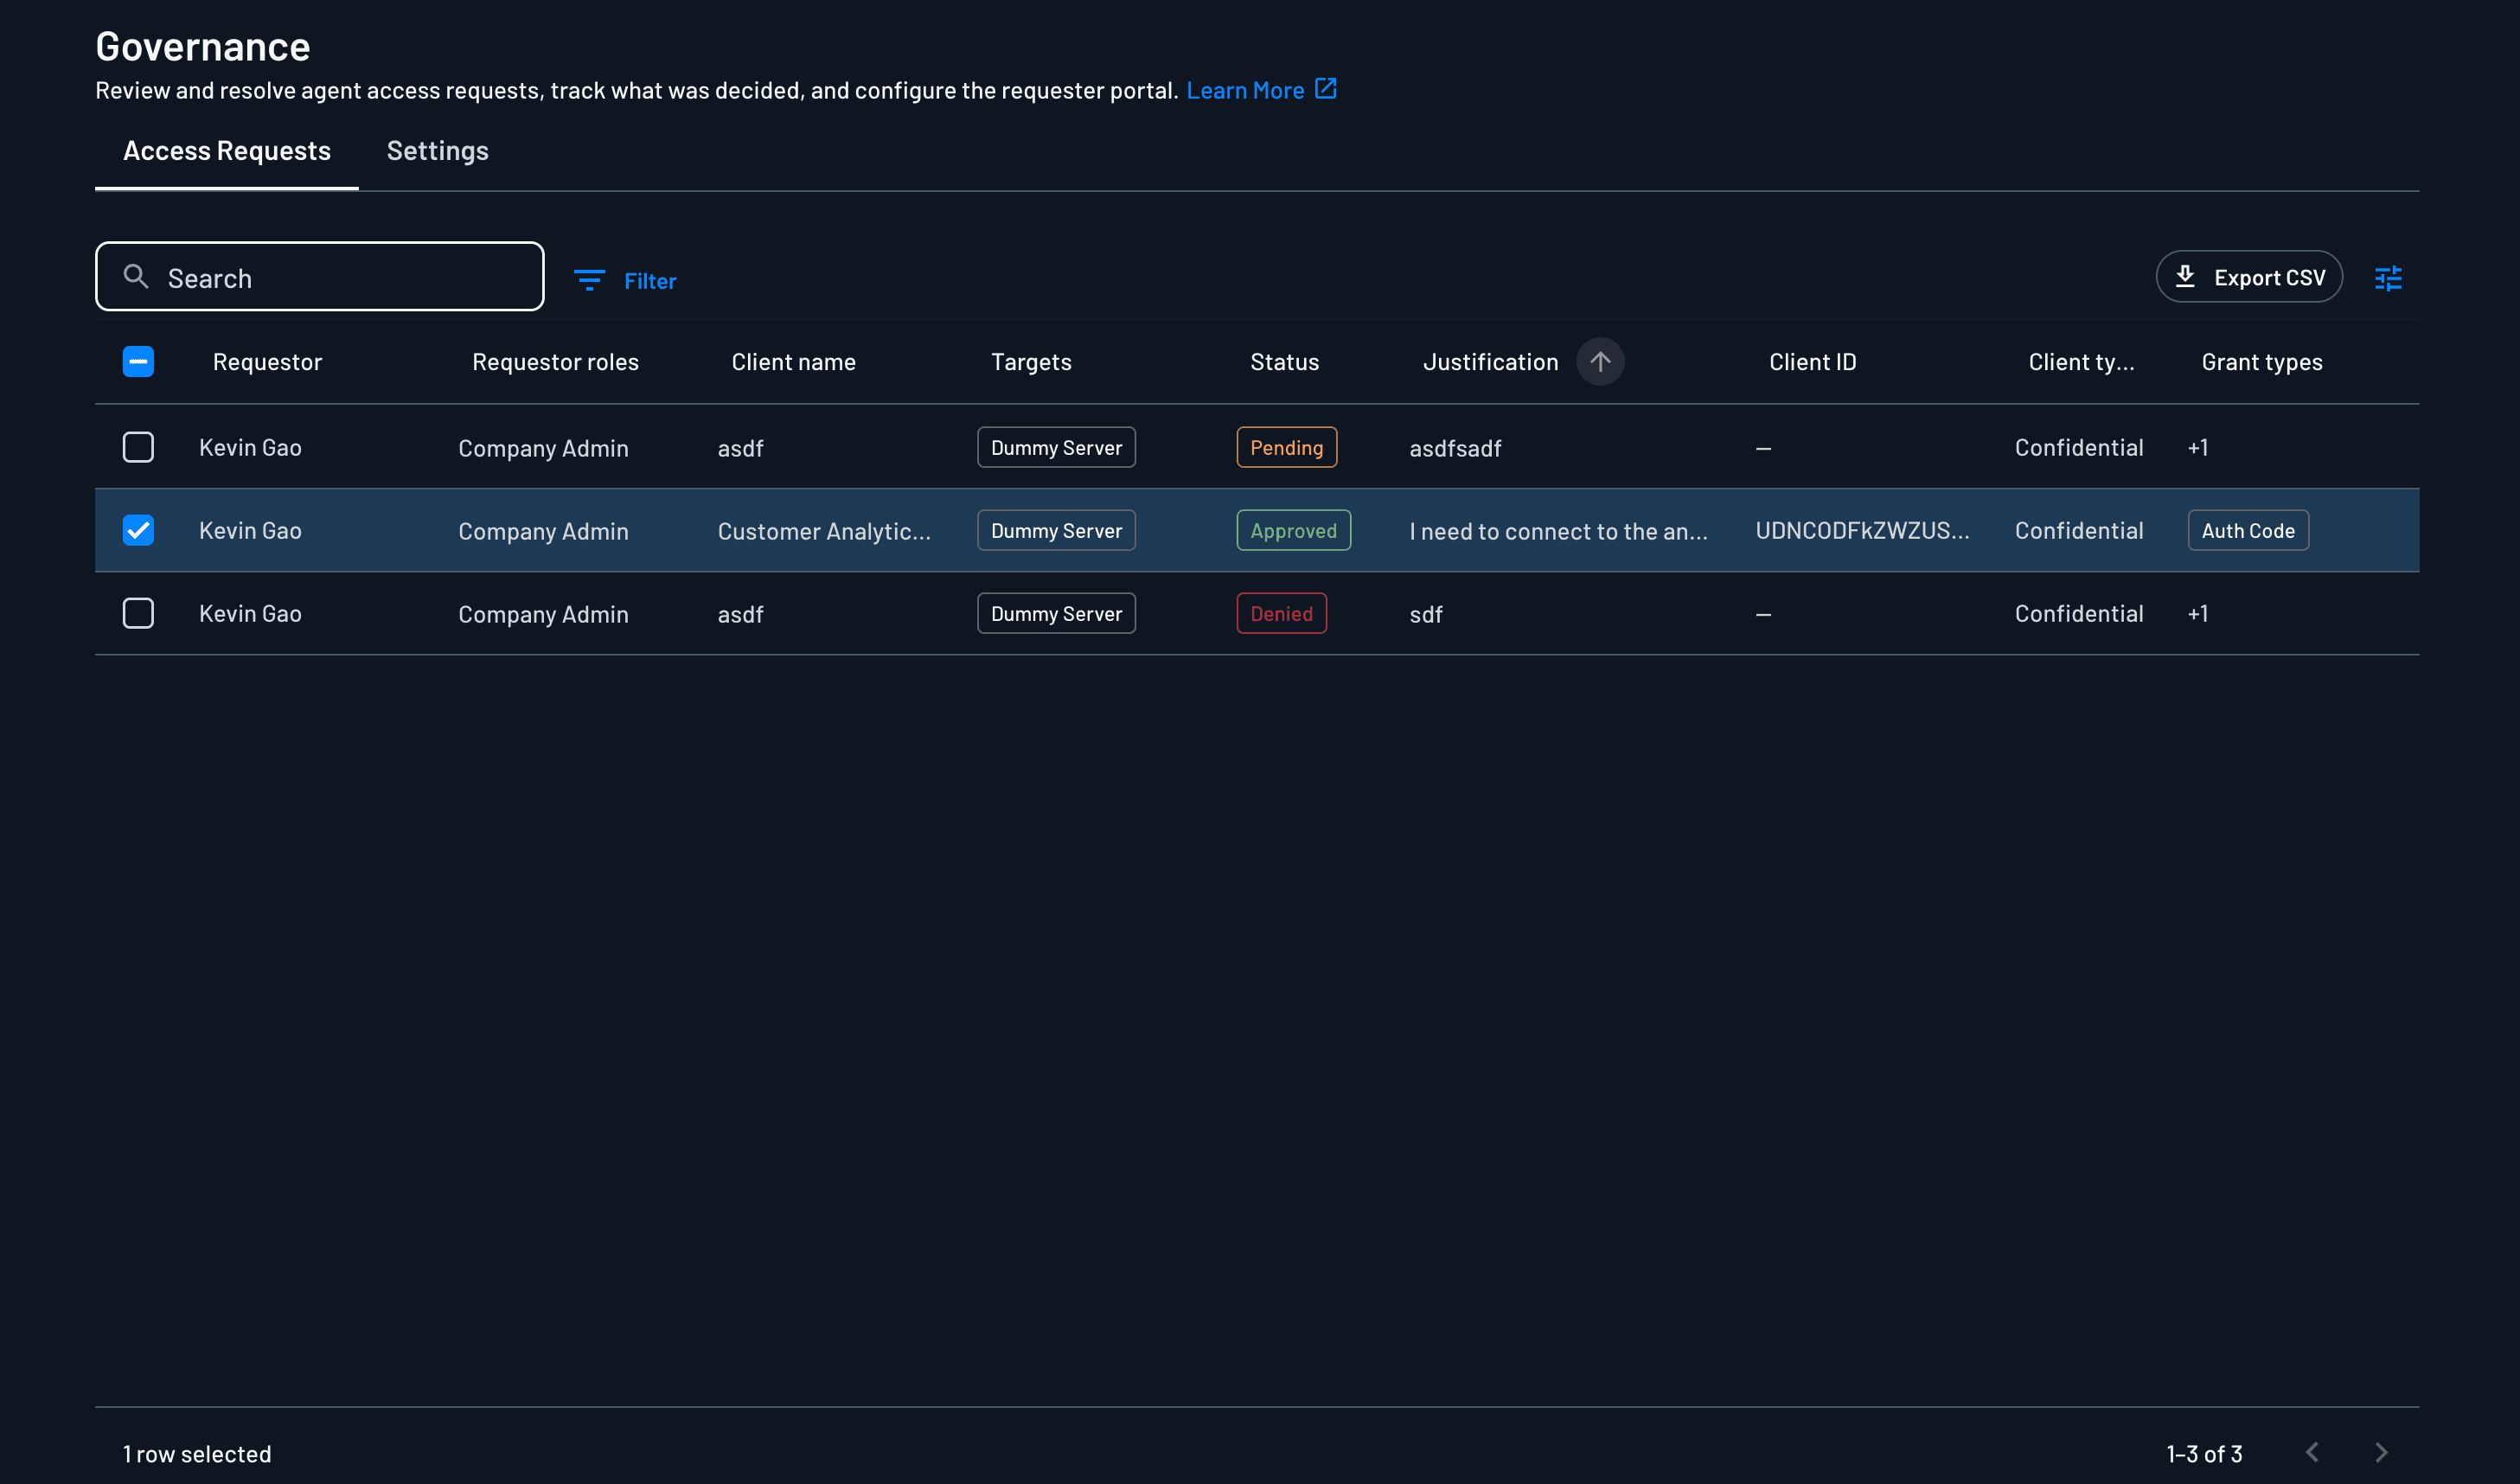
| Column | What it shows |
|---|---|
| Requestor | The employee who submitted the request. |
| Client name | The agent name from the request. |
| Client ID | The ID of the new client. Empty until you approve the request. |
| Targets | The Resources and Connections the employee requested. |
| Status | Pending Review while it waits. When an admin decides, Approved by or Denied by, followed by the admin's name. |
| Client type | Confidential or Public. |
| Grant types | The grant types the employee requested, such as Auth Code. |
| Resolver | The admin who approved or denied the request. Empty while the request is pending. |
| Resolution note | The note the resolver left with their decision. |
| Resolved | When the resolver made the decision. |
| ID | The ID of the access request itself, separate from the client ID. |
Resolving a Request
Click a request to open Request details. The panel shows the Requester profile with the requester's name and justification, the Client details, and the Requested access.
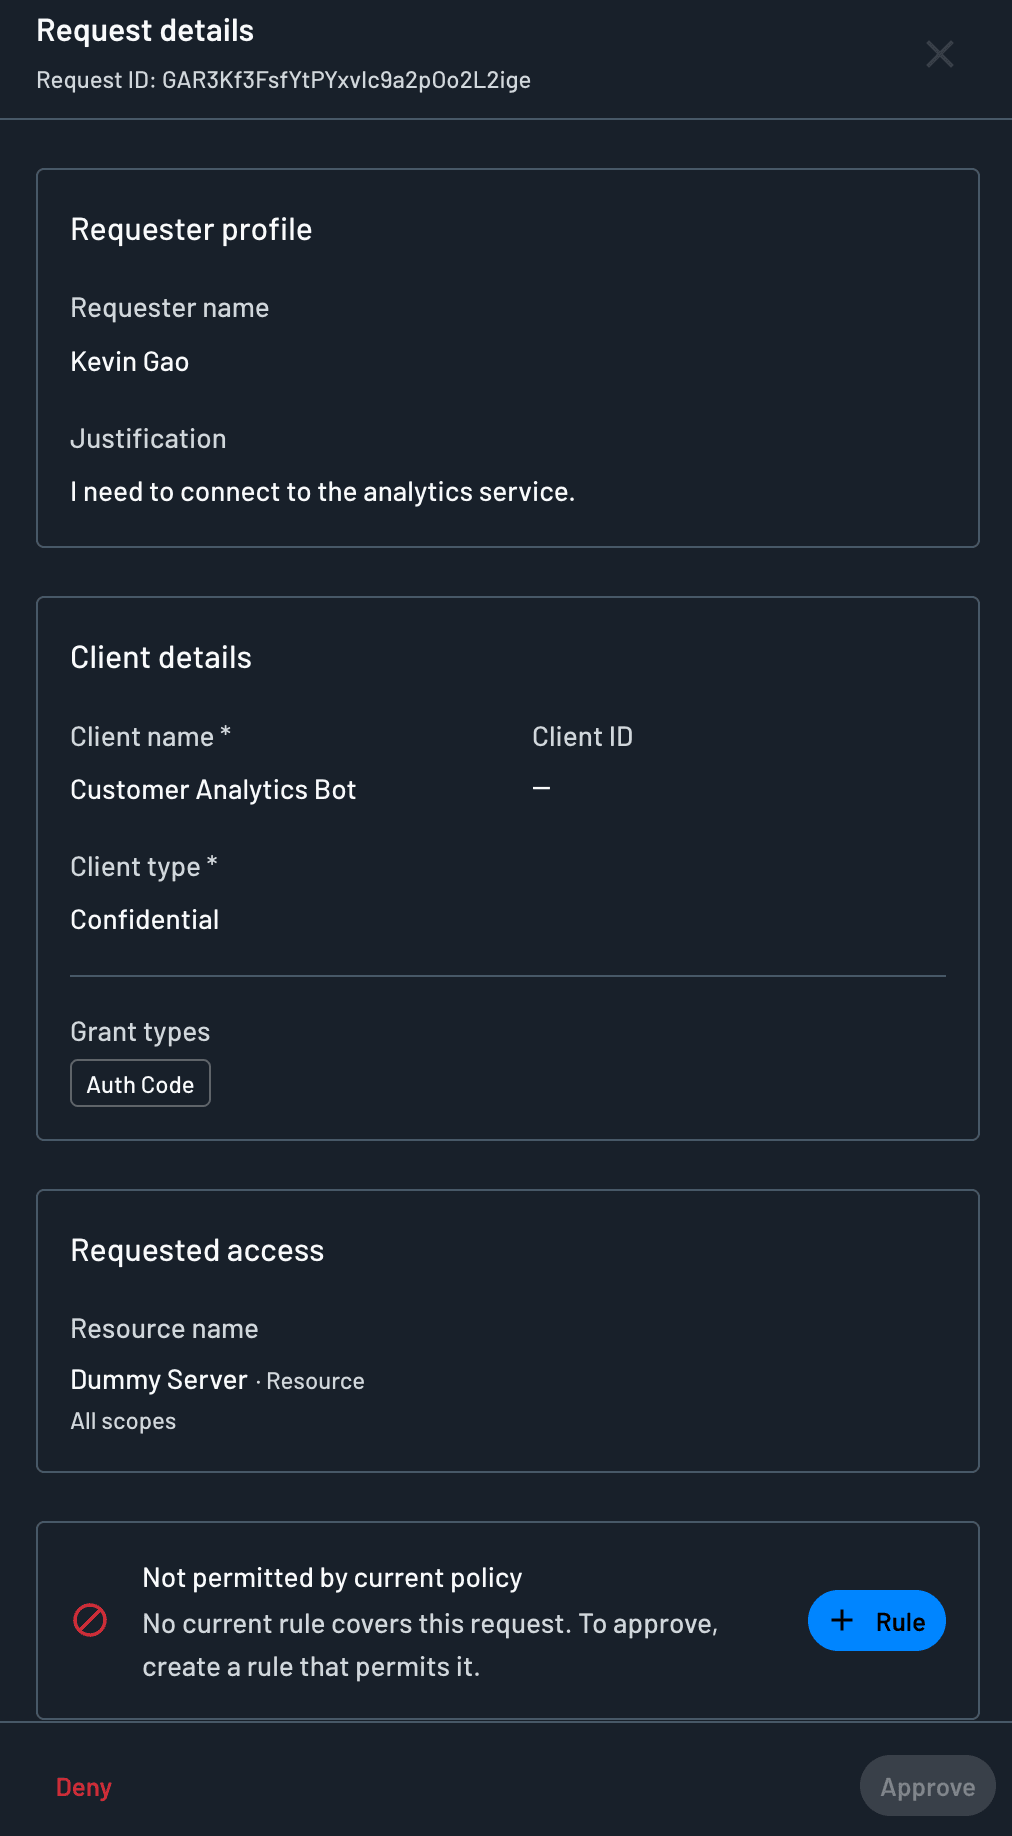
Below the requested access, the panel shows whether your policies already permit the request:
- Rules apply to this client: One or more policy rules already apply to the client. Review those rules before you approve, or click + Rule to add another one.
- Not permitted by current policy: No rule covers the request, so Approve stays disabled. Click + Rule to create a rule that permits it.
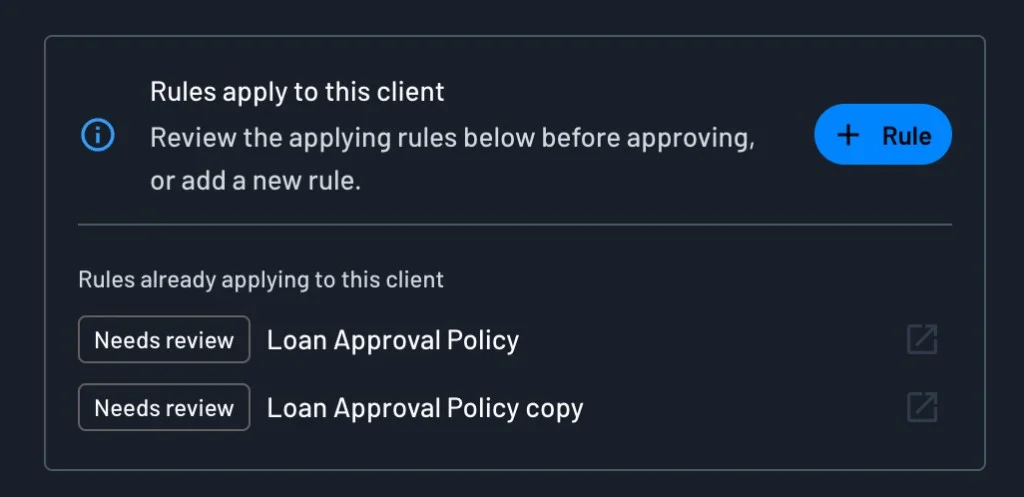
You have three options:
- Approve: Descope creates the client with the access the employee requested.
- Modify, then approve: Grant less than the employee asked for. For example, you might approve read access to the API but leave out a Connection the agent doesn't need yet.
- Deny: Descope doesn't create a client.
When you modify a request and then approve it, the portal notifies the requester.
The menu next to Approve offers two choices. Approve approves the request as it stands. Approve with comment lets you add a note with the approval, which is useful when you narrowed the request.
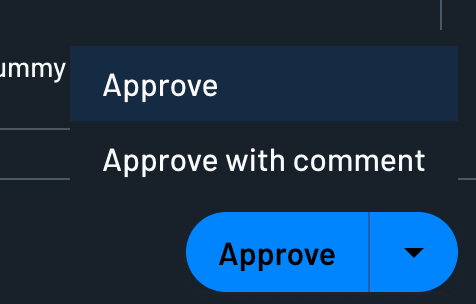
To deny a request, click Deny. The Deny request panel asks for a Comment, which is required. Descope shares the comment with the requester, so explain why you denied the request and what they could ask for instead.
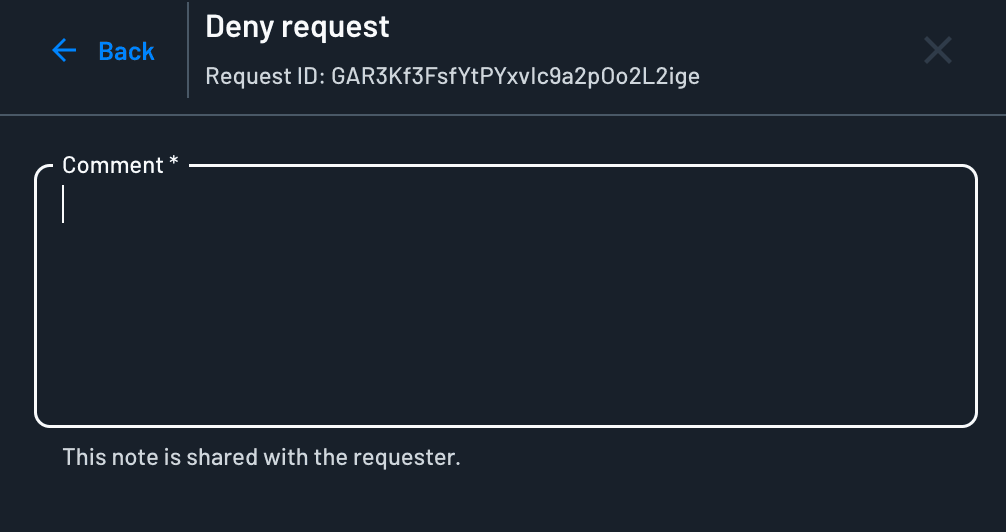
The Resolution note column keeps a record of each decision, so anyone who audits the agent later can see why you made the call.
Approving a request isn't the last word on that client. To end an agent's access, revoke it or delete the client from the Clients page. To adjust what the agent can reach, update the policies that apply to it.
Disabling the Suite
To stop accepting new requests, turn on Disable suite on the Settings tab. While that setting is on, the portal URL doesn't work.
Clients Descope has already created are not affected while the suite is disabled. Turn the setting back off to reopen the portal.