SMART on FHIR Example
This example shows how to use Descope Fine-Grained Authorization (FGA) to check patient access behind a SMART on FHIR server. A SMART scope such as patient/Observation.rs says that an app can read observations, but not which patients' observations. FGA adds a relationship check between the user and the patient on every request.
Before you start, register your FHIR server as a Resource with its SMART scopes, as described in Register Your FHIR Server as an API Resource.
How FGA Checks Patient Access in a SMART on FHIR Request
Your FHIR server runs the FGA check on every request for patient data, after it validates the access token and its SMART scopes. Descope issues the token, stores the relations, and answers the check.
Select any step to see what happens.
The scope check confirms that the token allows this type of request. The FGA check confirms that this user has a relationship with this specific patient.
Set Up FGA in the Descope Console
Define the Relationships between Users and Patients
This schema models access to patient data. To add it in the Console:
- In the Descope Console, go to Authorization > FGA.
- On the Schema tab, click Start from Blank, or open your existing schema in the editor.
- Paste the schema into the editor and click Save.
model AuthZ 1.0

type user

type patient
  relation subject: user
  relation careteam: user
  relation attending: user

  permission read_record: subject | careteam | attending
  permission write_note: attending
The three relations describe how a user is connected to a patient:
subject: the patient themselvescareteam: a nurse or other member of the patient's care teamattending: the patient's attending physician
The two permissions are derived from these relations. read_record is granted by any of the three relations, and write_note is granted only by attending.
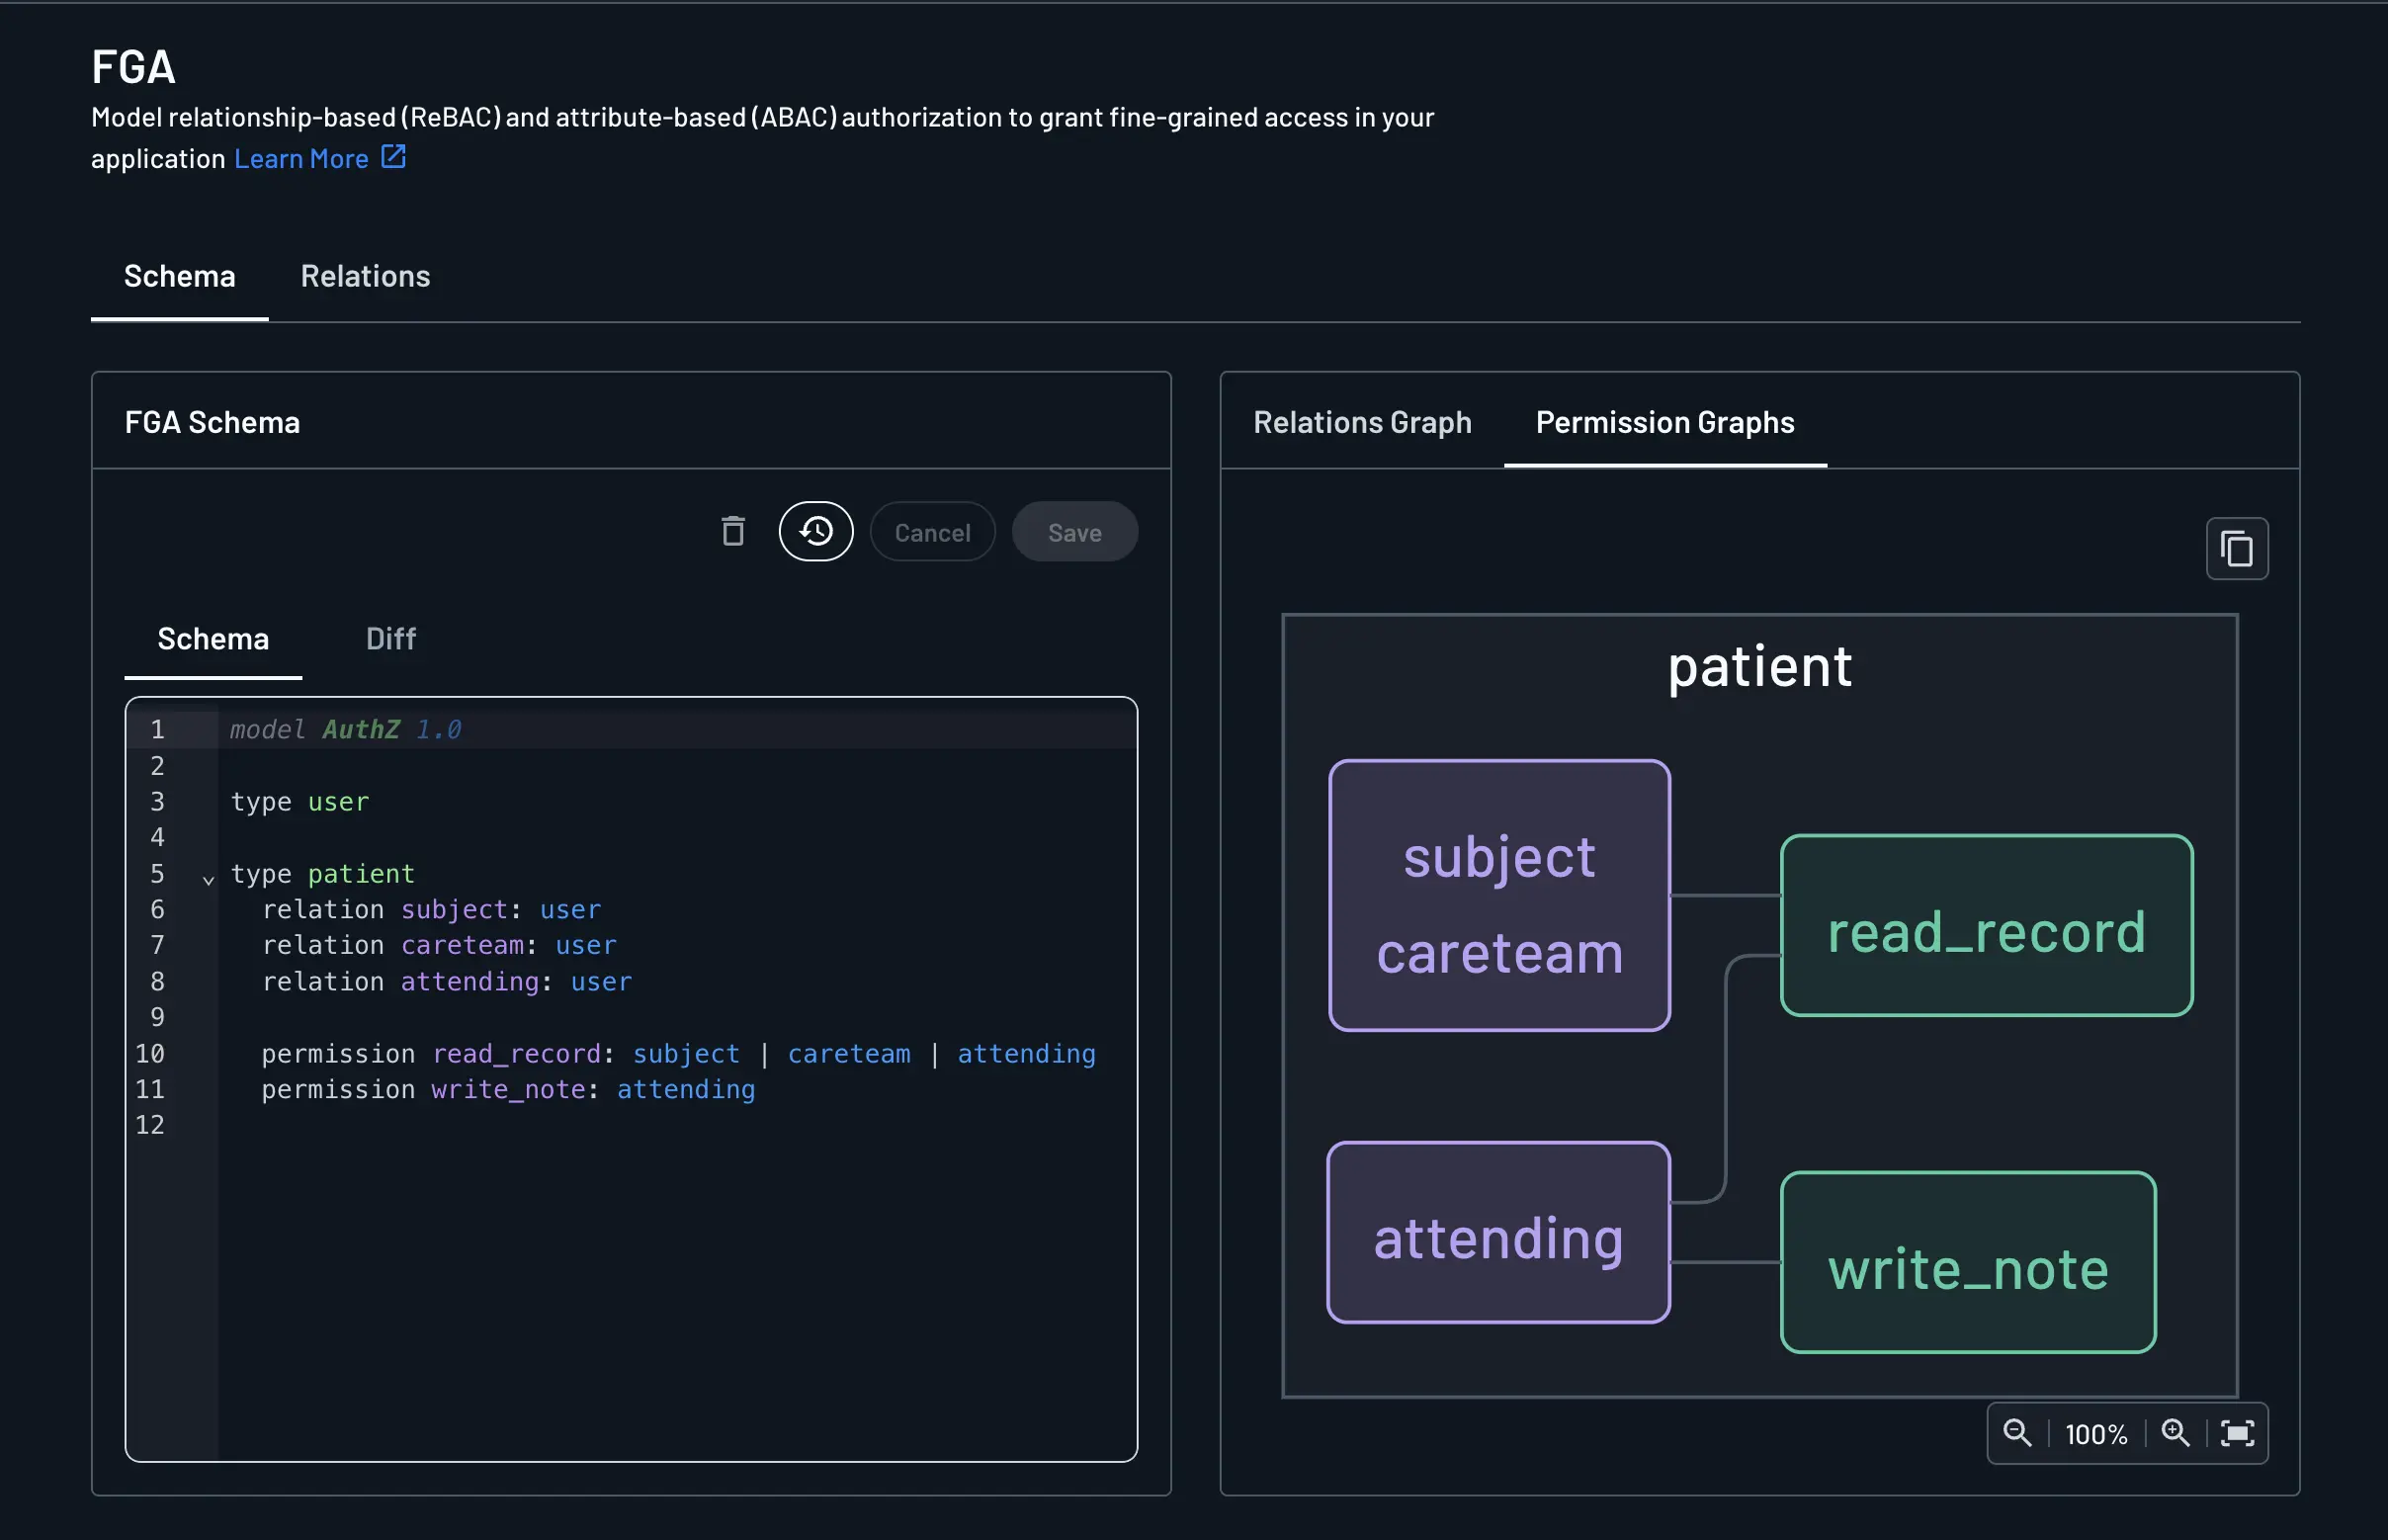
After you save, the panel next to the editor shows two graphs. The Relations Graph shows which types connect to each other and through which relations. The Permission Graphs show which relations grant each permission, so you can confirm that only attending grants write_note.
To understand full schema syntax, see Defining a Schema. To manage a schema with the SDK, see Managing a Schema.
Create Relations between Users and Patients
A relation connects a user and a patient. To create a relation in the Console:
- Go to Authorization > FGA > Relations and click + Relation.
- Fill in the fields:
- Resource Type:
patient - Resource: the FHIR Patient ID, for example
pt-alvarez - Relation:
subject,careteam, orattending - Target Type:
user - Target: the user's Descope user ID, for example
U2abc123def456
- Resource Type:
- Click Create.
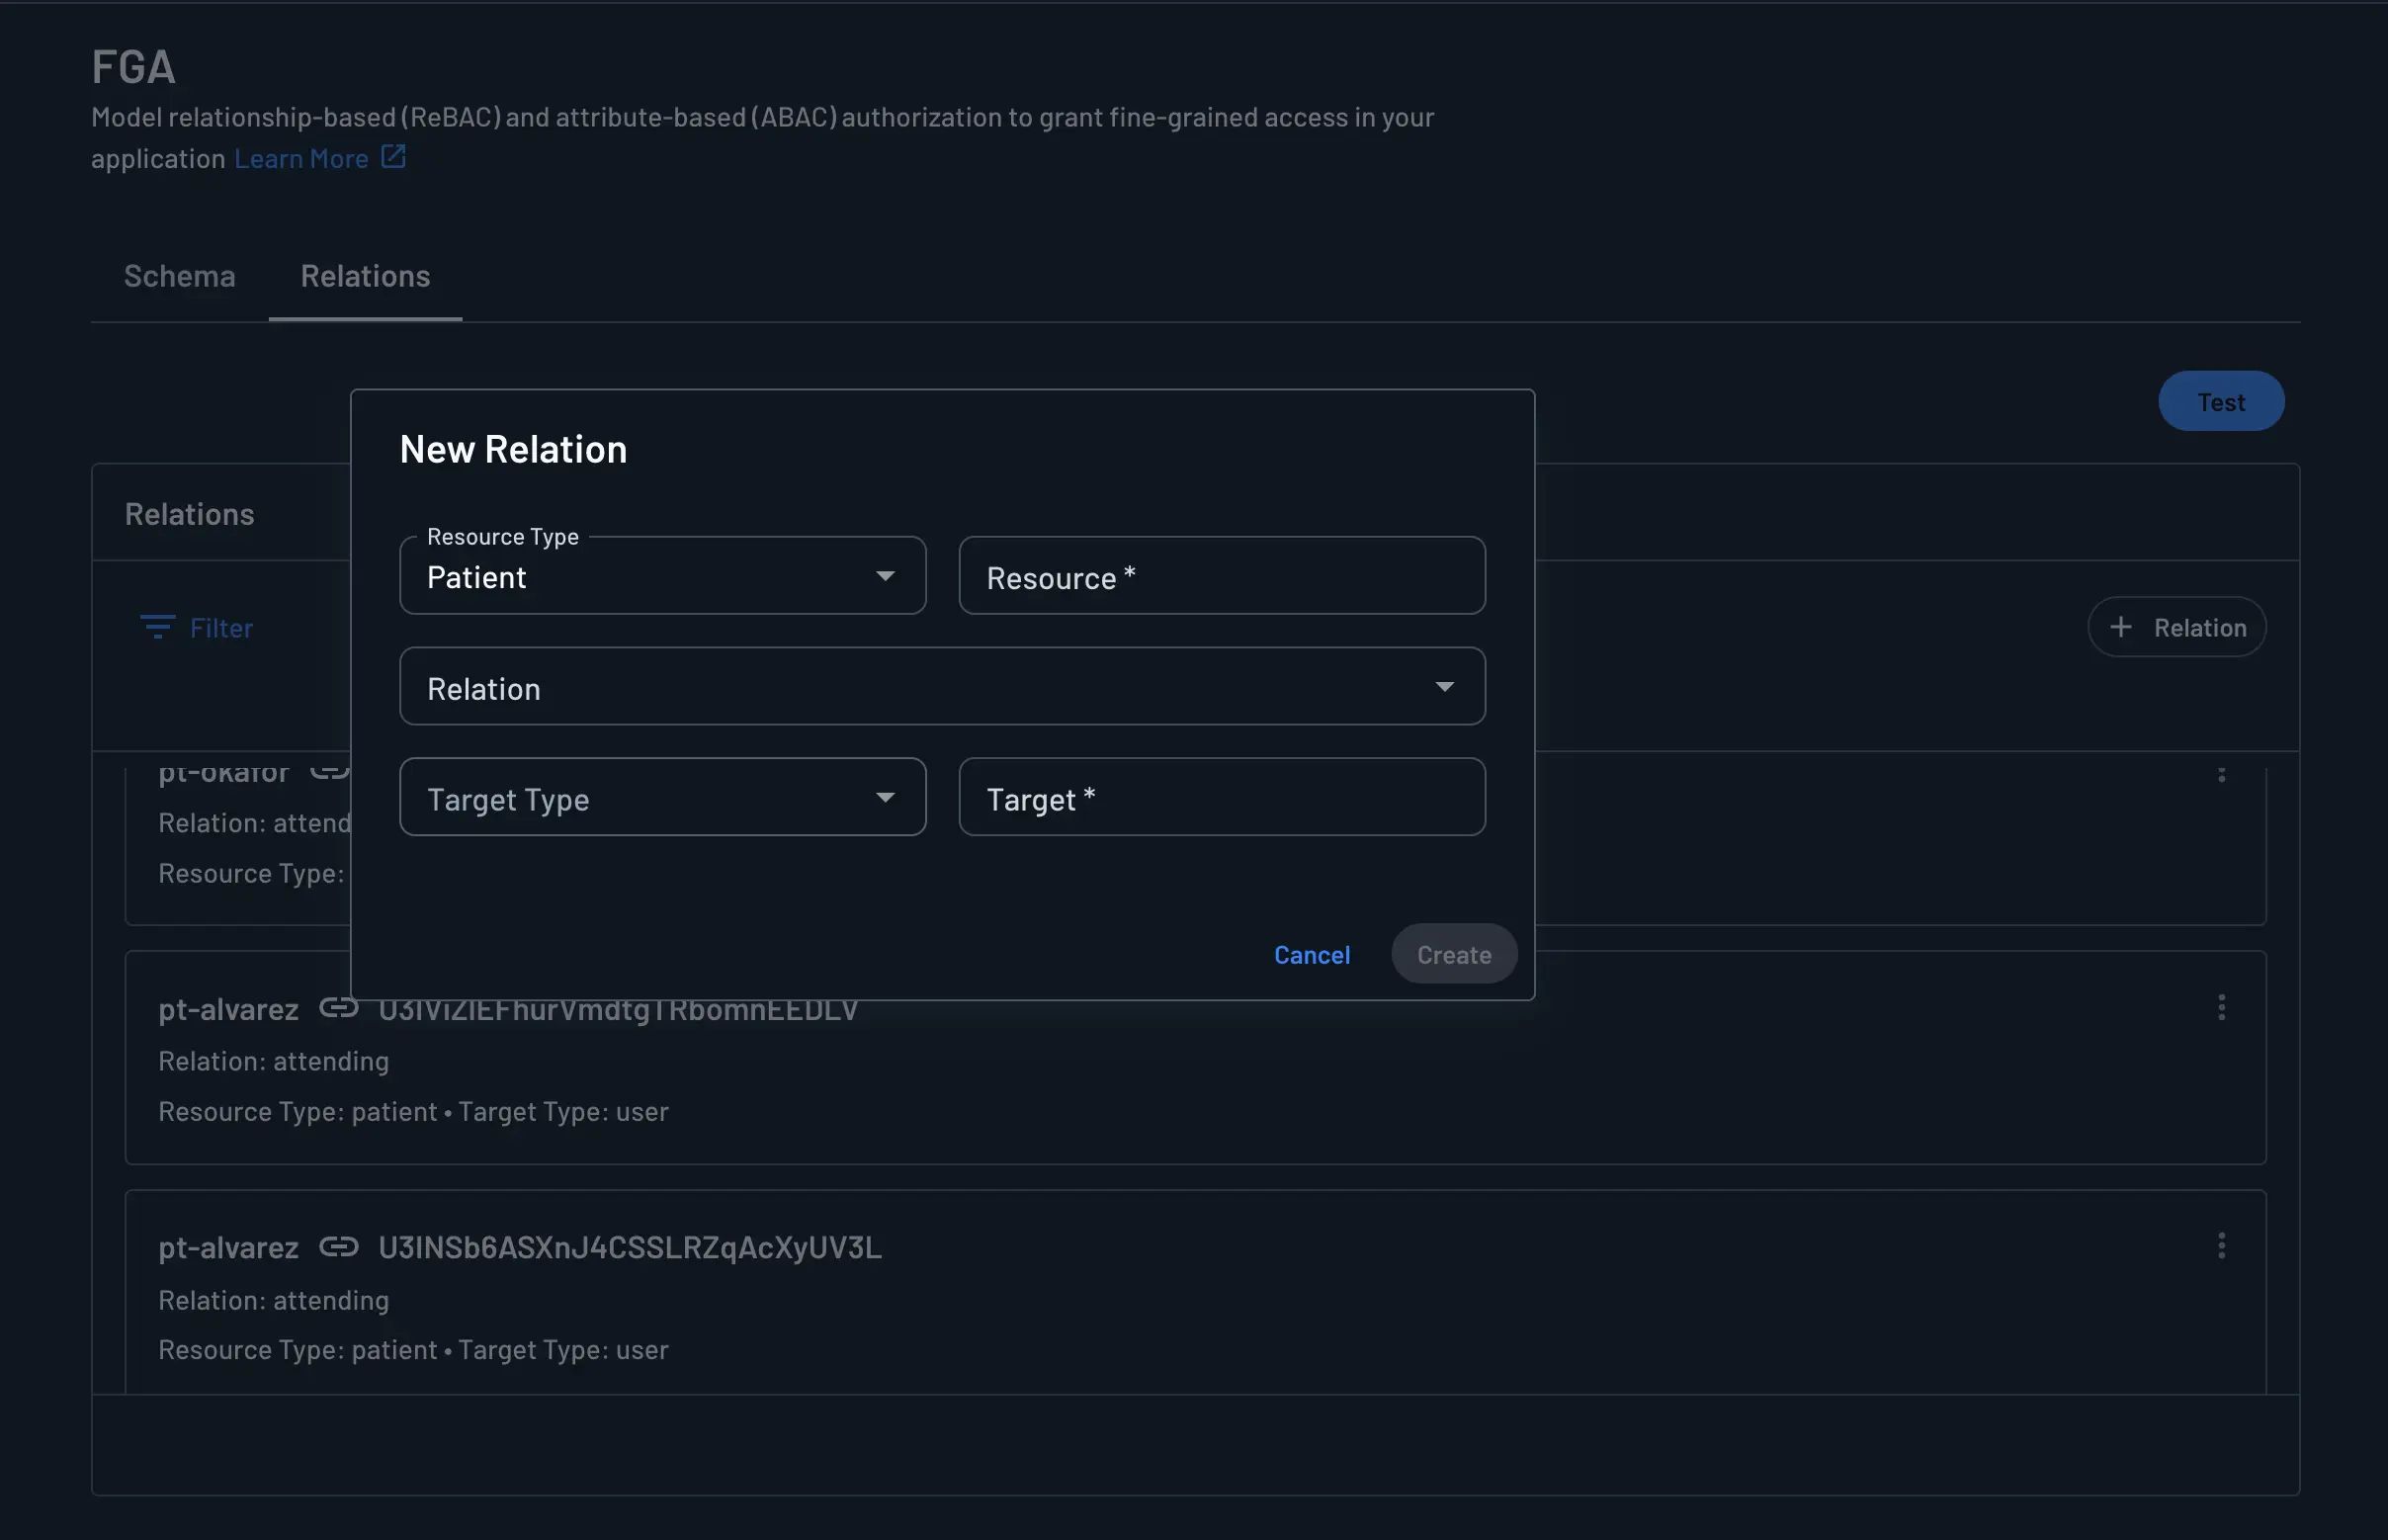
The examples in the rest of this guide use these relations:
- Dr. Chen is
attendingonpt-alvarez - Nurse Patel is
careteamonpt-alvarez - Maria Alvarez is
subjectonpt-alvarez
In production, create relations from your care team or admissions system with createRelations, or from IdP groups at sign-in with SSO group mapping.
Test and Enforce Patient Access
Test Access Rules with Assertions
Assertions verify that your schema and relations return the expected access decisions. Each assertion specifies whether a user should be allowed or denied permission for a patient.
- On the Relations tab, click Test to open Assertions.
- Click + Assertion and fill in Resource Type, Resource, Relation or Permission, Target Type, Target, and Ruling (Allow or Block).
- Click Run All to run every assertion.
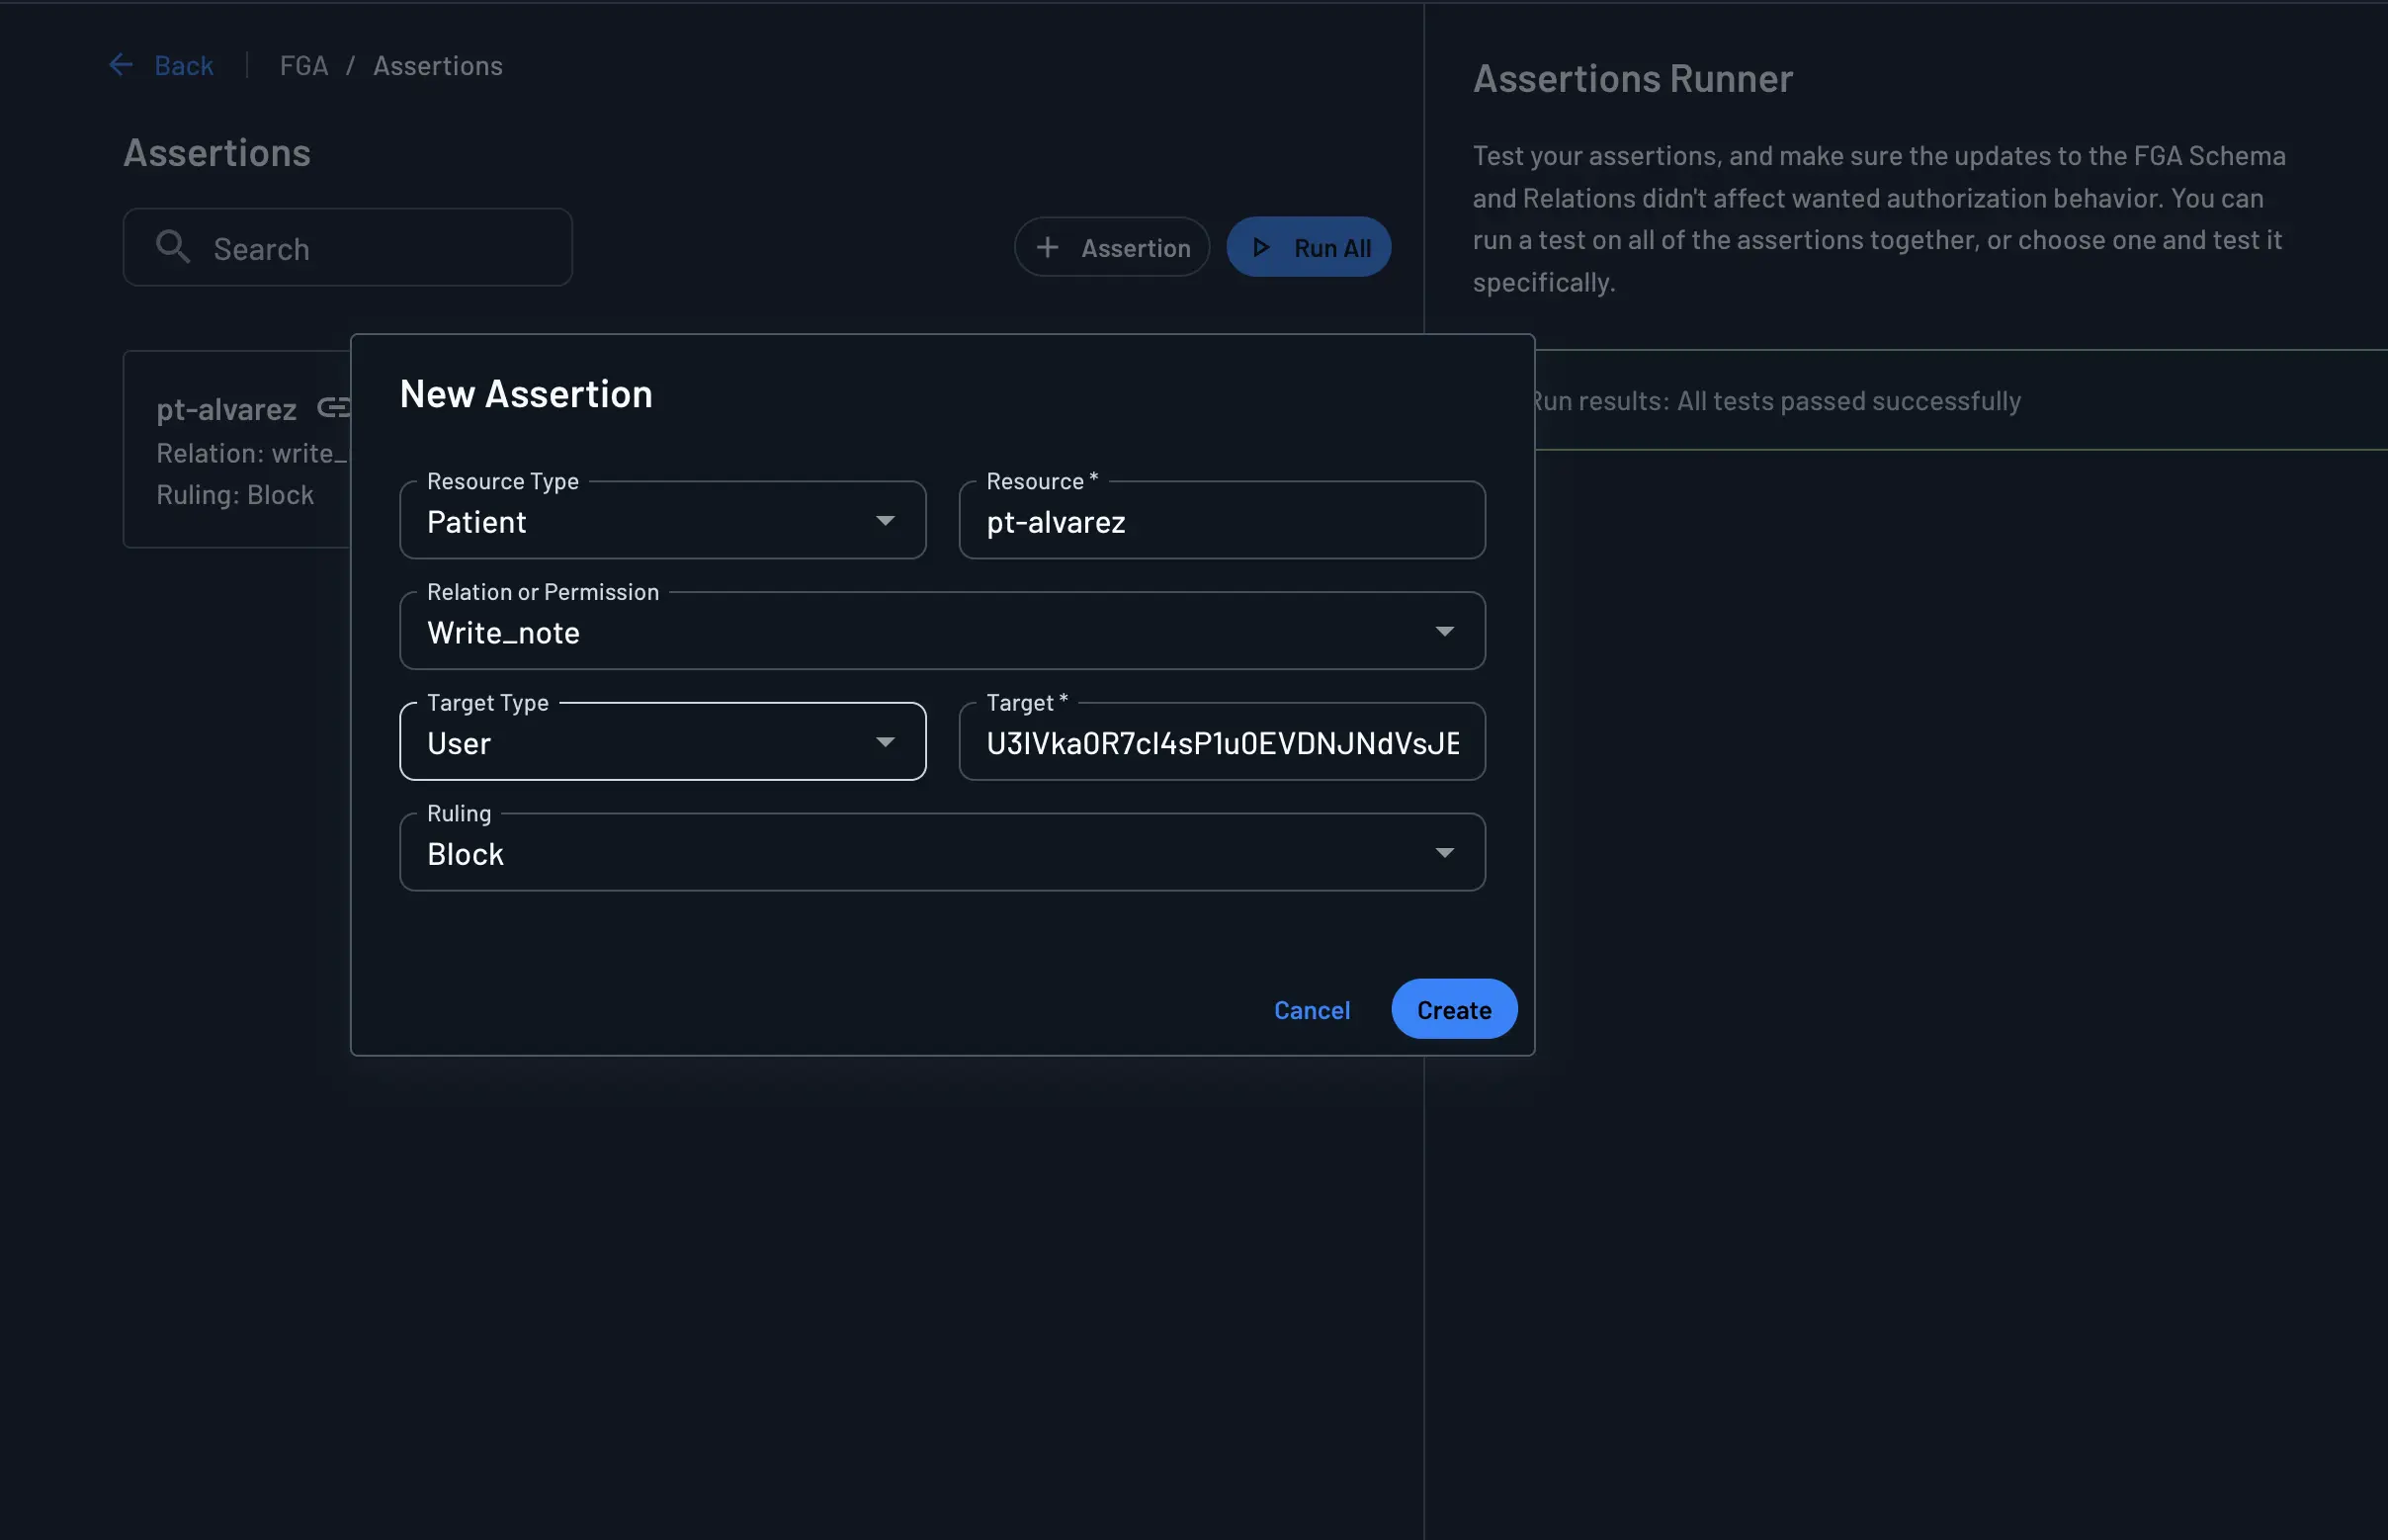
Based on the example relations, here are the expected access results. In this scenario, pt-nguyen represents a patient with no assigned relations:
| User | Read pt-alvarez | Write note to pt-alvarez | Read pt-nguyen |
|---|---|---|---|
| Dr. Chen | Allow | Allow | Block |
| Nurse Patel | Allow | Block | Block |
| Maria Alvarez | Allow | Block | Block |
Add an assertion for each result in the table, including every Block. A test set with only Allow assertions still passes when the schema grants too much access.
Design schemas in FGA Studio
FGA Studio is a visual designer for Descope AuthZ 1.0 schemas that lets you edit a schema as a graph or as code. Test your schema there with sample relations and assertions, then click Copy as FGA schema and paste it into the Console.
Check Patient Access in Your FHIR Server
Run the FGA check in your FHIR server for every request that reads or changes patient data. Read and search requests check read_record, while creating clinical notes checks write_note. This example schema has no permission for any other write, including PUT, PATCH, and DELETE, so deny those requests or add a permission for them to your schema.
The check needs two values from the request:
resource: the ID of the patient whose data the request reads or changes, such aspt-alvarez. Resolve it on the server from the/Patient/{id}path, thepatientsearch parameter, thesubjectof a new resource, or, for a request such asGET /Observation/{id}, the patient reference stored on the resource. These values can be FHIR references such asPatient/pt-alvarez, so read the ID from the reference, and deny the request if it points to a resource type other thanPatient. The ID must match the Resource field you entered when you created the relation.target: the user's Descope user ID from the access token'ssubclaim. Read it only after you validate the token.
If either value does not match the stored relation, the check returns false. Log both values whenever a check fails.
Deny any request for which you cannot resolve a single patient, such as a search without a patient parameter. If a response can contain resources for more than one patient, for example through _include or _revinclude, run the check for every patient in the response.
With the Node SDK, the check for a read request looks like this:
const res = await descopeClient.management.fga.check([
  {
    resource: patientId, // the FHIR Patient ID, such as 'pt-alvarez'
    resourceType: 'patient',
    relation: 'read_record', // or 'write_note' when creating a clinical note
    target: userId, // the user ID from the access token's sub claim
    targetType: 'user',
  },
]);
const allowed = res.ok && res.data?.[0]?.allowed === true;
Perform checks in this order: validate the access token's signature and expiry, confirm that its aud claim includes the FHIR server Resource's Audience, verify the SMART scopes, and then run the FGA check. If the token uses patient/ scopes, the requested patient, every patient in the response, and any patient that is changed must match the token's patient claim, in addition to the FGA check. Deny the request if the check errors or times out.
The FGA check requires a management key. Store this key securely on your FHIR server only, never in client apps, and assign it only the necessary roles. For SDK setup and examples in other languages, see Checking Relations.