AWS SES Email Validation Connector
AWS SES Email Validation uses the Amazon SES GetEmailAddressInsights API to validate email addresses, checking syntax, DNS records, mailbox existence, and whether the address is disposable, role-based, or randomly generated.
Descope's AWS SES Email Validation connector allows you to run this check directly in your authentication flows to catch invalid or low-quality email addresses before they reach your user base.
Prerequisites
Your AWS account must have Virtual Deliverability Manager enabled in SES for the target region.
Setting Up the AWS SES Email Validation Connector
To integrate the connector, follow the steps below:
1. Navigate to Connector
- Visit the Connectors page in the Descope Console.
- Select AWS SES Email Validation from the list of connectors.
2. Connector Setup
Enter the following information to configure the connector:
- Connector name: Custom name for your connector. This will come in handy when creating multiple connectors from the same connector template.
- Connector description (Optional): Describe what your connector is used for.
- Authentication: Choose between the following authentication options:
Use AWS Credentials
Use your AWS credentials to authenticate. You will need to provide:
- Access Key ID: The AWS access key ID.
- Secret Access Key: The AWS secret access key.
- (Optional) Session Token: A session token for temporary credentials.
The IAM user associated with these credentials must have the ses:GetEmailAddressInsights permission. You can attach a policy like this:
{
  "Version": "2012-10-17",
  "Statement": [
    {
      "Effect": "Allow",
      "Action": ["ses:GetEmailAddressInsights"],
      "Resource": "*"
    }
  ]
}
Use Role Based Permissions
Use role-based permissions to authenticate instead of long-lived credentials. You will need to provide:
- Role ARN: The Amazon Resource Name (ARN) of the role that has permissions to call
ses:GetEmailAddressInsights. - External ID: The external ID used to assume the role.
Important
When creating the IAM role for this connector, you must include a trust policy that allows Descope to assume the role:
Trust Policy Requirements:
- Principal:
arn:aws:iam::312892722078:role/prod-external-role-us-east-1 - External ID: The external ID provided by Descope during connector configuration
- Action:
sts:AssumeRole
Your trust policy should look like this:
{
  "Version": "2012-10-17",
  "Statement": [
    {
      "Effect": "Allow",
      "Principal": {
        "AWS": "arn:aws:iam::312892722078:role/prod-external-role-us-east-1"
      },
      "Action": "sts:AssumeRole",
      "Condition": {
        "StringEquals": {
          "sts:ExternalId": "your-external-id-from-descope"
        }
      }
    }
  ]
}
Without this trust policy configuration, you'll receive an is not authorized to perform: sts:AssumeRole error when testing the connector.
- Region: The AWS region to use, e.g.
us-east-1.
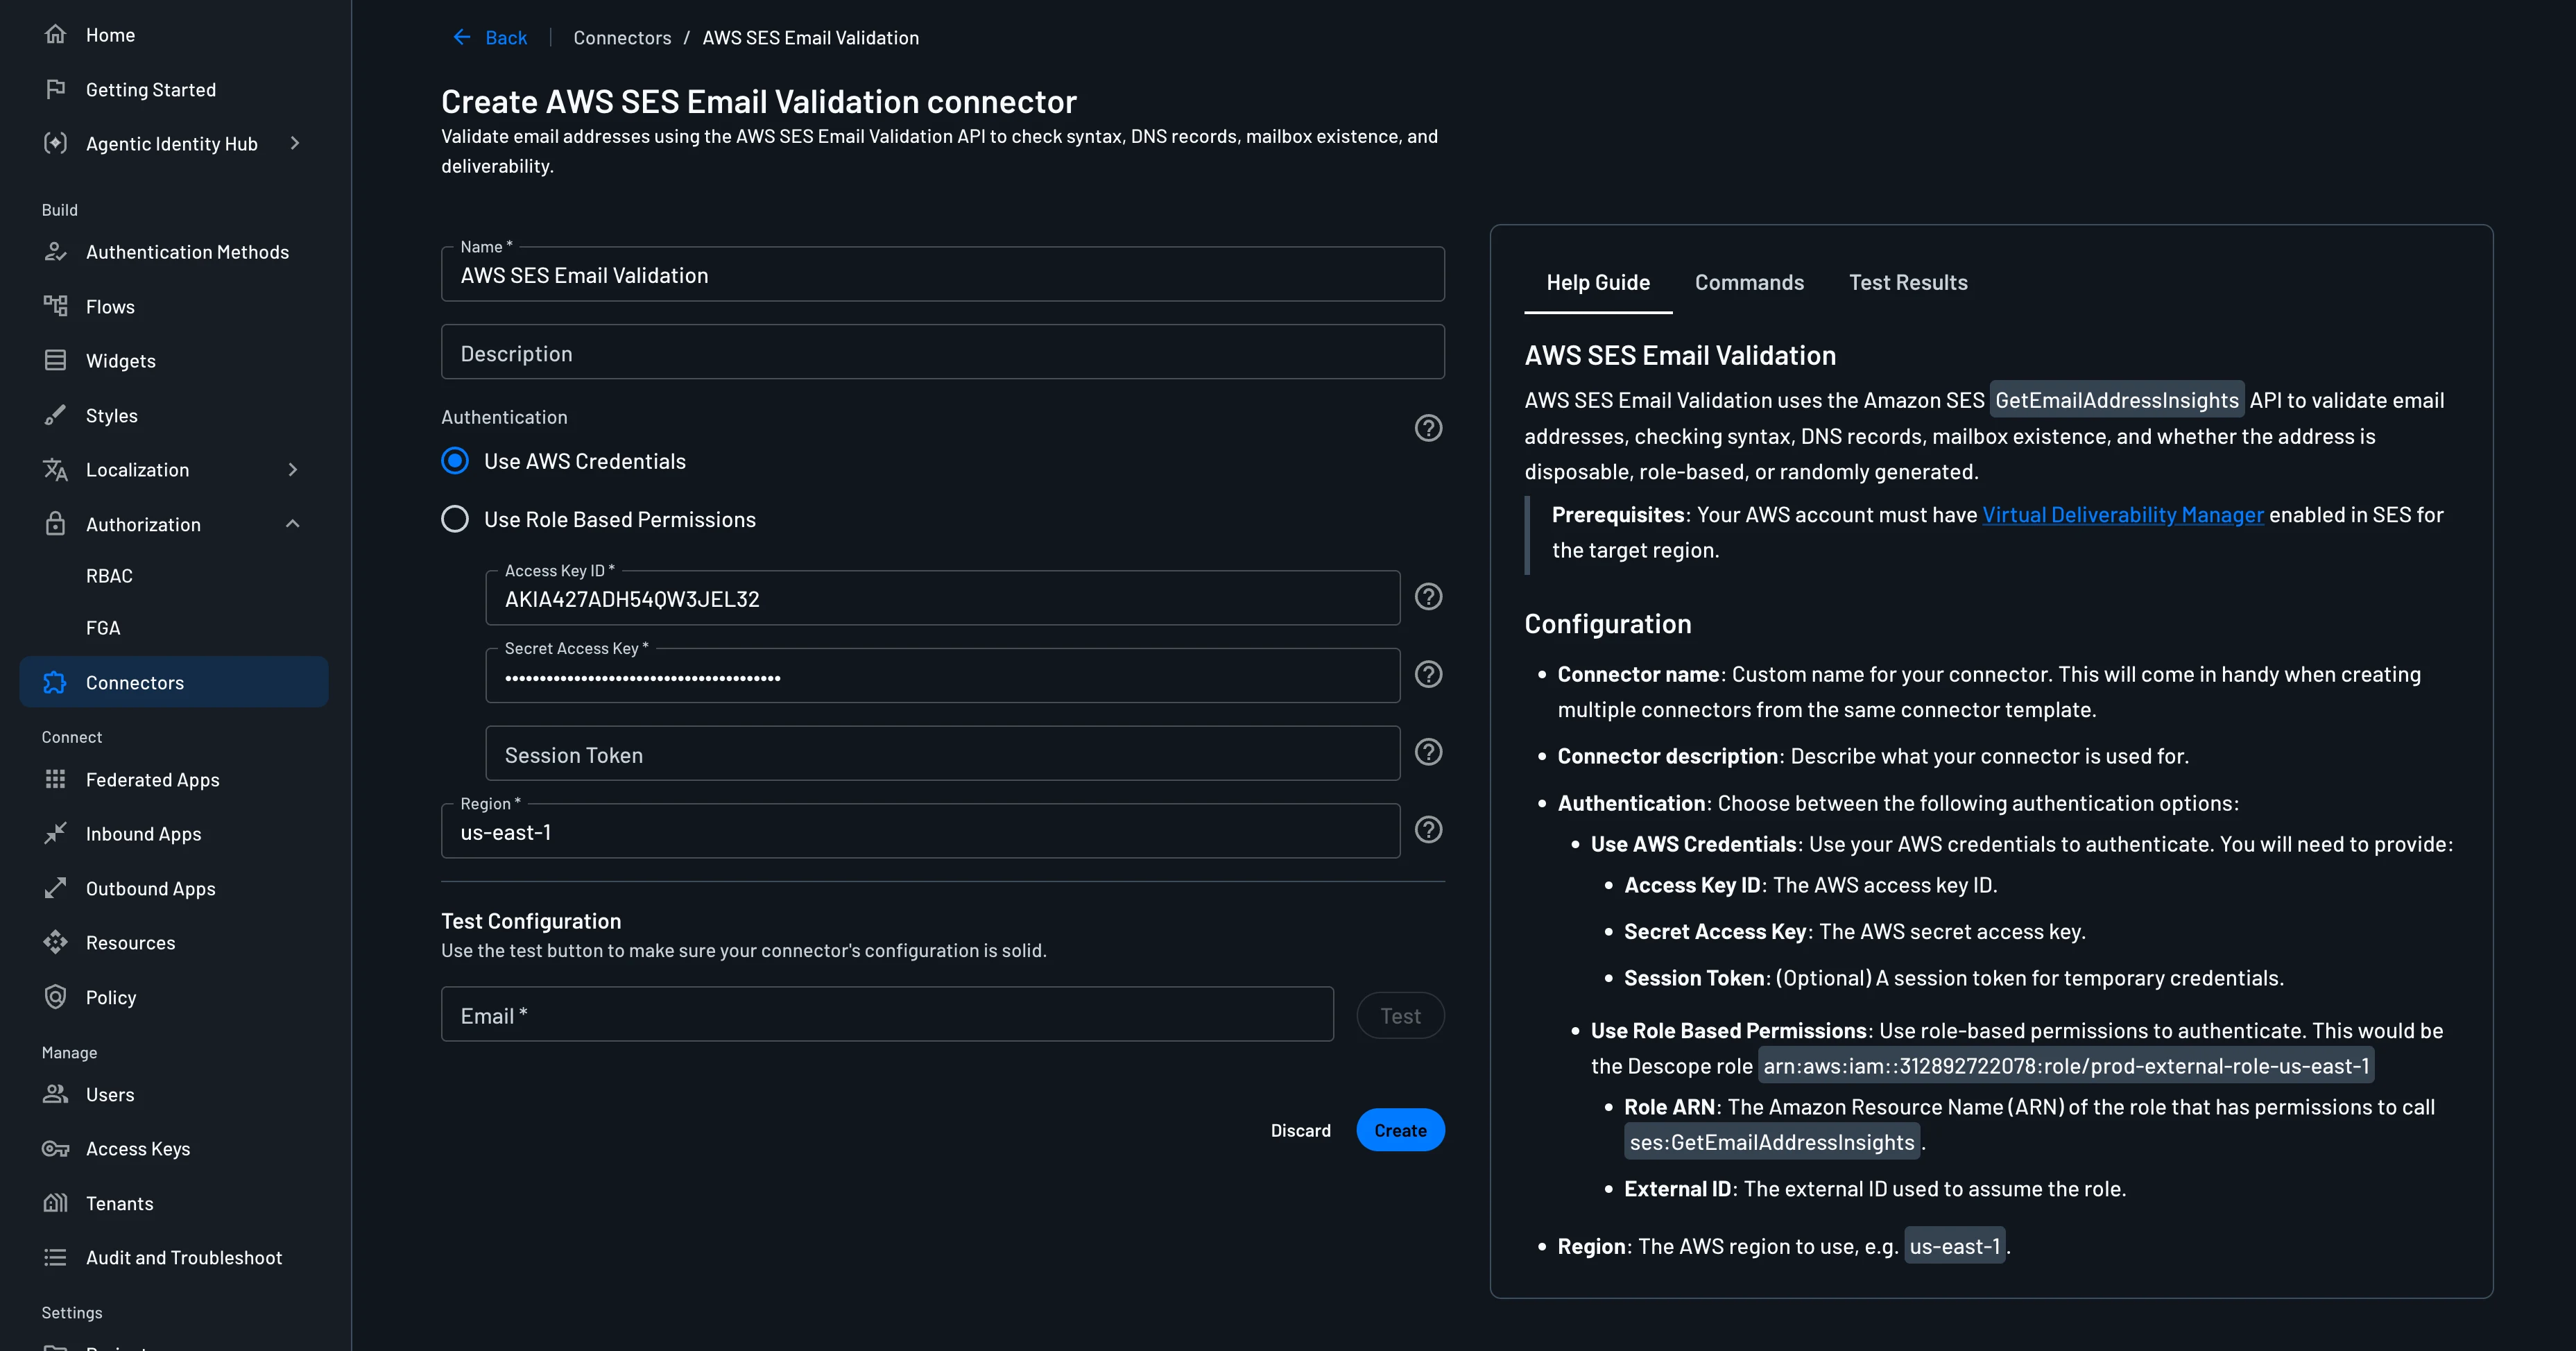
3. Test & Save
- Enter an Email in the Test Configuration section and click
Testto verify your configuration works. - Review the results in the
Test Resultspanel. - Once successful, click
Createto save the connector.
Implementing the AWS SES Email Validation Connector in Your Flow
1. Select or Create a Flow
- Navigate to the Flows page of the Descope console.
- Select an existing flow or create a new one.
2. Add the Connector to the Flow
Click the blue plus icon in the flow builder, select Connector, and choose the AWS SES Email Validation action.
You can enter the email address to validate manually or set it dynamically based on previous attributes (e.g., {{form.email}} or {{user.email}}).
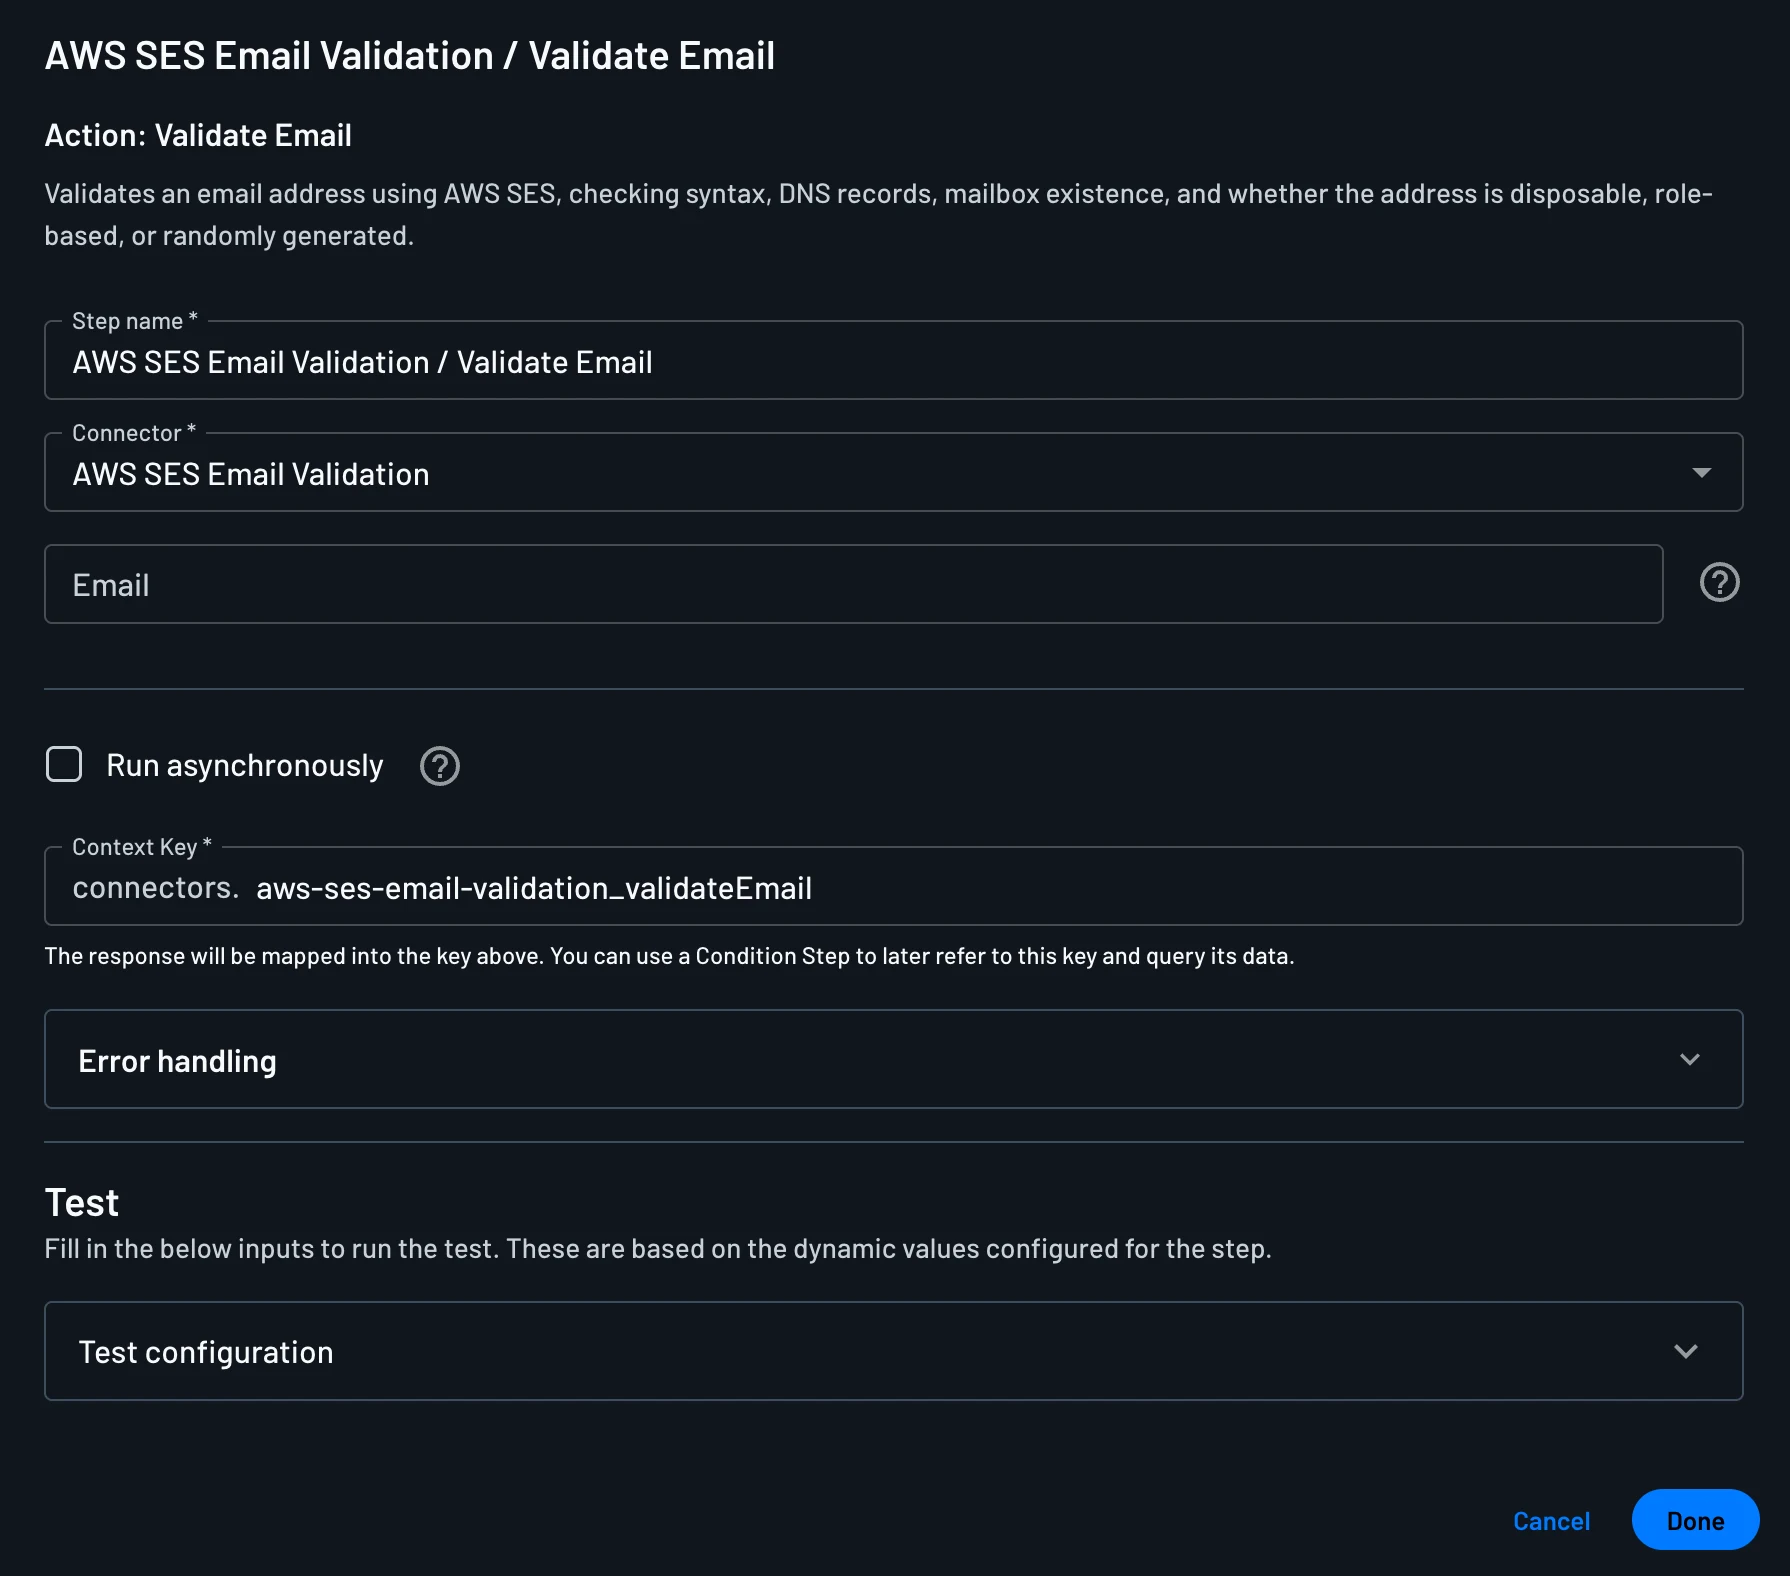
3. Handle the Response
The connector's response is mapped into the connectors.aws-ses-email-validation_validateEmail context key.
Add a condition step immediately after the connector to refer to this context key and query its data to evaluate the validation result.