Unibeam Connector
Unibeam is a SIM-based authentication platform that enables passwordless authentication and transaction approval using their OnSim technology. Descope's Unibeam connector allows you to authenticate users and request approvals directly through their SIM card, without requiring any app installation.
Setting Up the Unibeam Connector
To integrate the Unibeam connector, follow the steps below:
1. Navigate to Connector
- Visit the Connectors page in the Descope Console.
- Select Unibeam from the list of connectors.
2. Connector Setup
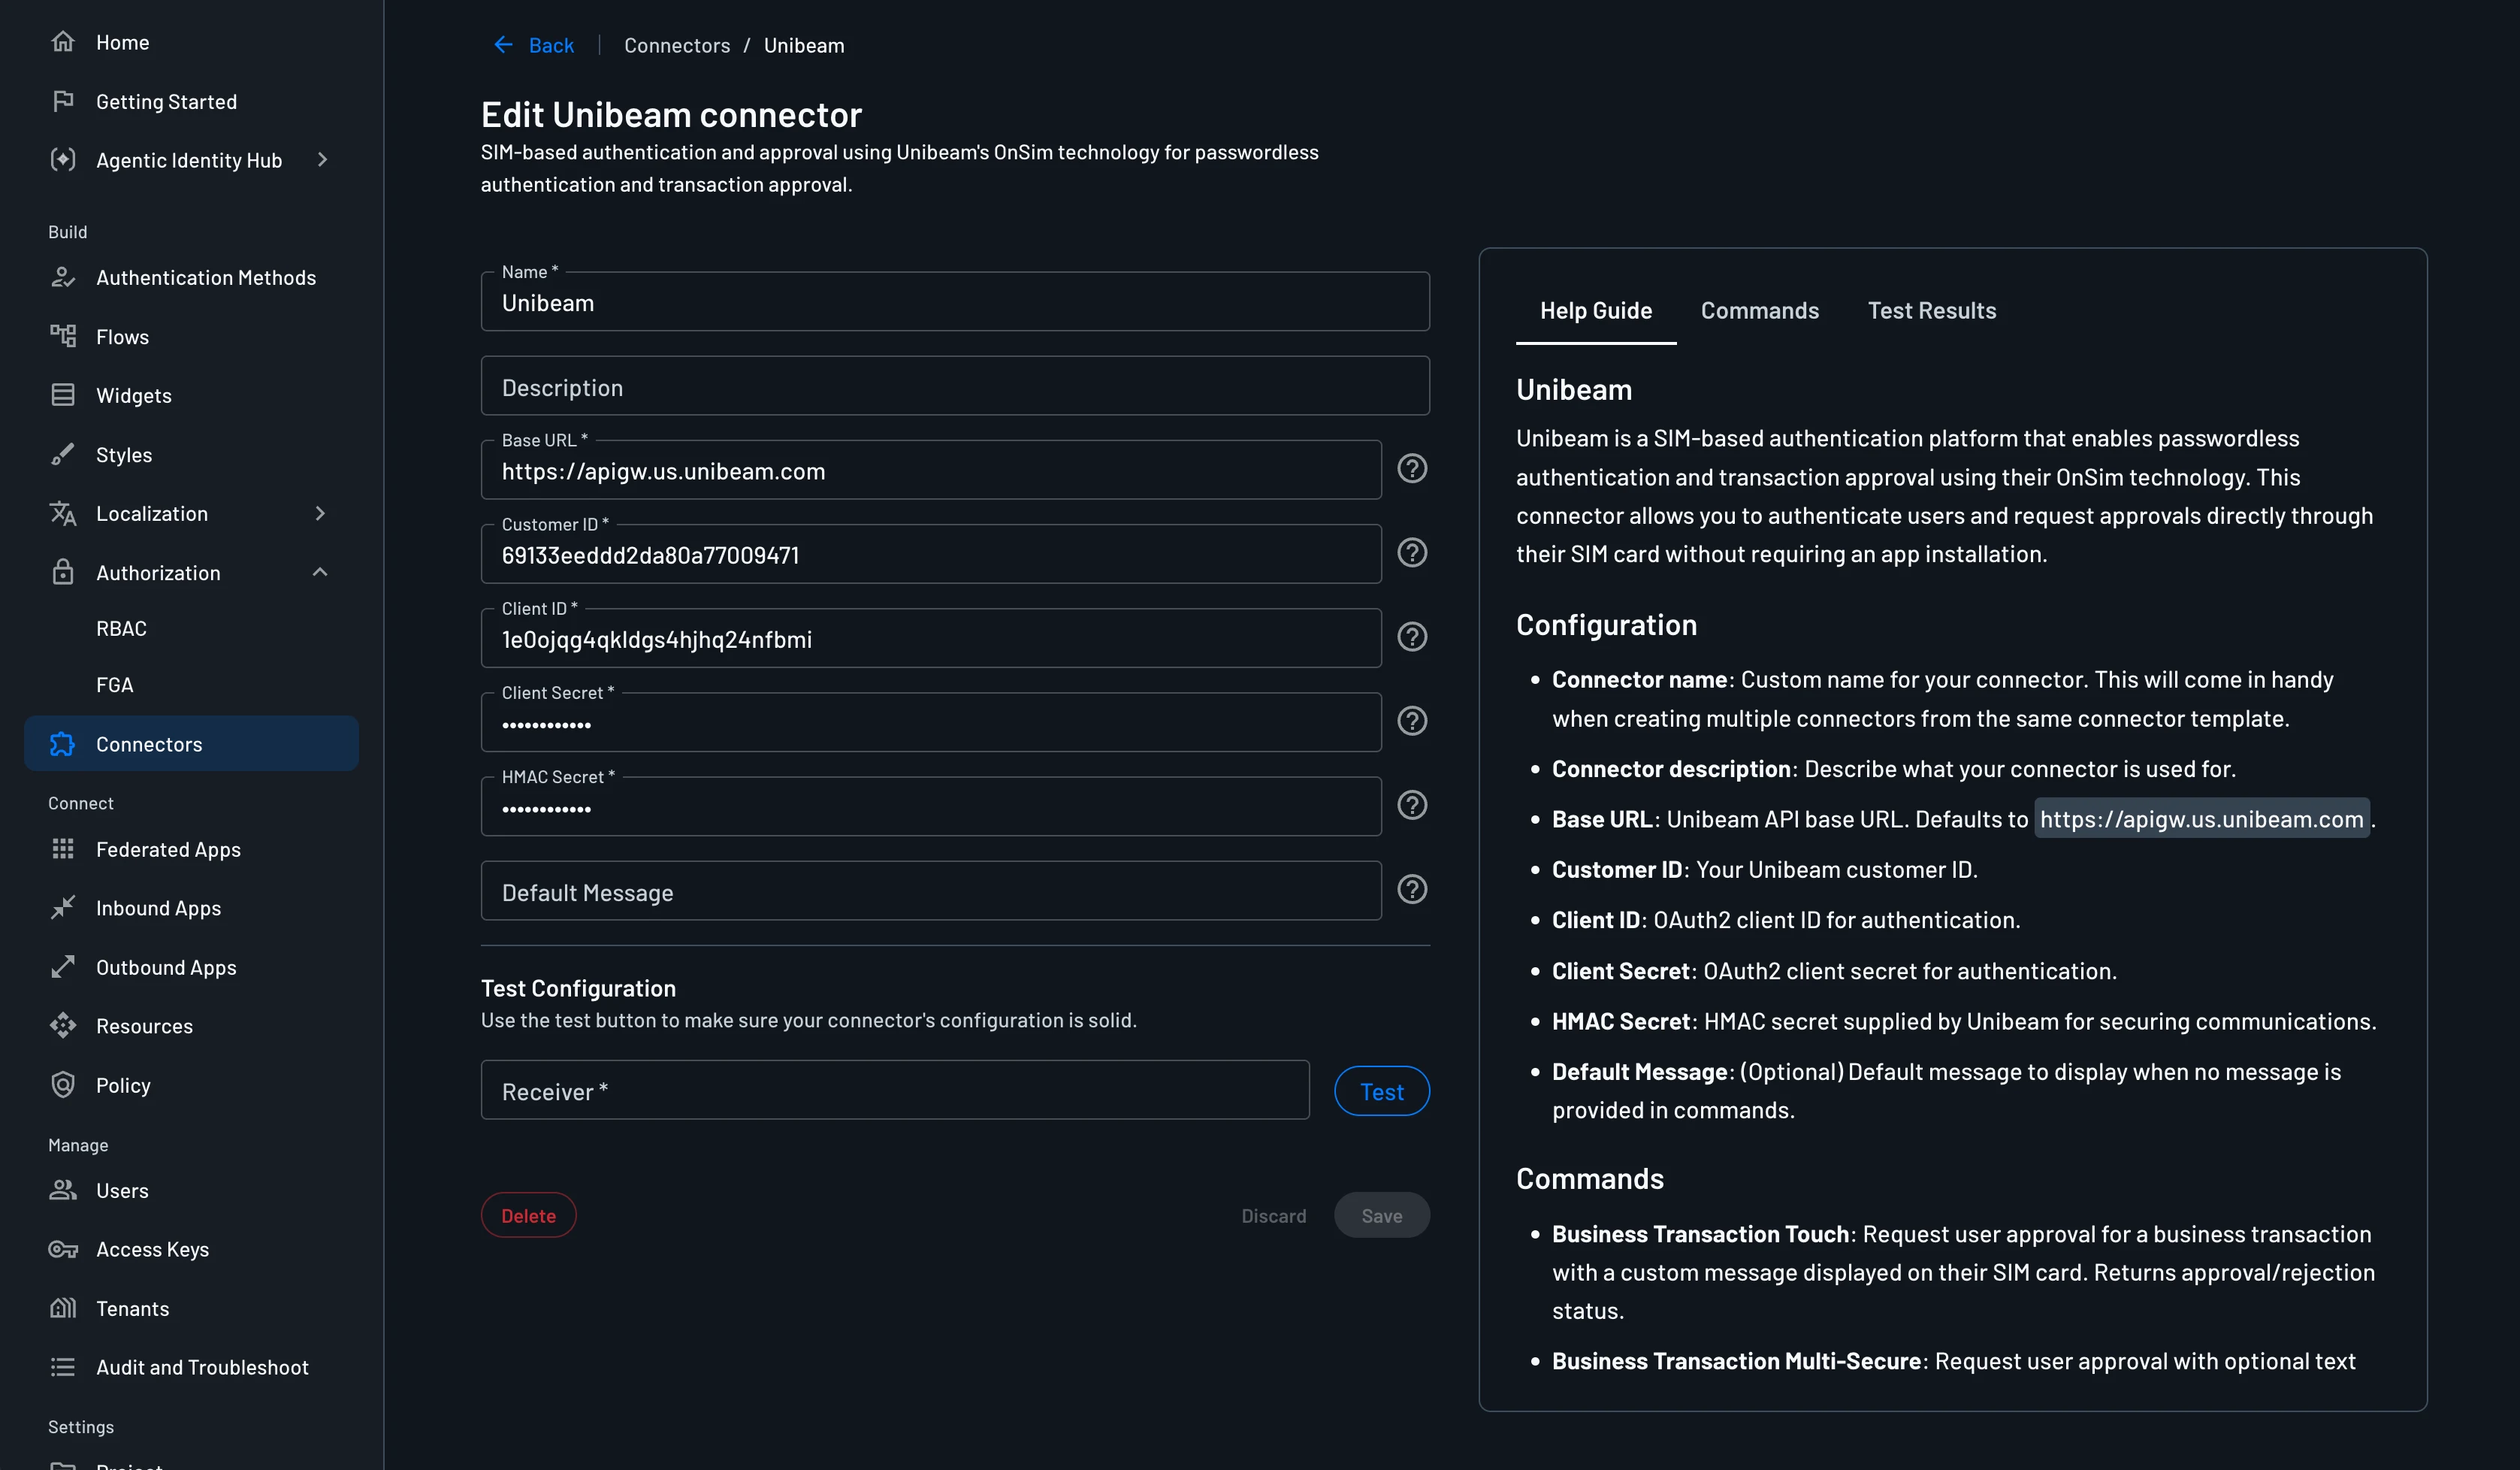
Enter the following information to configure the connector:
- Connector name: Custom name for your connector. This will come in handy when creating multiple connectors from the same connector template.
- Connector description (Optional): Describe what your connector is used for.
- Base URL: Unibeam API base URL. Defaults to
https://apigw.us.unibeam.com. - Customer ID: Your Unibeam customer ID.
- Client ID: OAuth2 client ID for authentication.
- Client Secret: OAuth2 client secret for authentication.
- HMAC Secret: HMAC secret supplied by Unibeam for securing communications.
- (Optional) Default Message: Default message to display when no message is provided in commands.
3. Test & Save
- Enter a Receiver in the Test Configuration section and click
Testto verify your configuration works. - Review the results in the
Test Resultspanel. - Once successful, click
Createto save the connector.
Implementing the Unibeam Connector in Your Flow
1. Select or Create a Flow
- Navigate to the Flows page of the Descope console.
- Select an existing flow or create a new one.
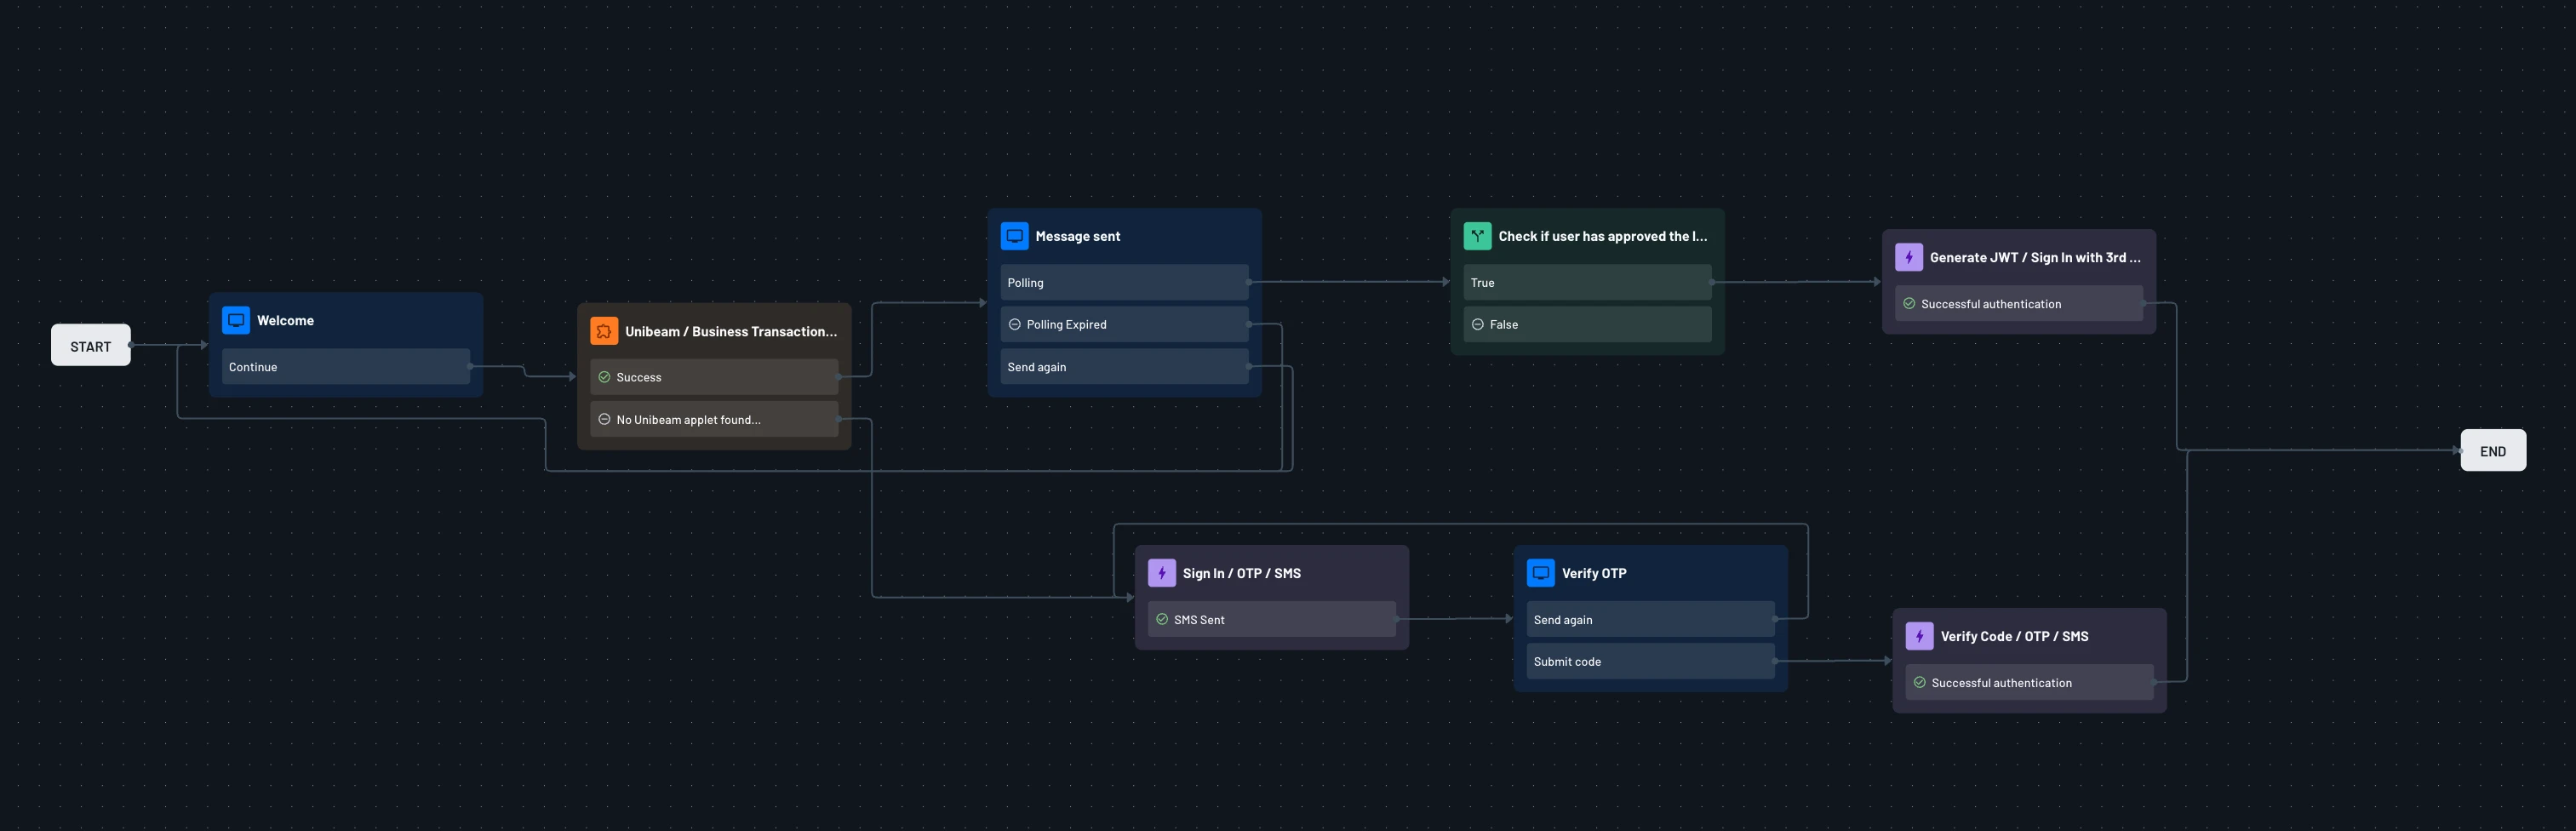
2. Add the Unibeam Connector to the Flow
Note
Because the Unibeam connector waits on user approval at runtime, it should be placed after the screen or action that identifies the user (e.g., after collecting their phone number).
- Click the blue plus icon in the flow builder, select Connector, and choose either Unibeam / Business Transaction Touch or Unibeam / Business Transaction Multi-Secure.
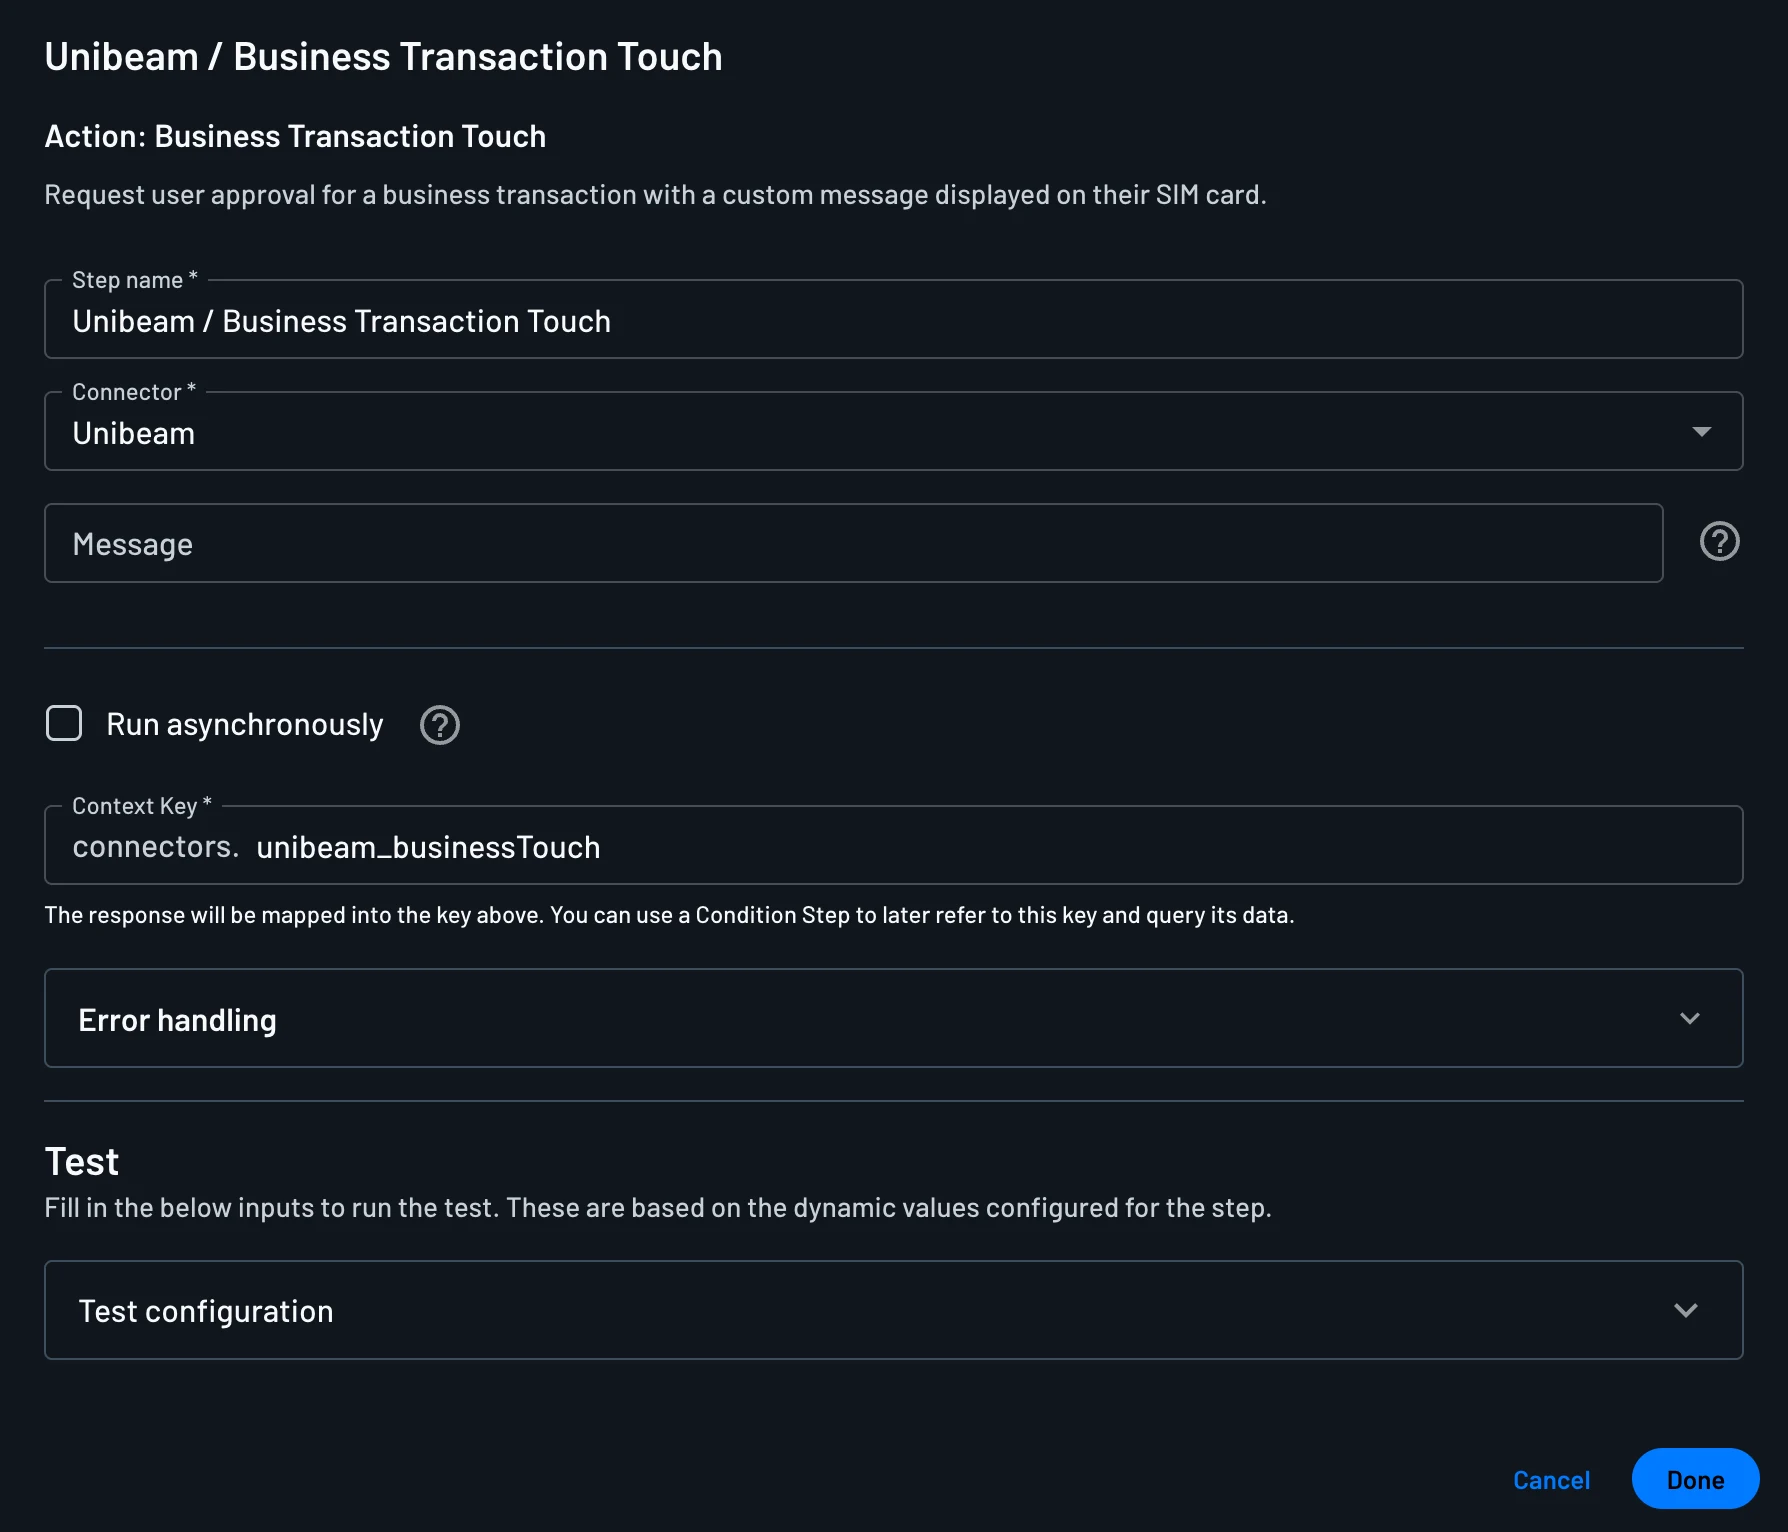
- You can configure the connector action with the message that will be displayed to the user for approval.
3. Handle the Response
The connector's response is mapped into a context key based on which command was used. For Business Transaction Touch, the response is mapped into connectors.unibeam_businessTouch.status, while for Business Transaction Multi-Secure, it is mapped into connectors.unibeam_businessMultiSecure.status.
You can use a Condition step immediately after the connector to refer to the relevant key above and query its data to determine whether the user approved or rejected the request.
For example, if the status indicates the request was approved, you can continue the flow to complete login or authorize the transaction. If it indicates the request was rejected, you can block the action or return the user to a previous screen. If the request times out or errors, you can offer a fallback authentication method or restart the flow instead.