Manage User Preference
Many apps need to capture user consent during sign-up — acknowledging a privacy statement, agreeing to terms of service, or opting in to marketing emails. Descope handles this using flows and custom attributes.
You add it to a flow screen to capture consent at sign-up, and optionally add it to the User Profile Widget so users can change their mind for opting out of marketing emails afterward.
This guide walks through a single example — privacy statement, terms of service, and marketing email consent — but the same pattern applies to any preference you want to track and let users manage.
How to Manage User Preference
Step 1: Create a Custom Attribute for Each Preference
In the Users page of the Descope Console, open the Custom Attributes tab and click + Create Attribute. Create one boolean attribute per preference — for this example:
- Read Privacy Statement
- Terms of Service Consent
- Marketing Consent
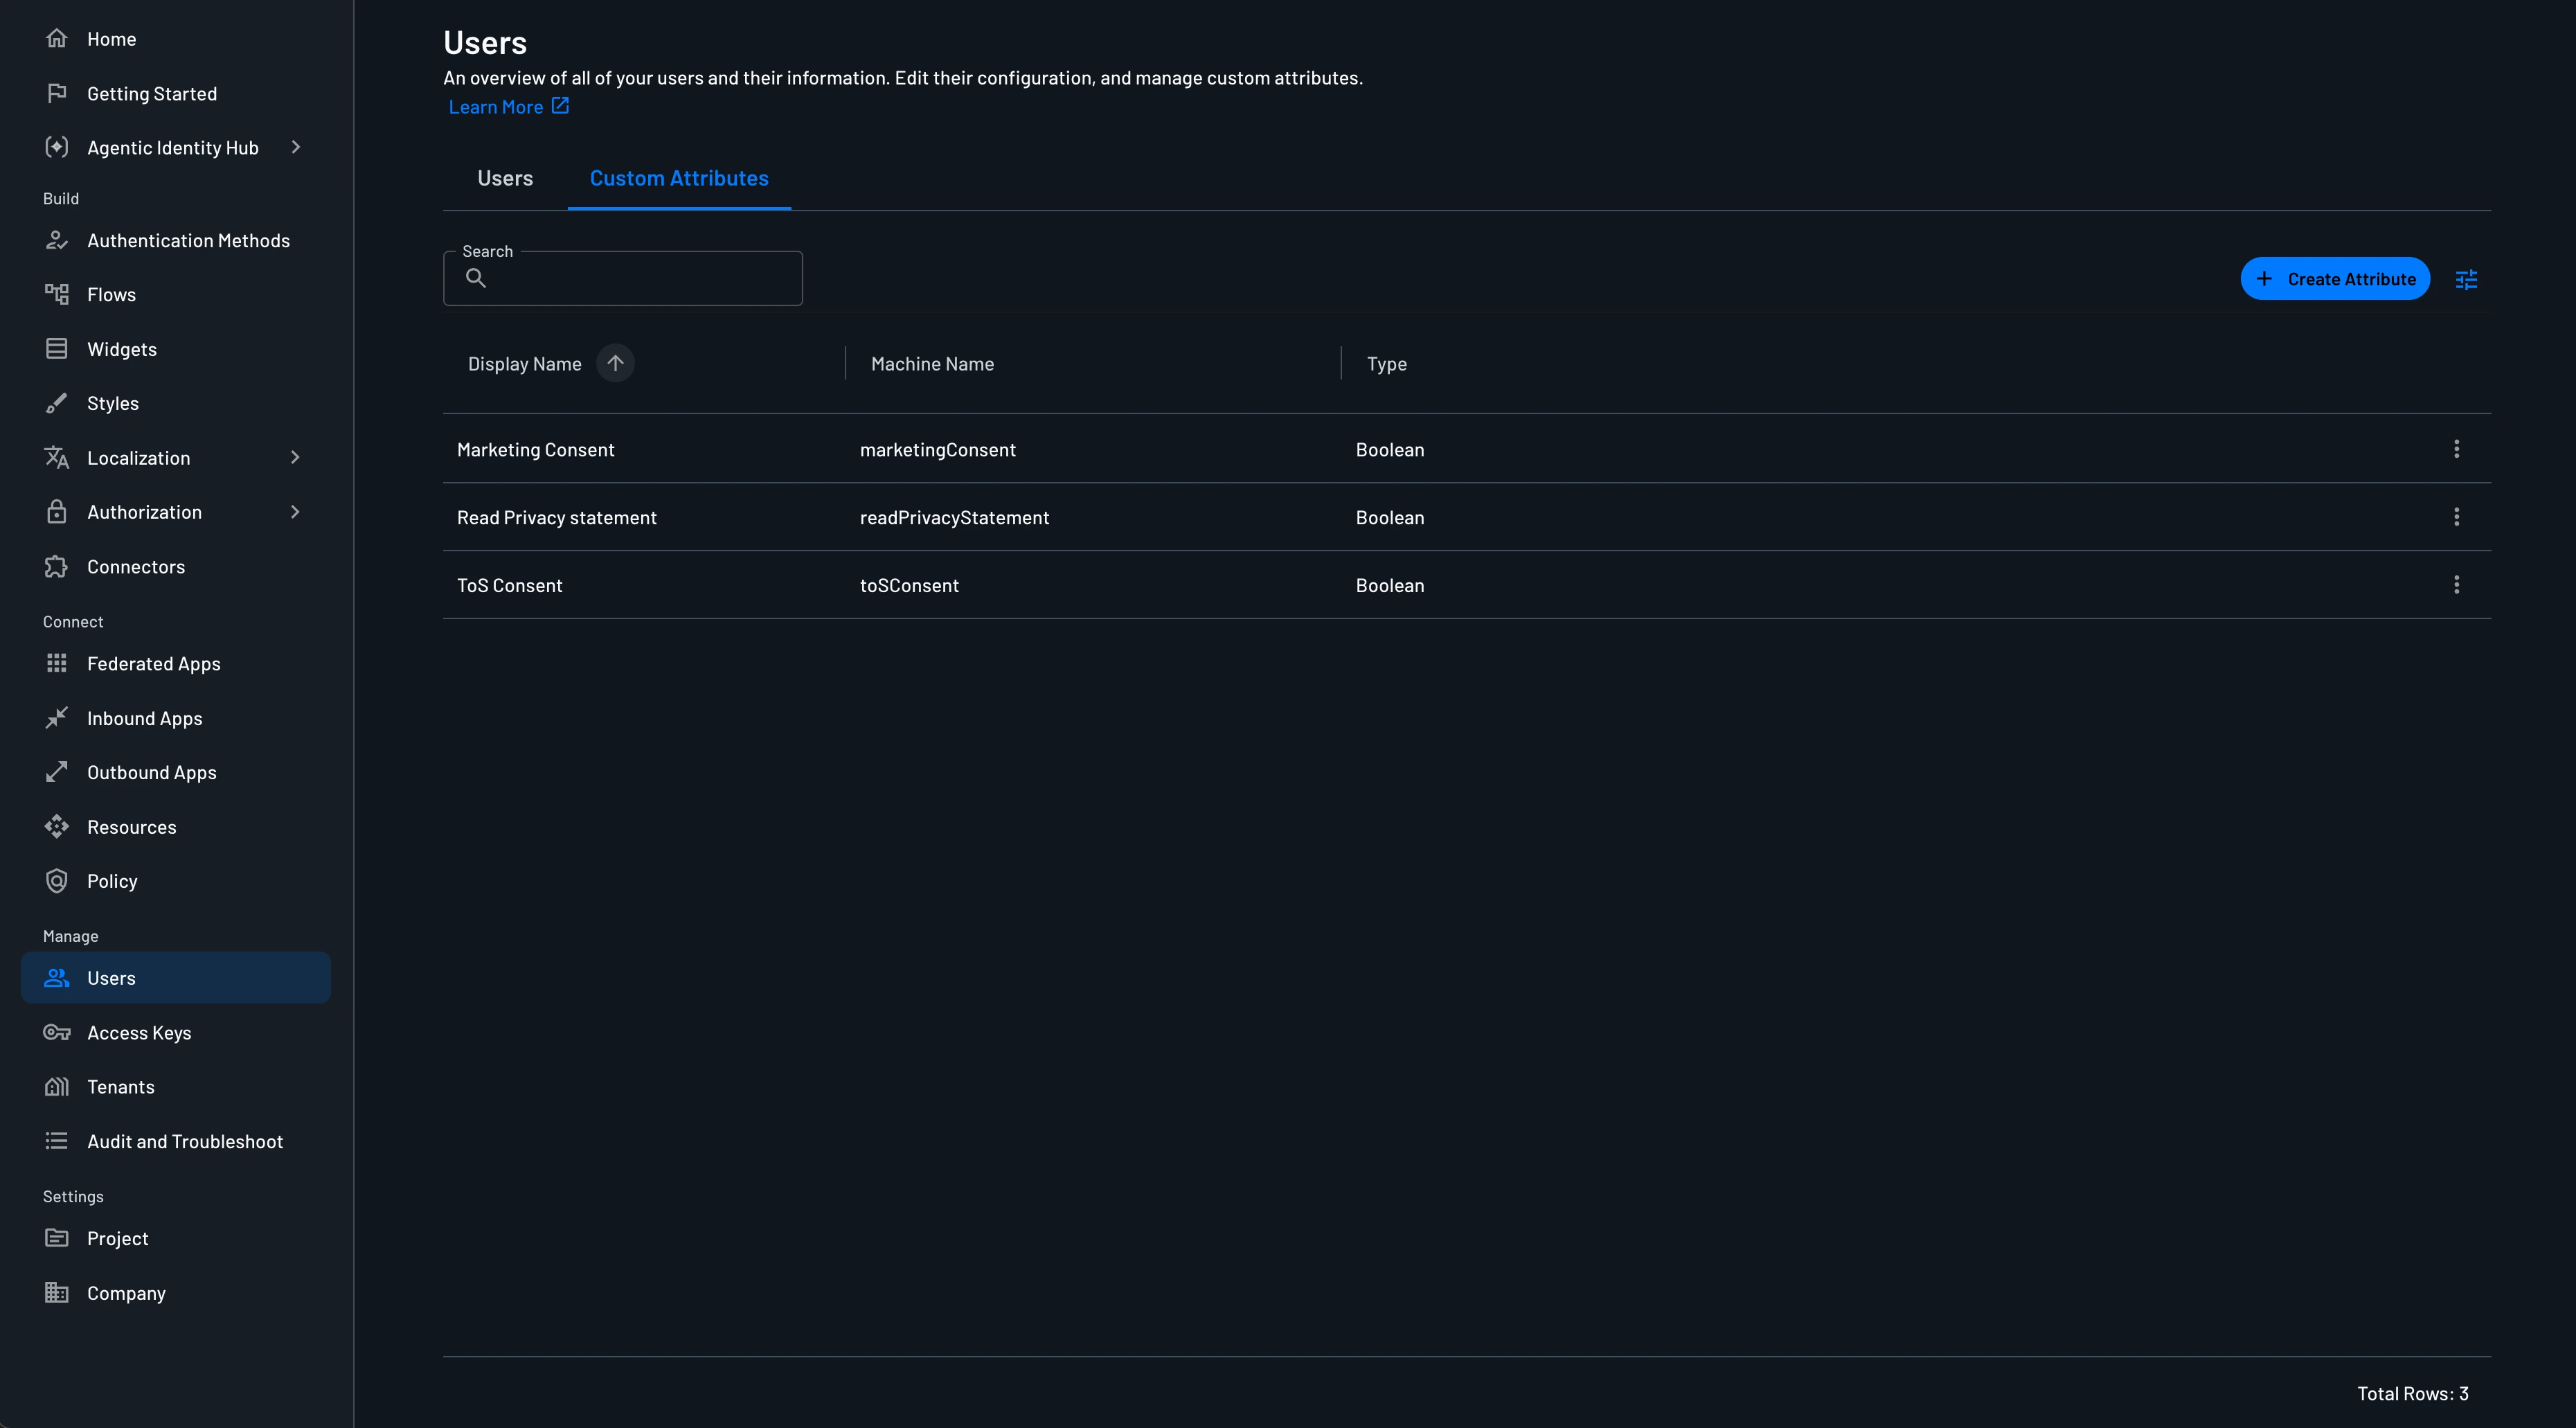
See Custom User Attributes for the full list of supported attribute types.
Step 2: Add these Custom Attributes to Your Flow
Open the Flows page, select the flow, and open the screen where you want to collect consent.
Under the Custom User Attributes dropdown on the left, find each custom attribute you just created, and drag it onto the screen — this adds it as a checkbox bound to that attribute.
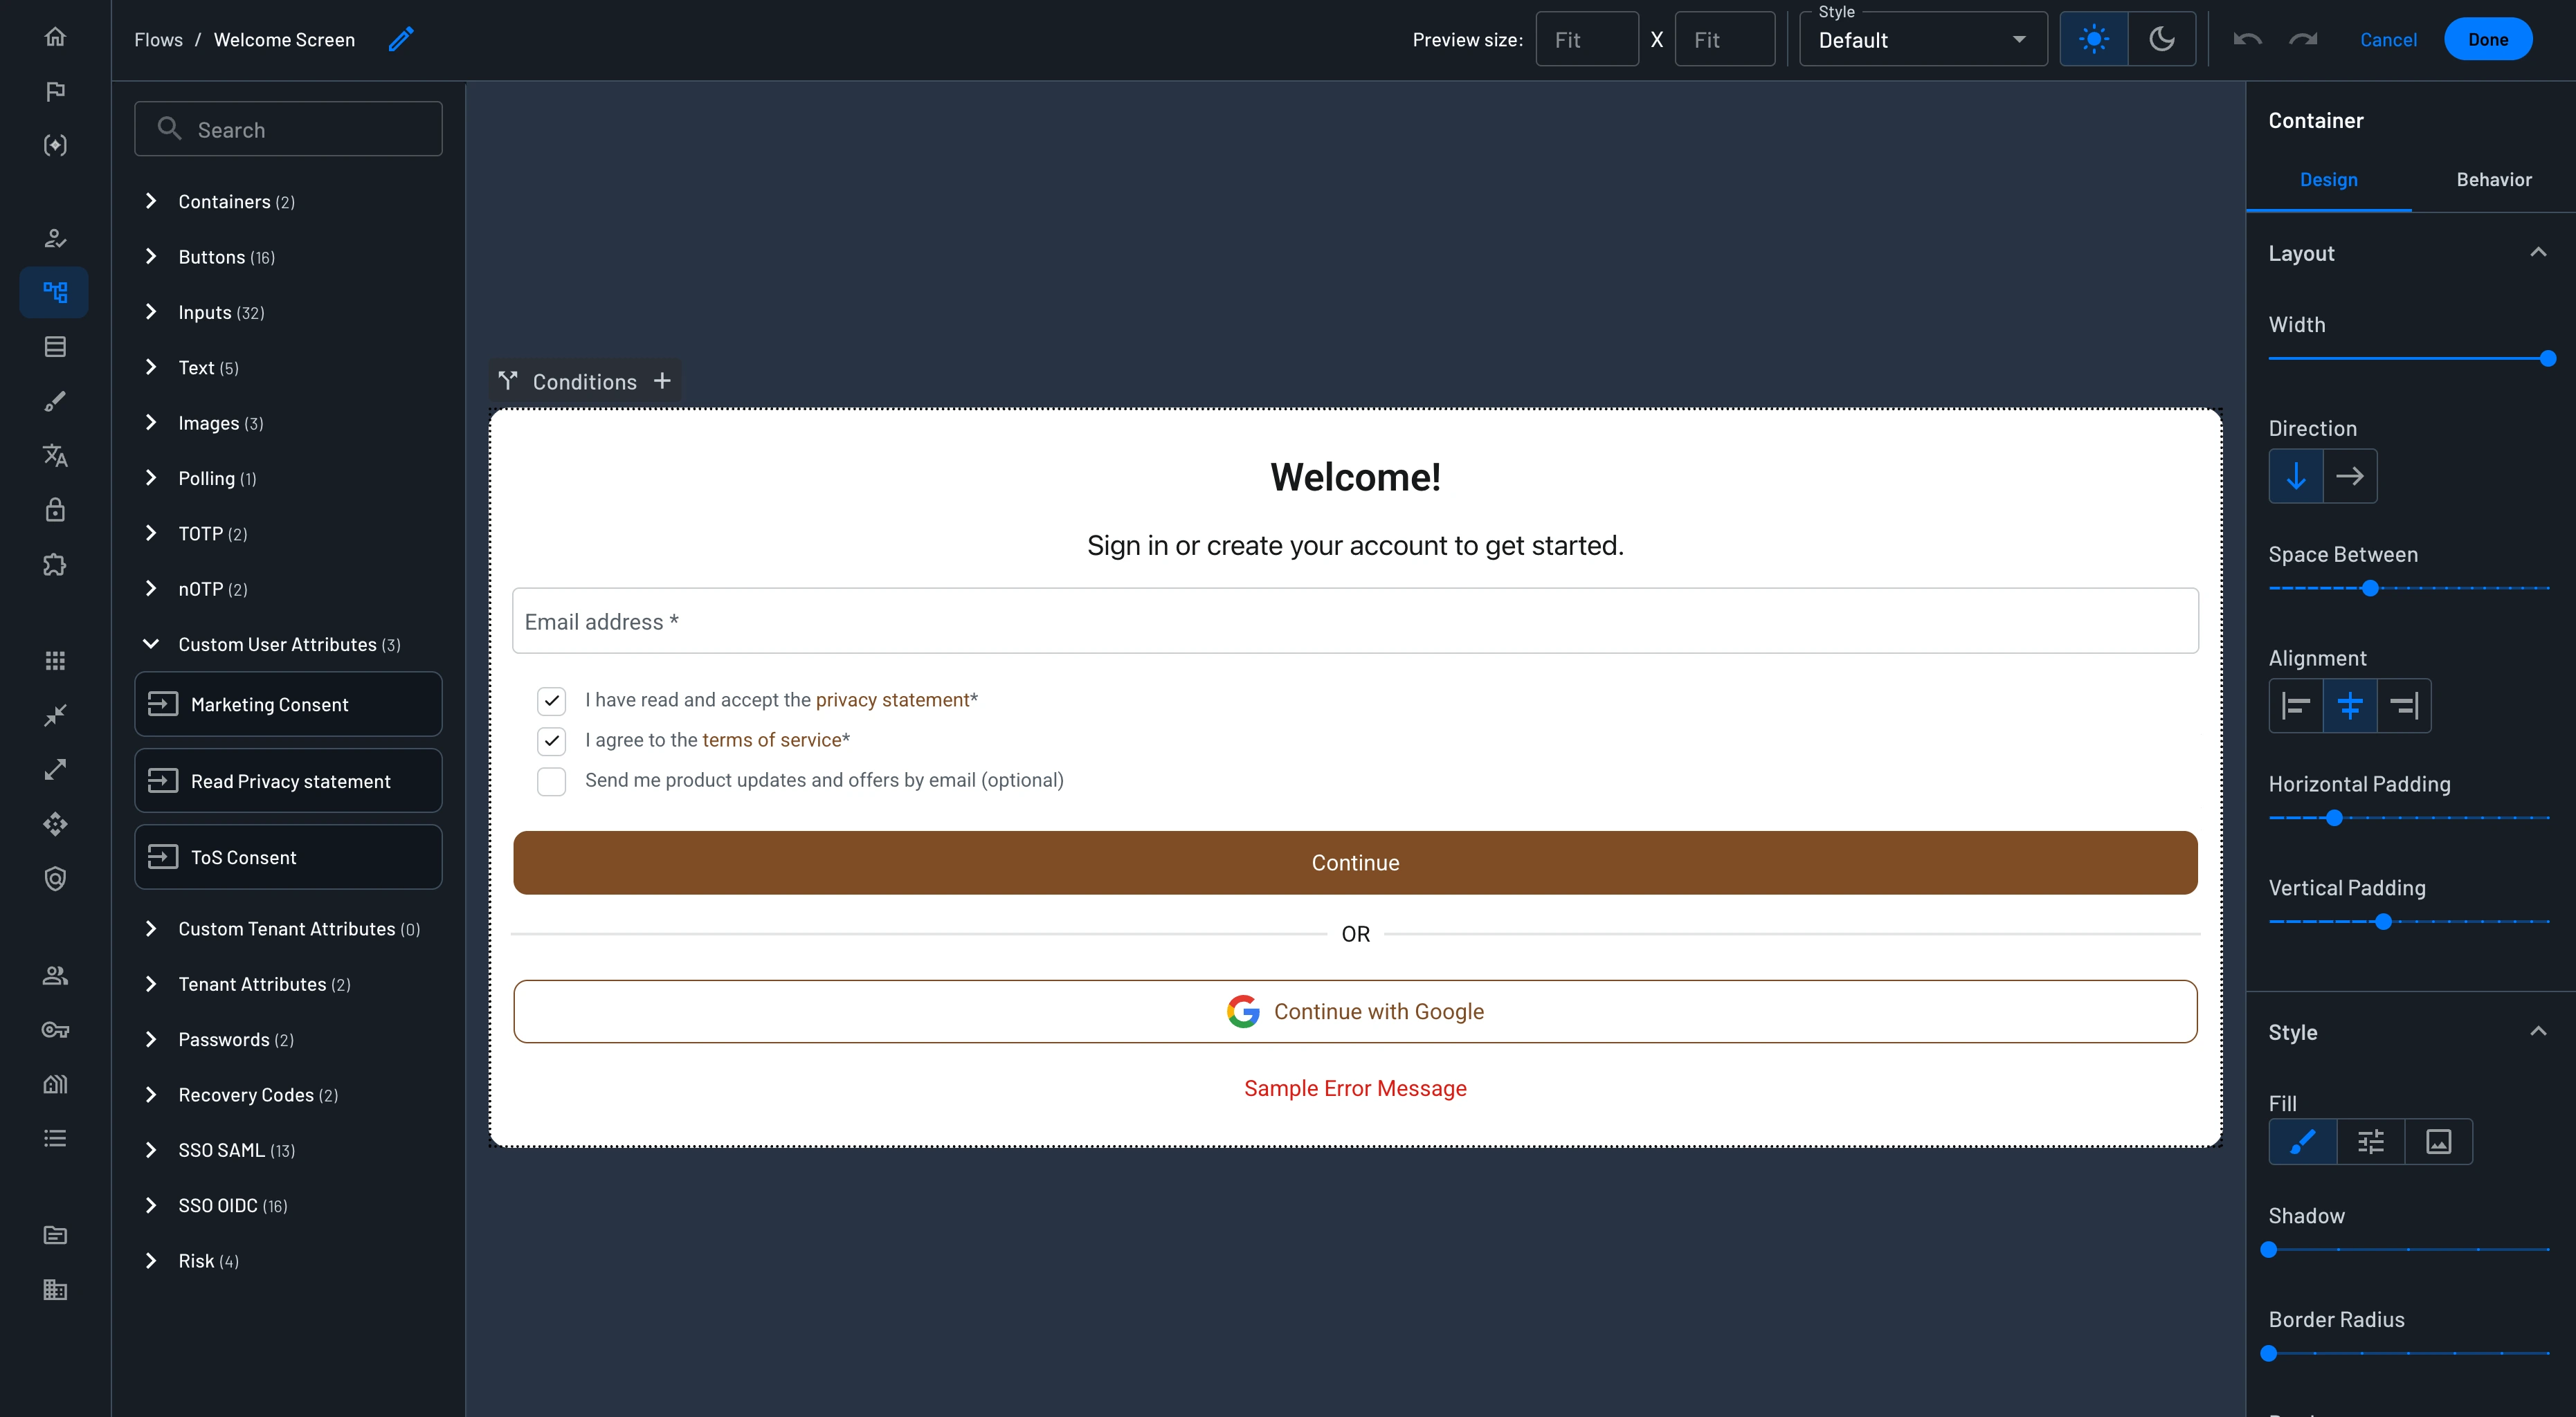
For each attribute, you can configure the following:
- Content: Edit the content and link to the privacy statement or terms of service pages.
- Mandatory: You can mark the attribute as mandatory, which will require the user to check the checkbox before they can continue.
- Selected by Default: You can set the default state of the checkbox to checked or unchecked.
Step 3: Let Users Manage Their Preference Later
Consent for a privacy statement or terms of service is typically a one-time acknowledgment, but preferences like marketing emails should stay editable.
Open the Widgets page, edit your User Profile Widget, and drag the Marketing Consent attribute onto it the same way you did on the flow screen.
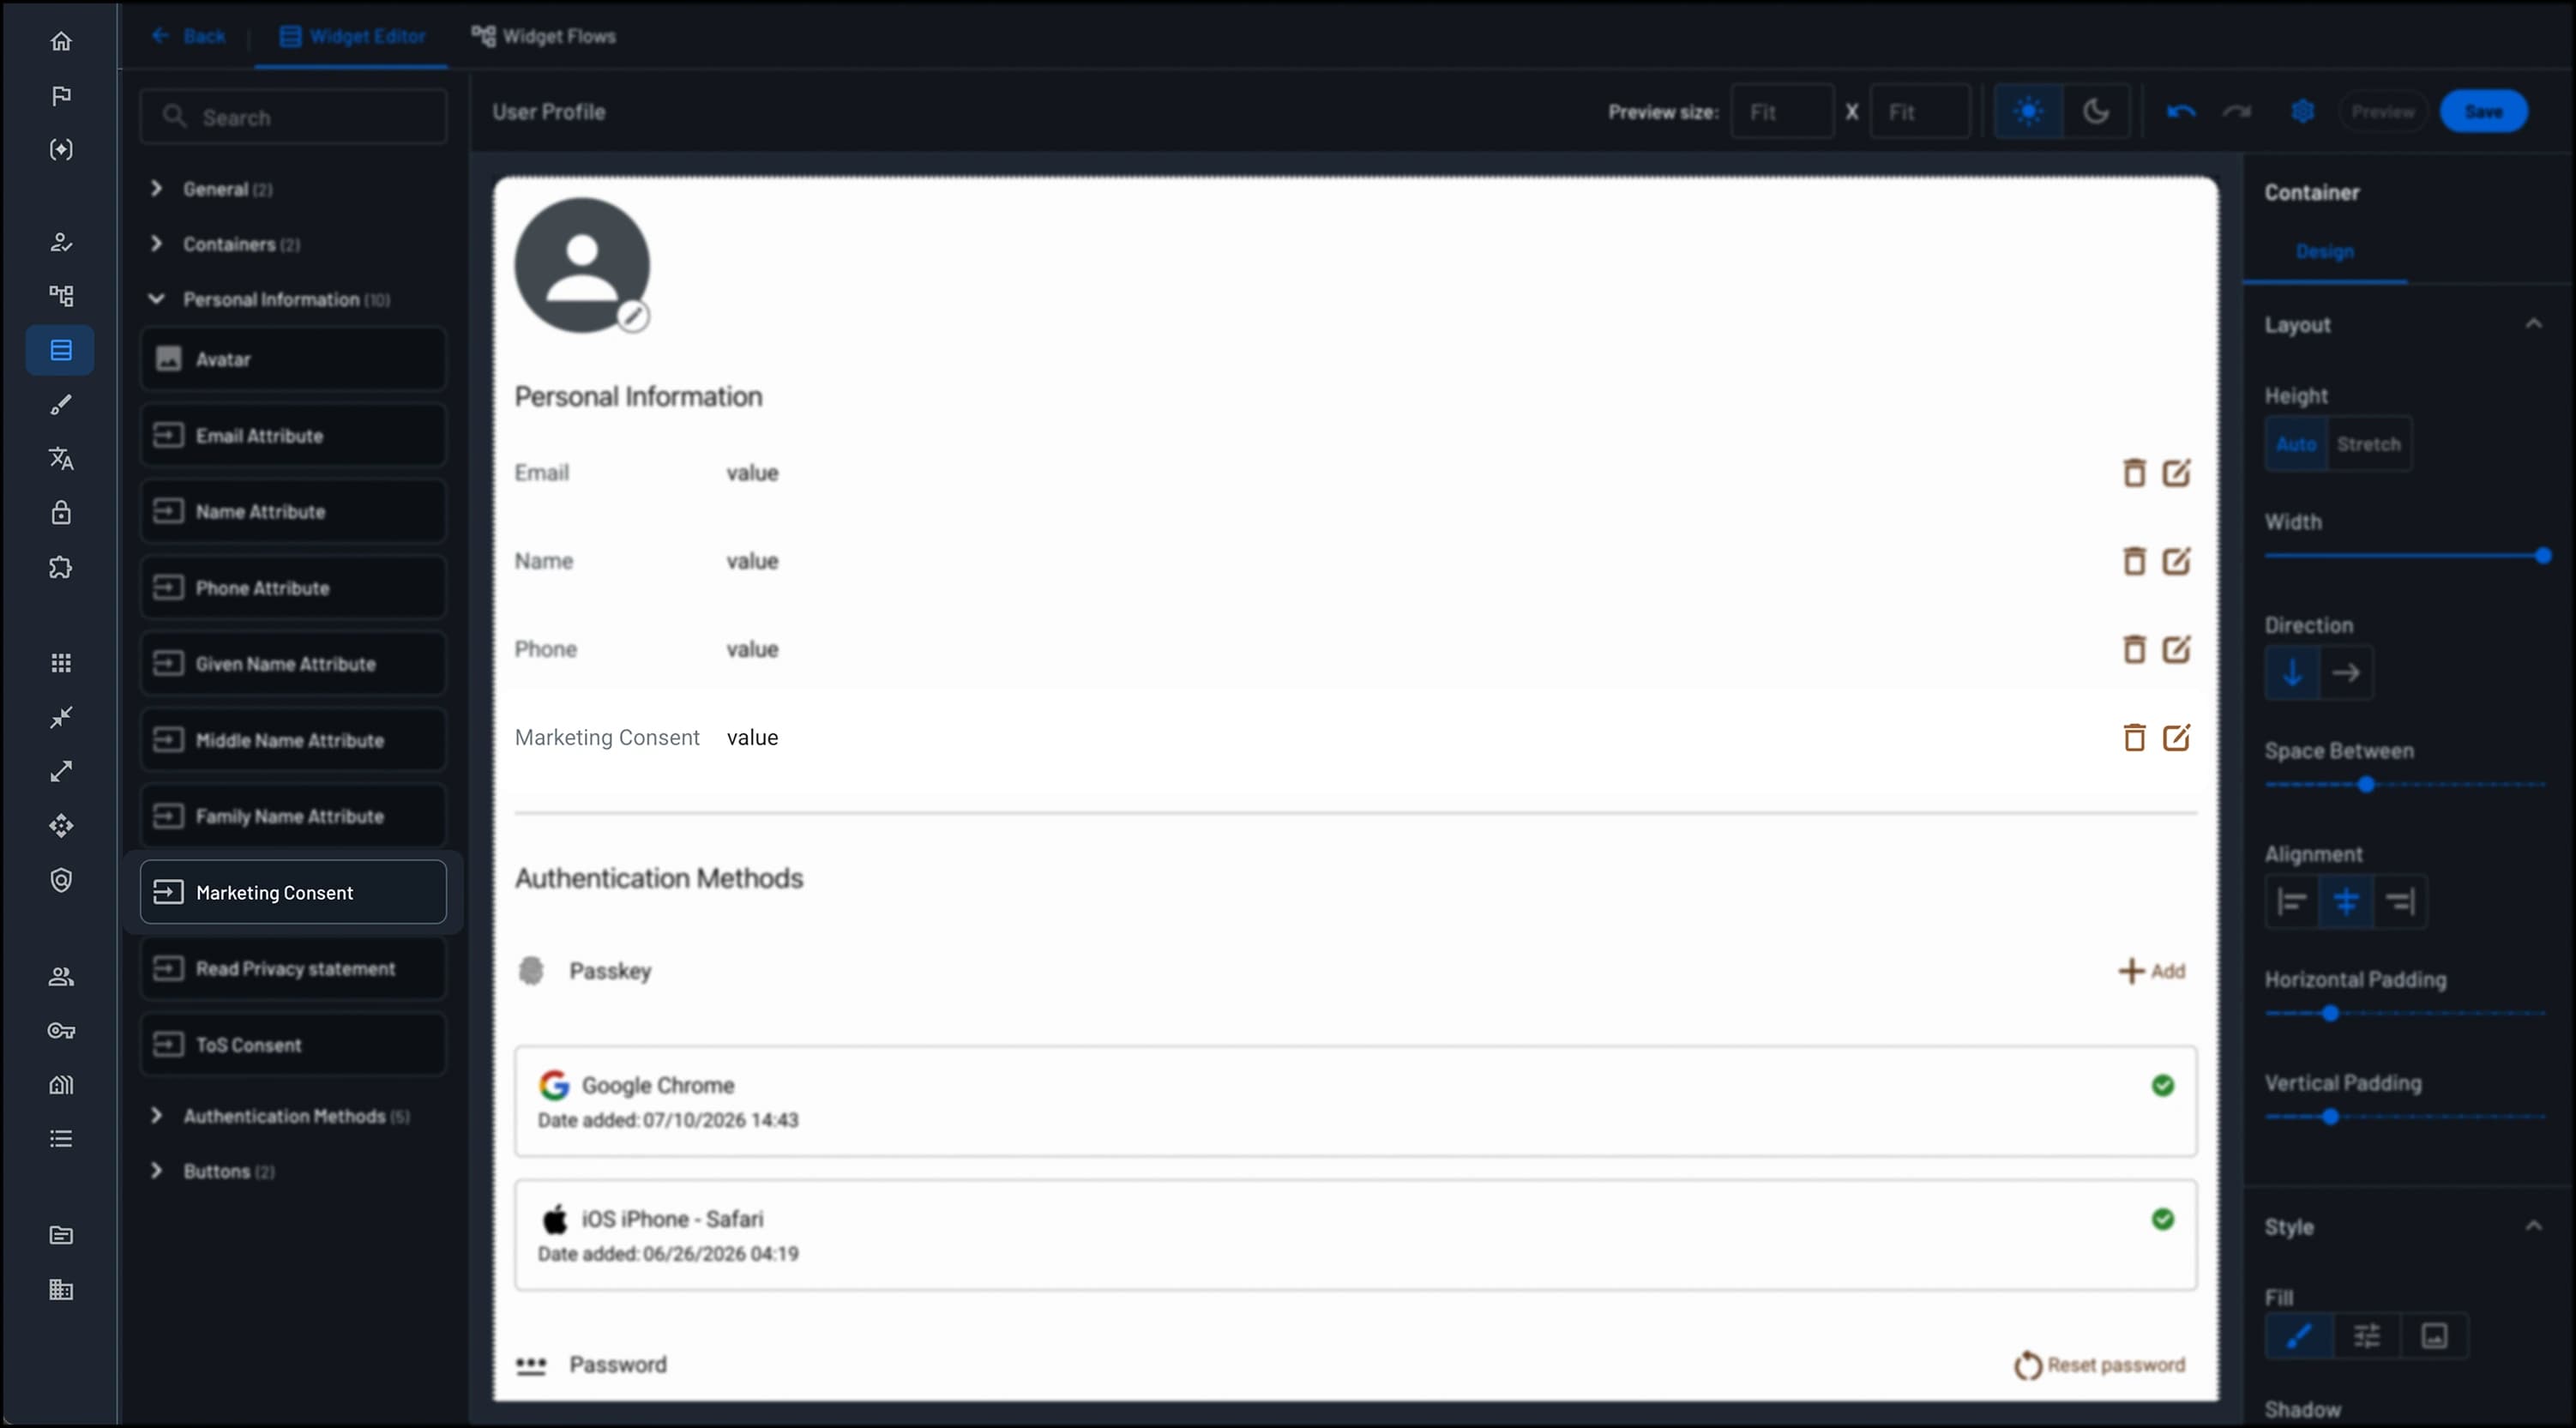
Step 4: Add an Update User / Attributes Action
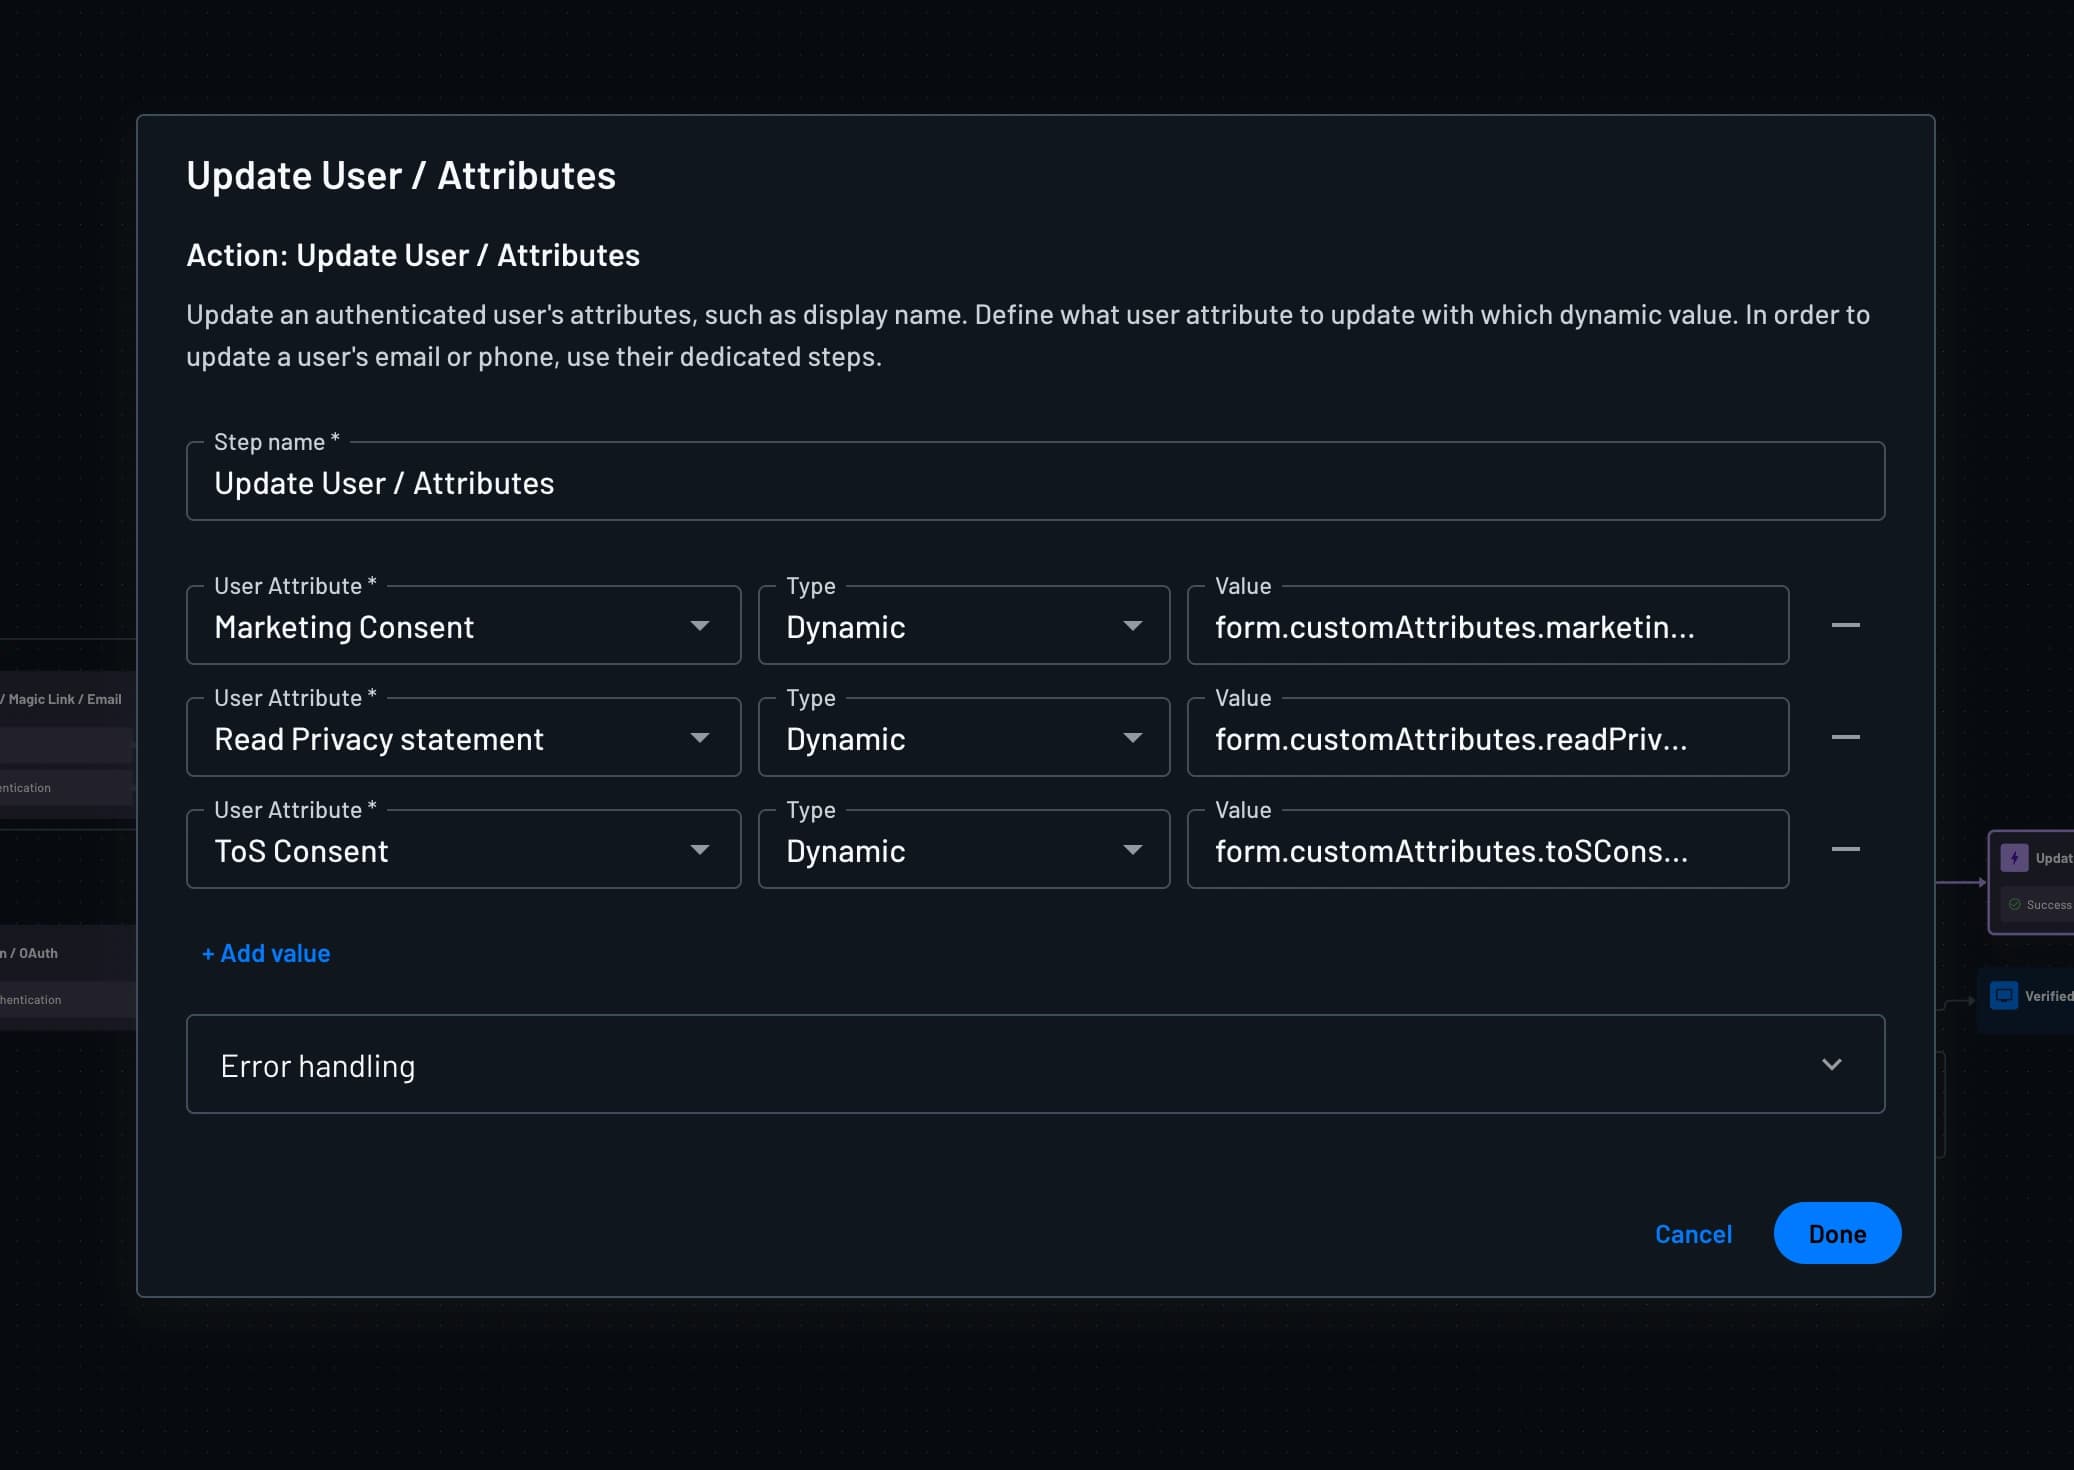
Dragging a custom attribute onto the screen only captures each checkbox's value in the flow's context — it doesn't save it to the user yet. Add an Update User / Attributes action to the flow (via the blue + icon) after the screen with your consent checkboxes, then map each captured value to its corresponding custom user attribute.
Checking for Email Scanners
Condition to check if the email is being scanned and prevent magic link invalidation
Embedded OTP with Generic HTTP Connectors
Learn how to utilize embedded OTP codes for authenticating users when sending customized notifications with your messaging connectors within Descope.