Adobe Campaign Classic Connector
Using Descope's connectors allows you to use Adobe Campaign Classic (ACC) to send email messages with your own ACC account and trigger these actions within the authentication flow.
This connector supports Adobe Campaign Classic v7 and later versions, allowing you to leverage ACC as your mail sending server. This article will guide you through setting up and using the Adobe Campaign Classic connector.
Allowlist Descope's IPs
Requests from this connector come from a fixed set of Descope IP addresses. If your Adobe Campaign Classic instance restricts inbound traffic by IP, allowlist these addresses so Descope's requests are not blocked.
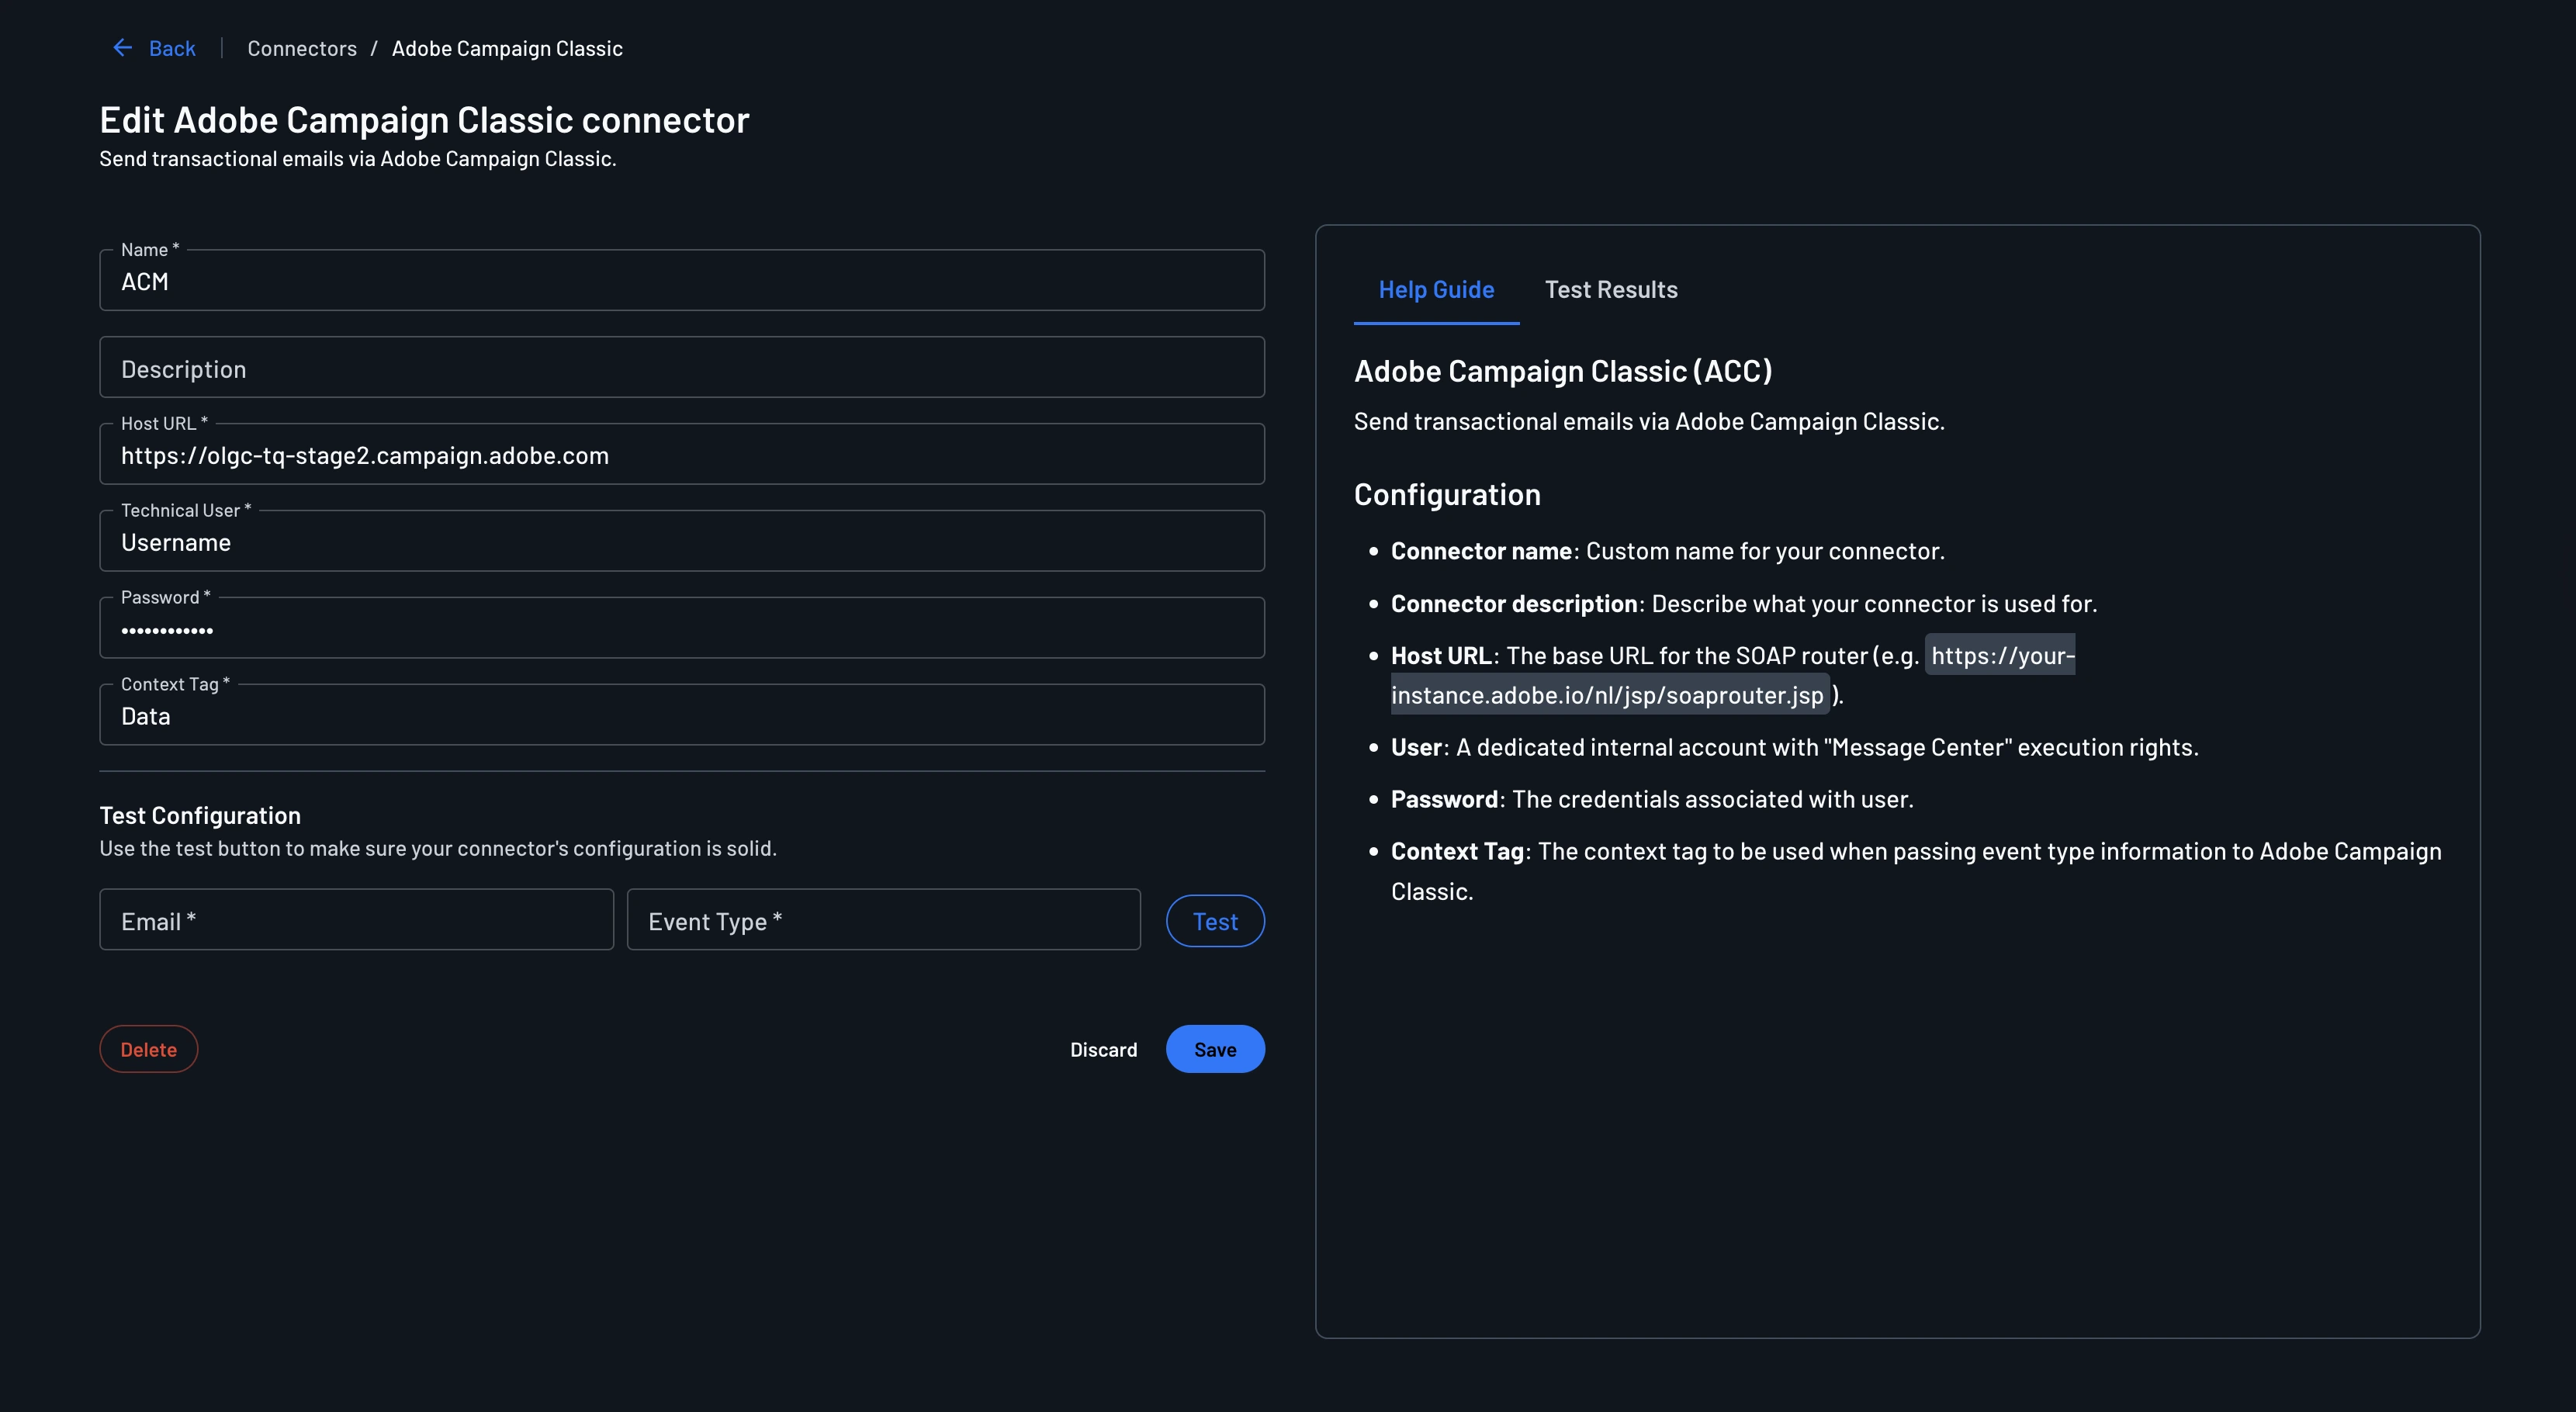
The connector's configuration screen in the Console shows the exact IPs your requests originate from, for example:
Requests from this connector will come from the following IPs: 52.210.65.163, 52.209.75.229
See Public Static IPs for the full, region-specific list.
Configure Adobe Campaign Classic connector
Descope uses your Adobe Campaign Classic API credentials and sender details for integration.
To configure an Adobe Campaign Classic connector, go to the Connectors page within the Descope Console, search for Adobe Campaign Classic, and select the connector tile.
Configure the connector with the following parameters:
- Connector name: Custom name for your connector. This will come in handy when creating multiple connectors from the same connector template.
- Connector Description: (Optional) Describe what your connector is used for.
- Host URL: The Adobe Campaign Classic host URL for your instance.
- Technical User: Your Adobe Campaign Classic username for authentication.
- Password: Your Adobe Campaign Classic password for authentication.
- Context Tag: The context tag to be used when passing event type information to your Adobe Campaign Classic.
Testing
You can test if your connector's configuration is working properly simply by hitting the Test button and viewing the Test Results panel.
Save your configuration by hitting Create.
Add your Adobe Campaign Classic connector to a flow
Configure Adobe Campaign Classic as the Default Email Connector
To use Adobe Campaign Classic for sending emails, go to Authentication Methods and select the method you want to configure. Under the Email section, select the Adobe Campaign Classic connector.
You can also set a default email template for your messages — see our guide for Using Email and SMS Templates for details.
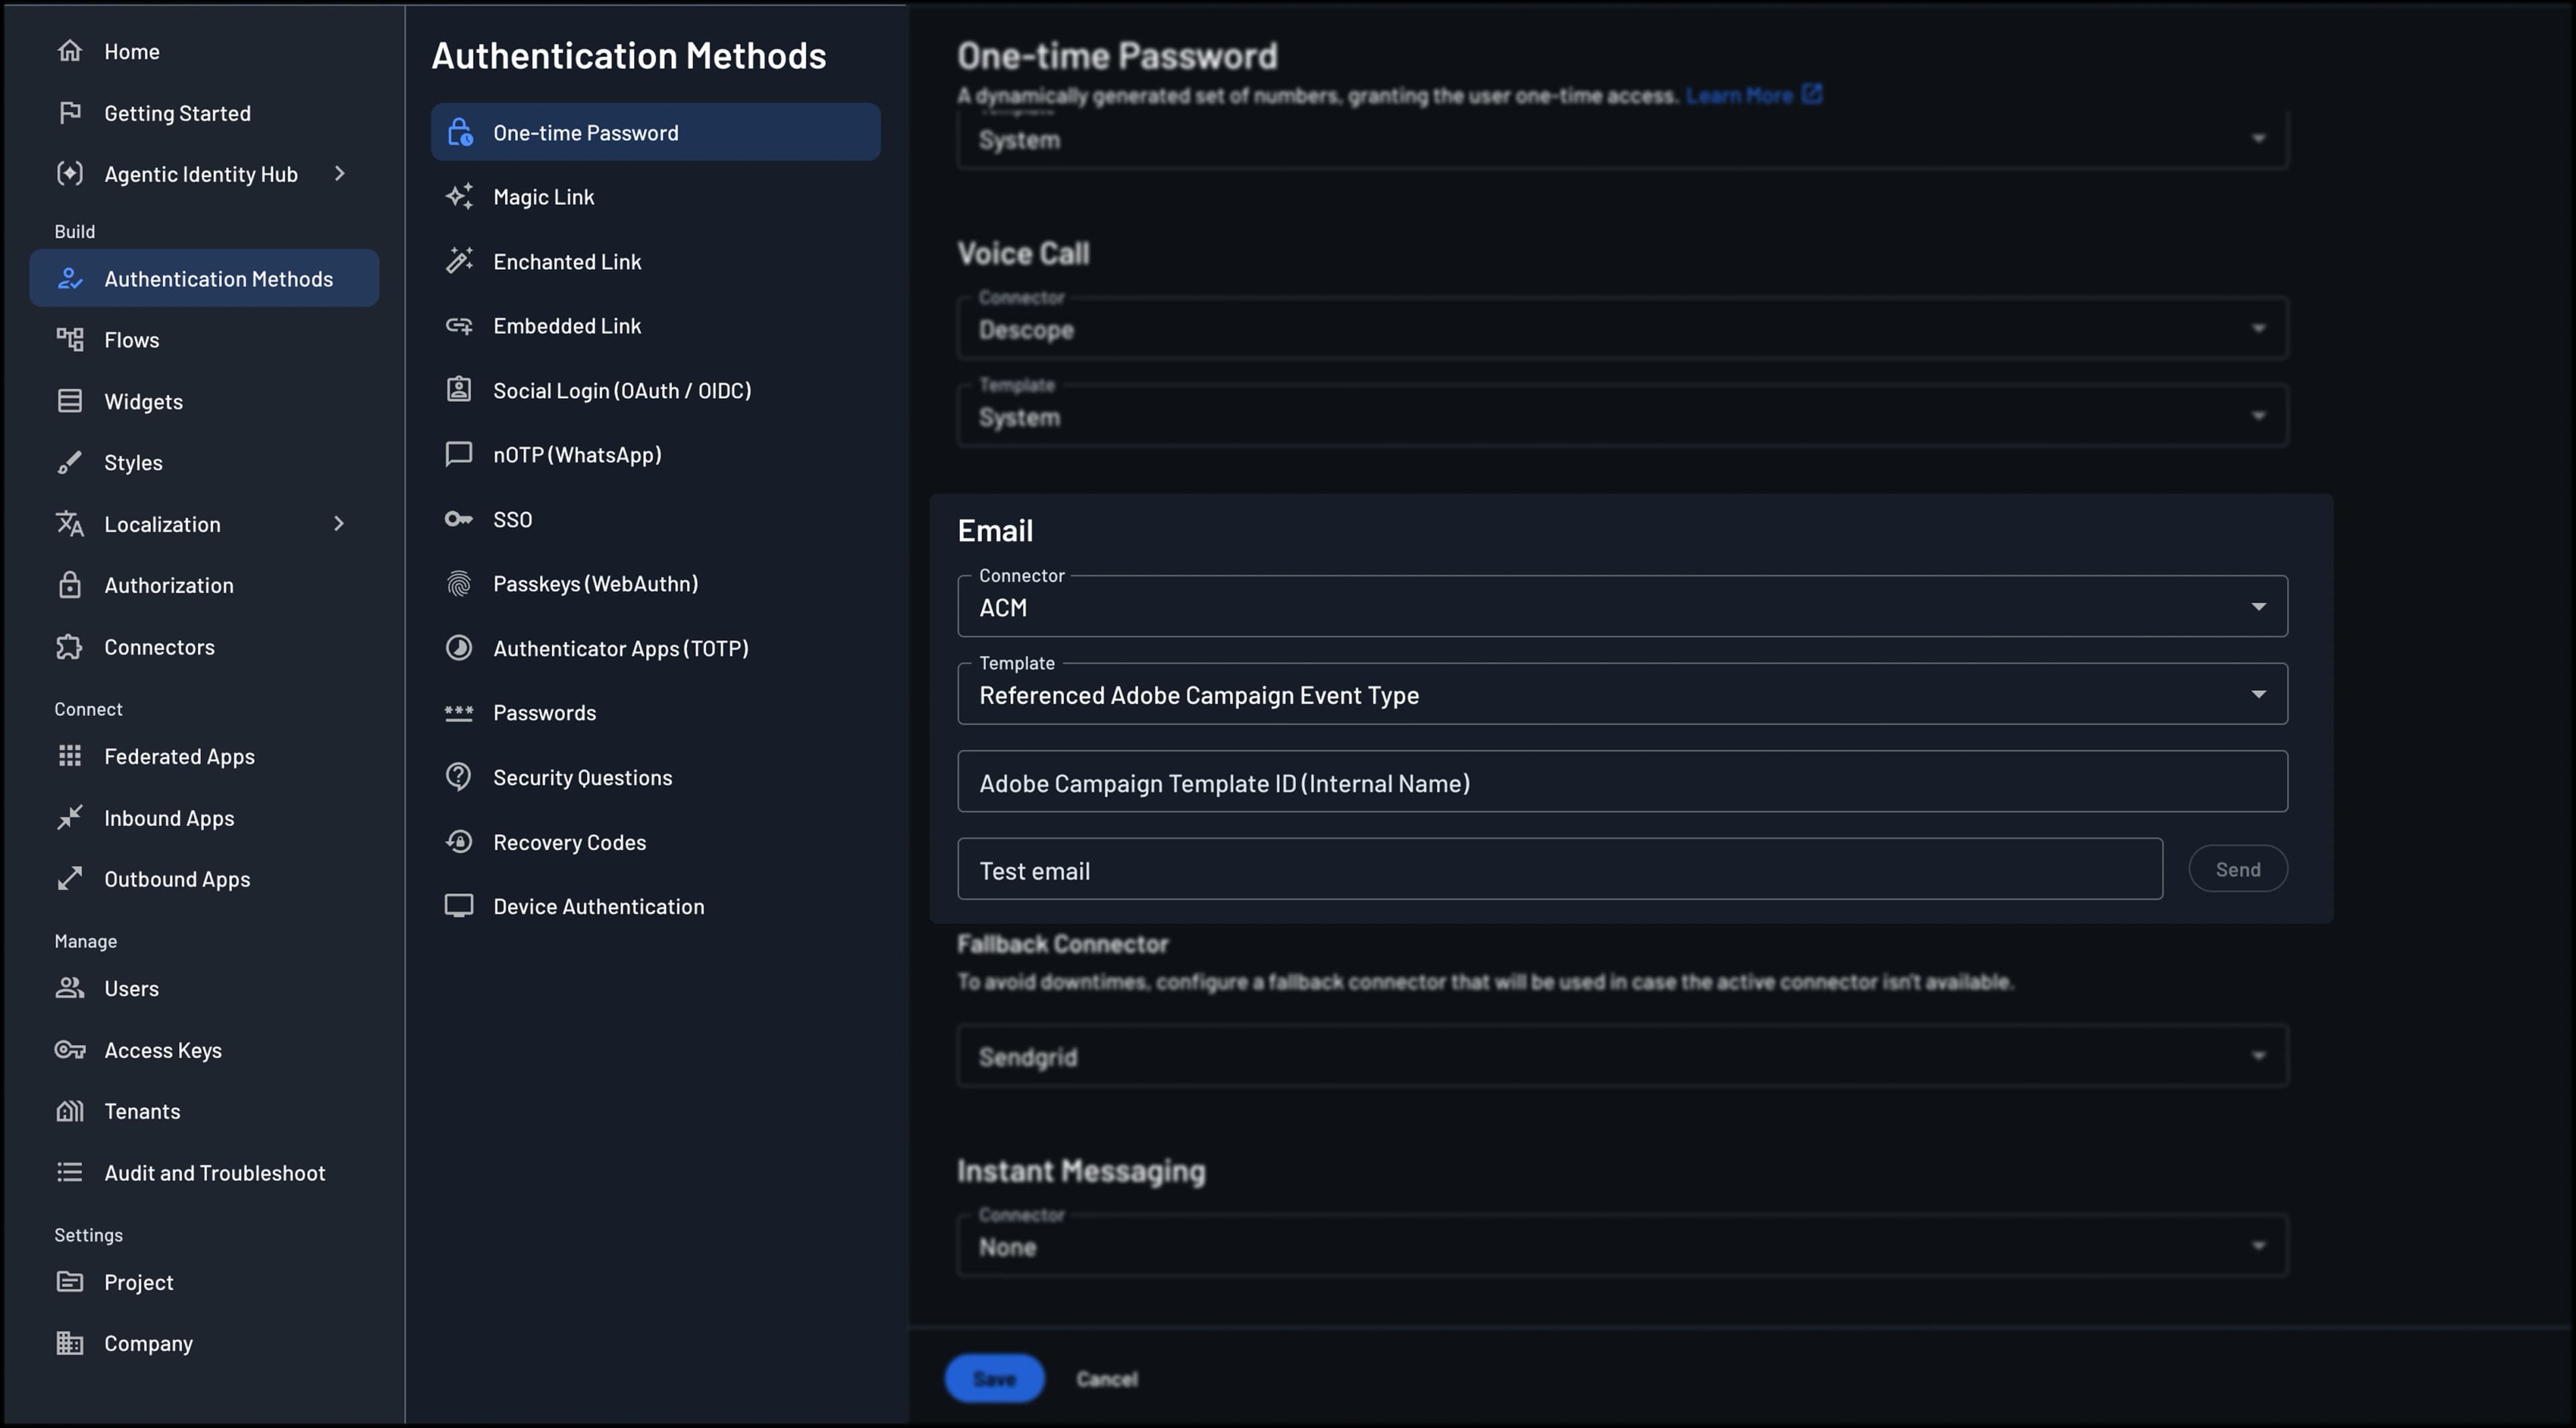
Once saved, all email messages triggered by Descope flows or API/SDK calls will be routed through Adobe Campaign Classic automatically.
Using Adobe Campaign Classic Explicitly in Flows
To use Adobe Campaign Classic for a specific flow, go to Flows and open the flow you want to update.
Select and edit the action that initiates the email process — such as Sign Up or In / OTP / Email or Sign Up or In / Magic Link / Email. If you haven't added it yet, click the + icon in the top left, search for the email action, and add it before editing.
Select the dropdown for the connector and choose your Adobe Campaign Classic connector. After selecting the Adobe Campaign Classic connector, click Done, and save your flow. You can also select a customized template; for more details, see our guide for Using Email and SMS Templates.
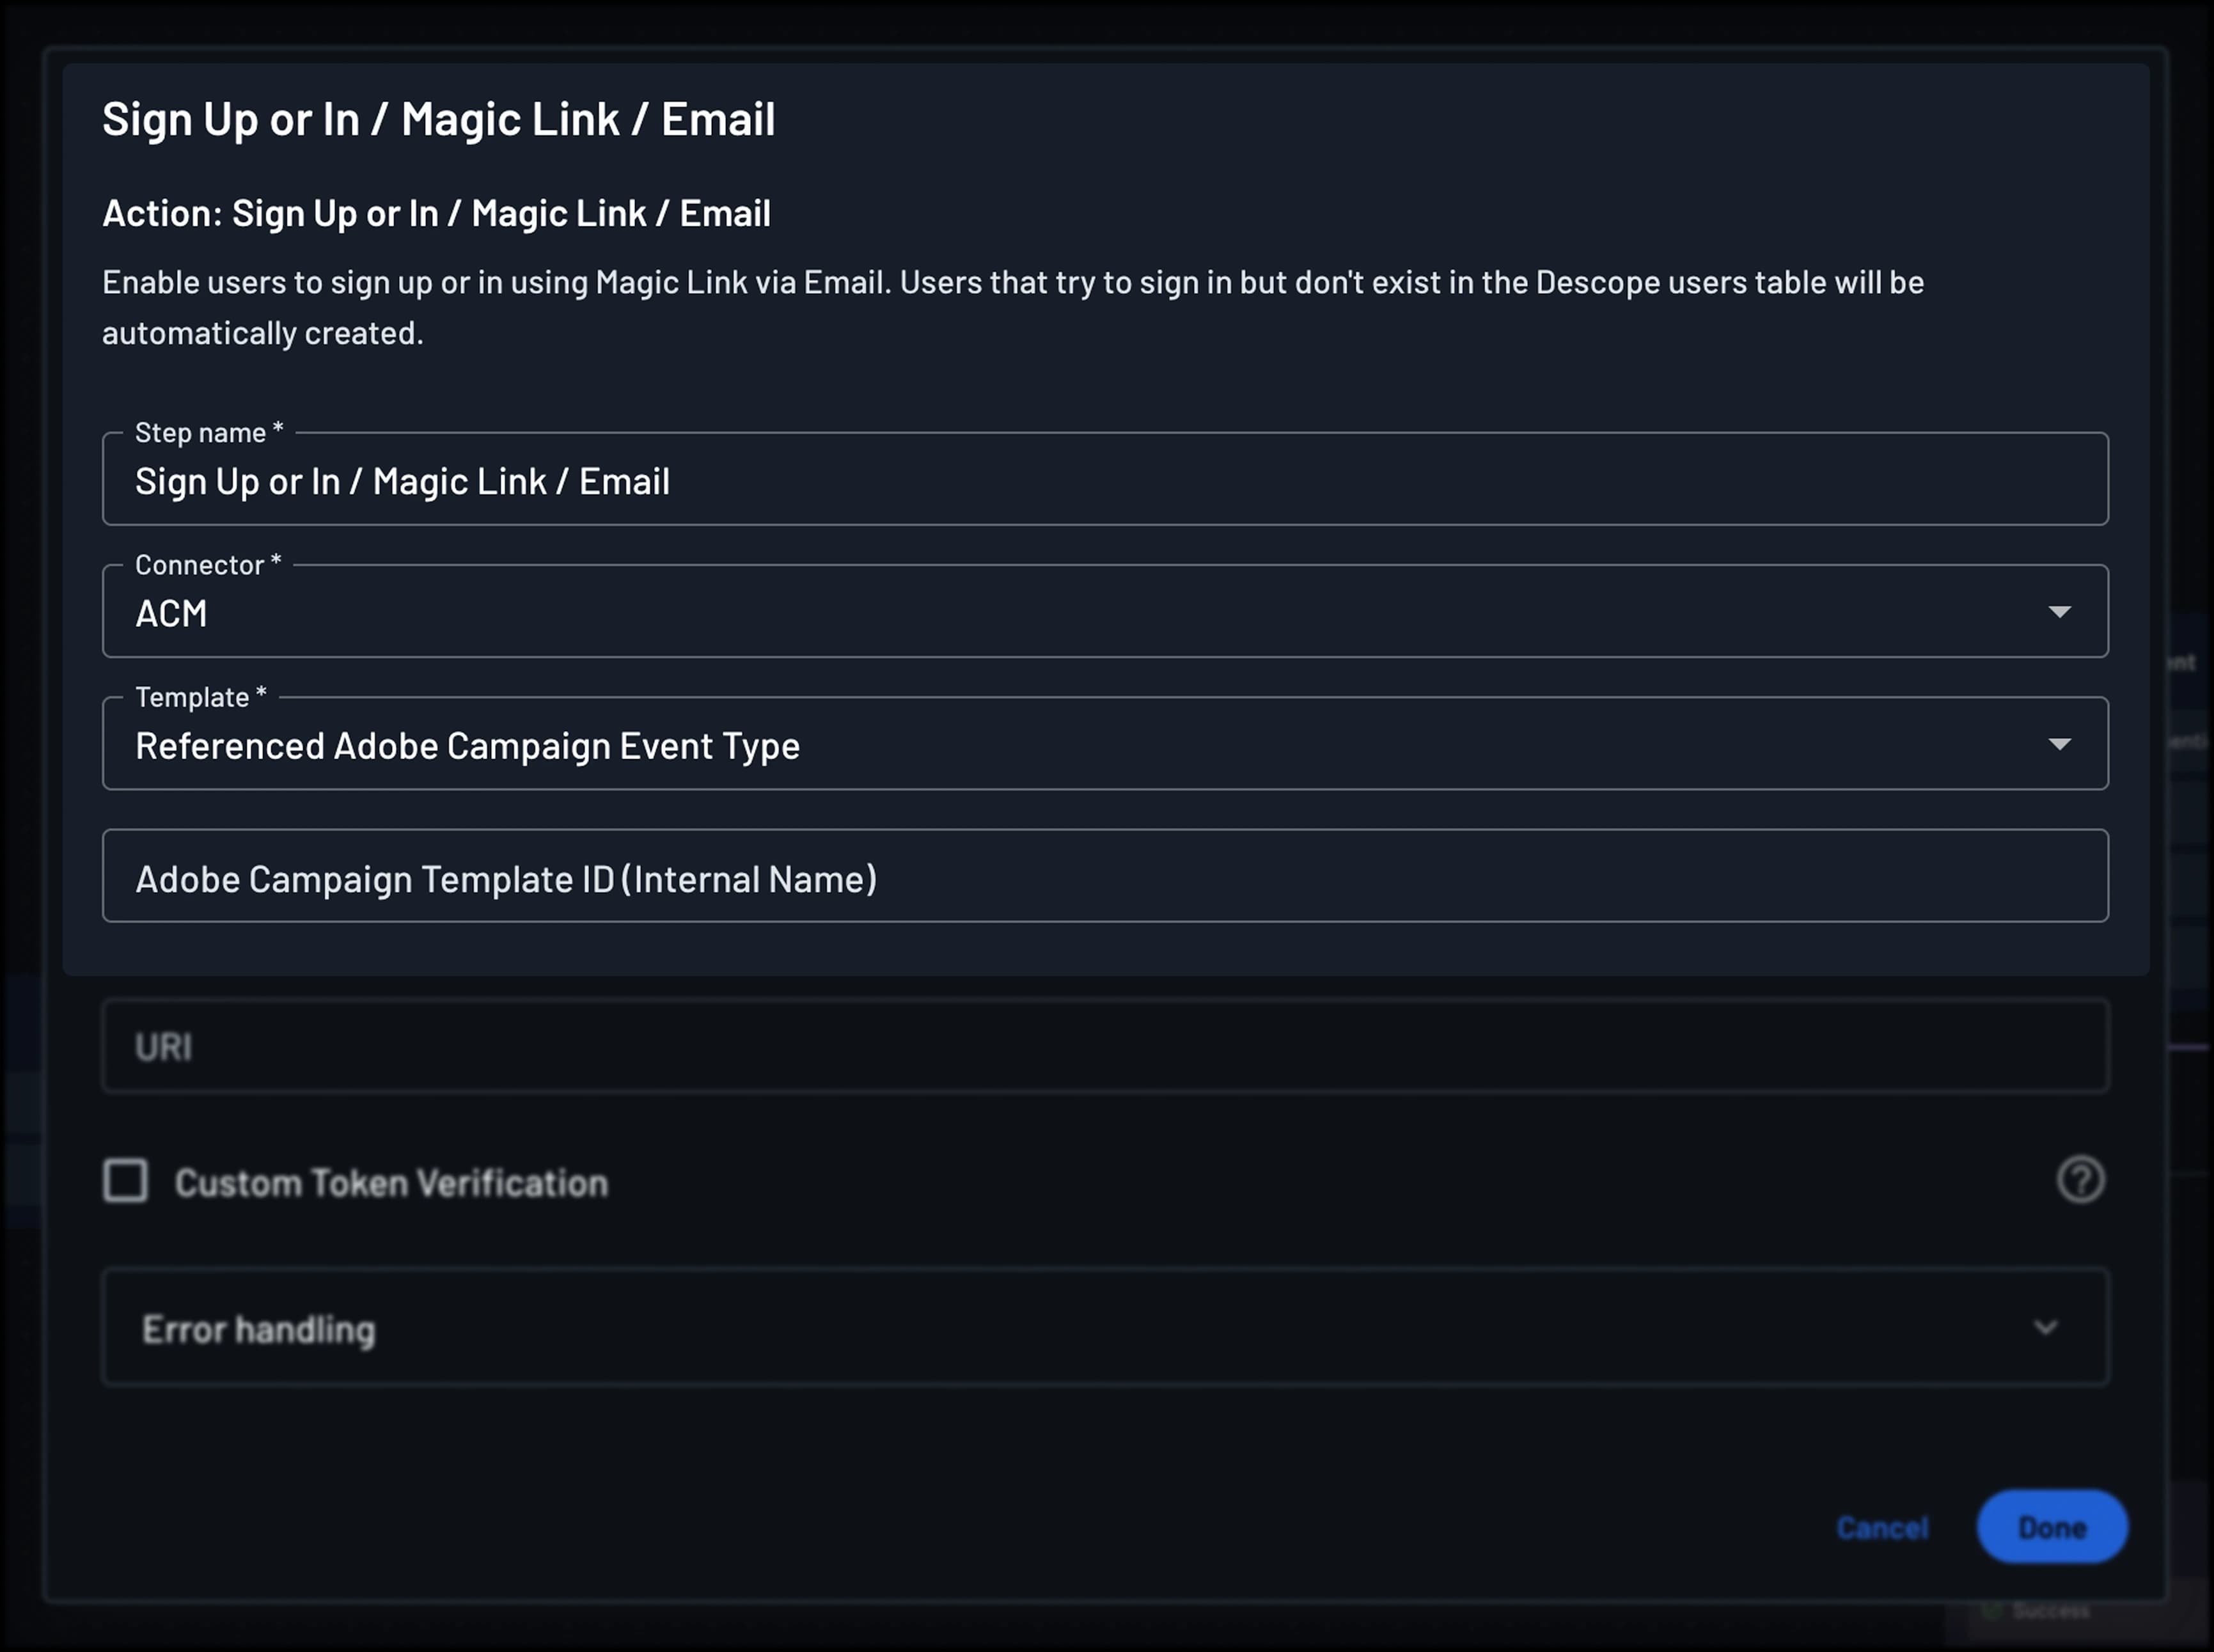
This action within your flow will utilize the Adobe Campaign Classic connector and override the configured default email connector.
Setting an External ID for Events
Adobe Campaign Classic matches each event Descope sends to an existing contact record for deduplication, tracking, and audience segmentation. To enable this, add a template option with the key rtEventExternalId and a value that uniquely identifies the recipient, such as their login ID. See Dynamic Content with Template Options for how to add template options through flows or SDKs.
rtEventExternalId is a reserved key for this connector. Descope doesn't insert its value into your message content like other template options. Instead, the value goes to Adobe Campaign Classic as the event's external ID. Leave it unset and Descope sends no external ID.