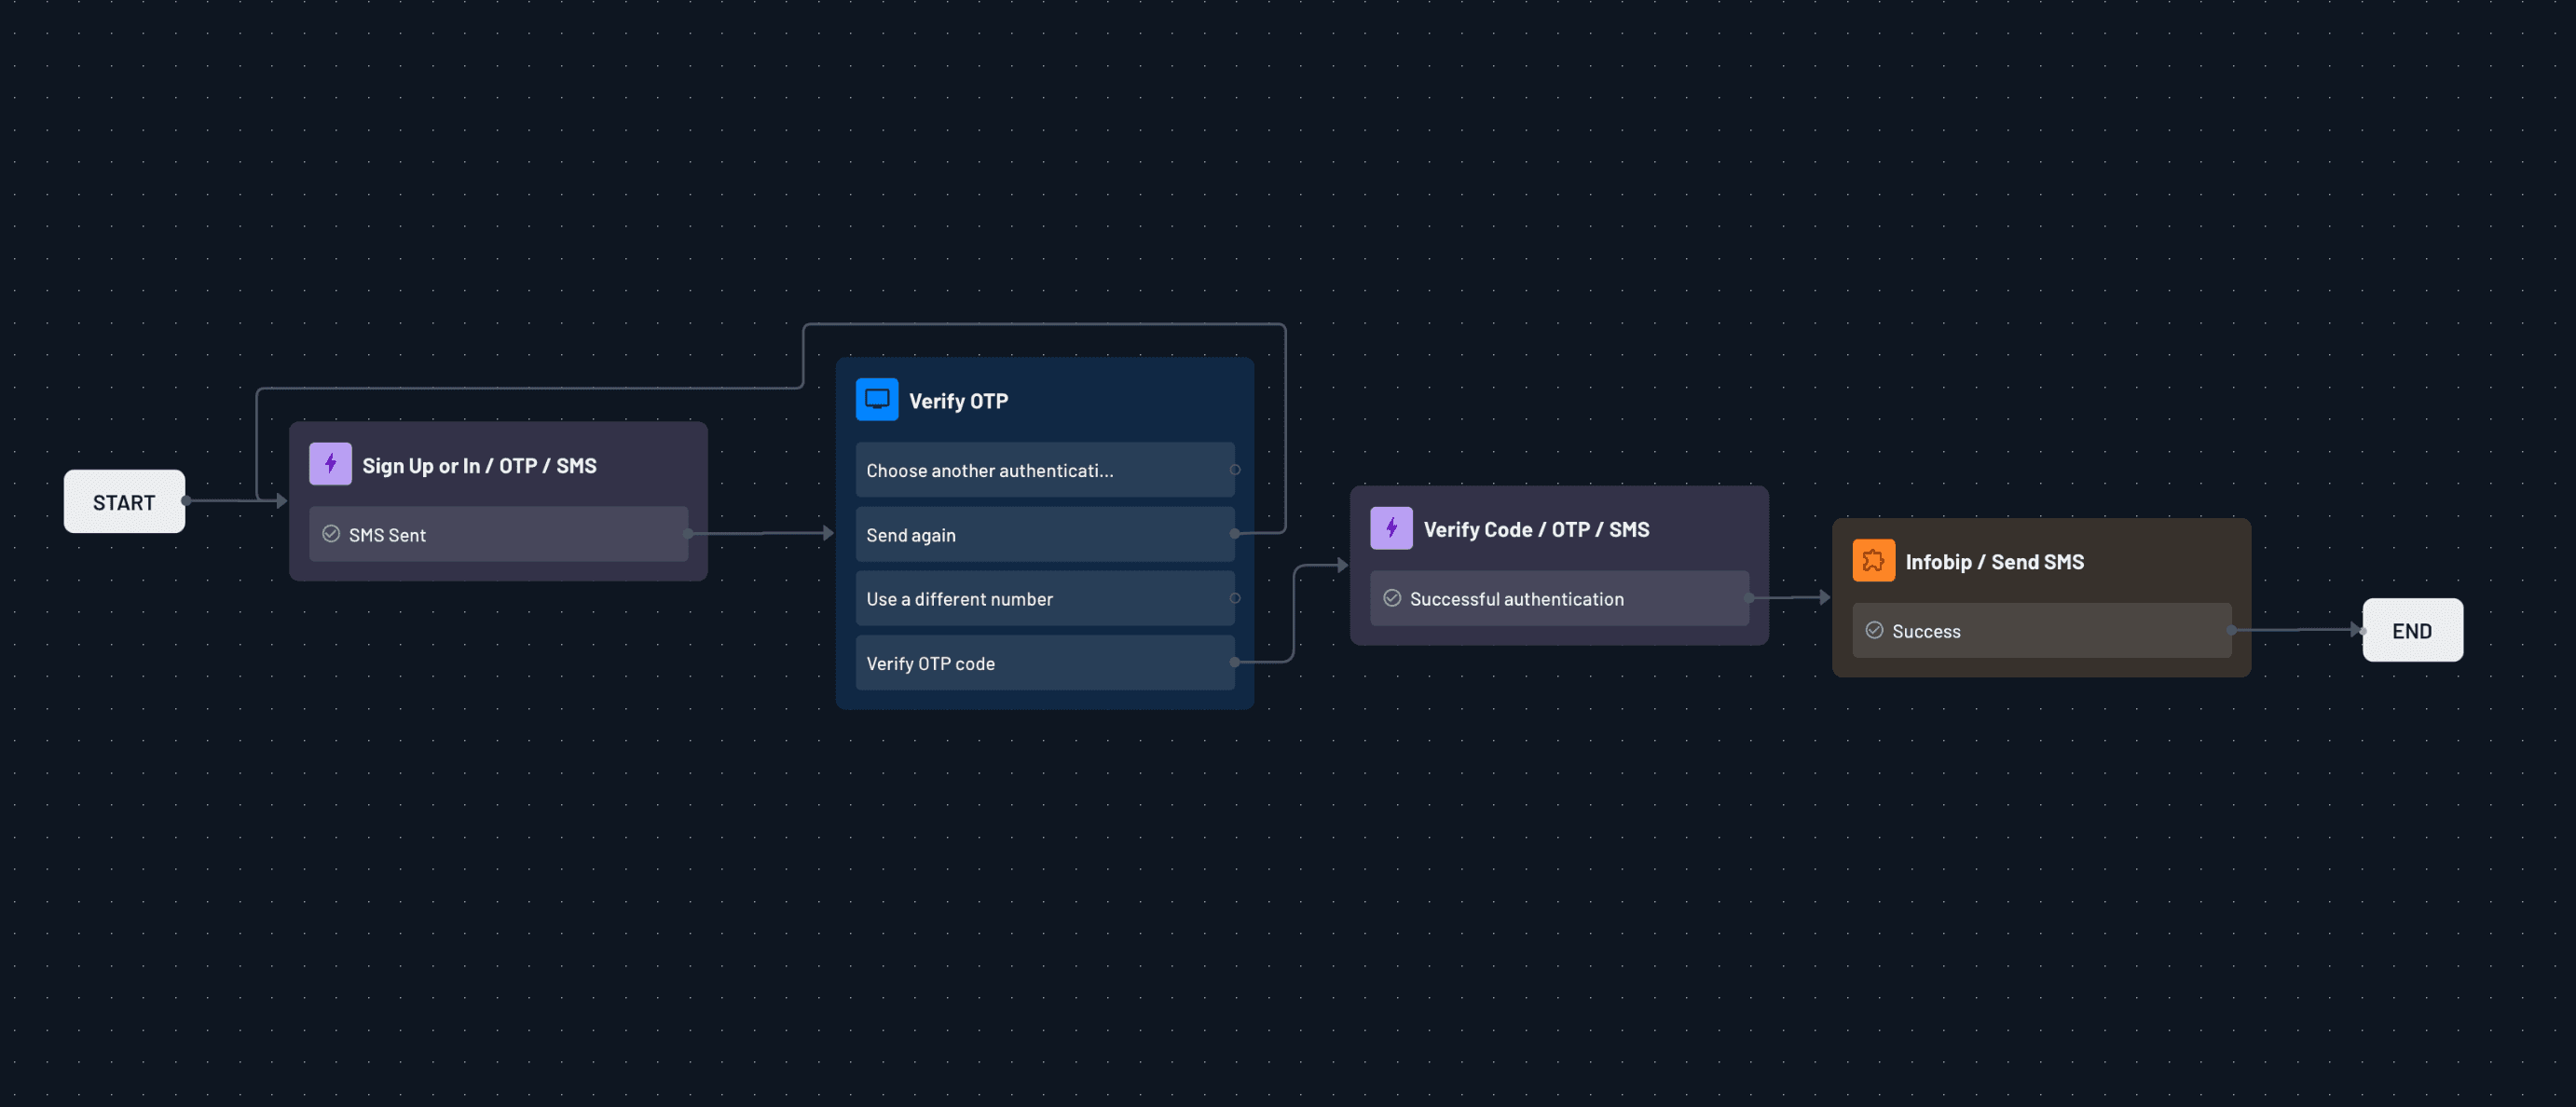
Infobip Connector
Descope's Infobip connector allows you to send SMS from authentication flows using your own Infobip account. This article will guide you through setting up and using the Infobip connector.
Configuration
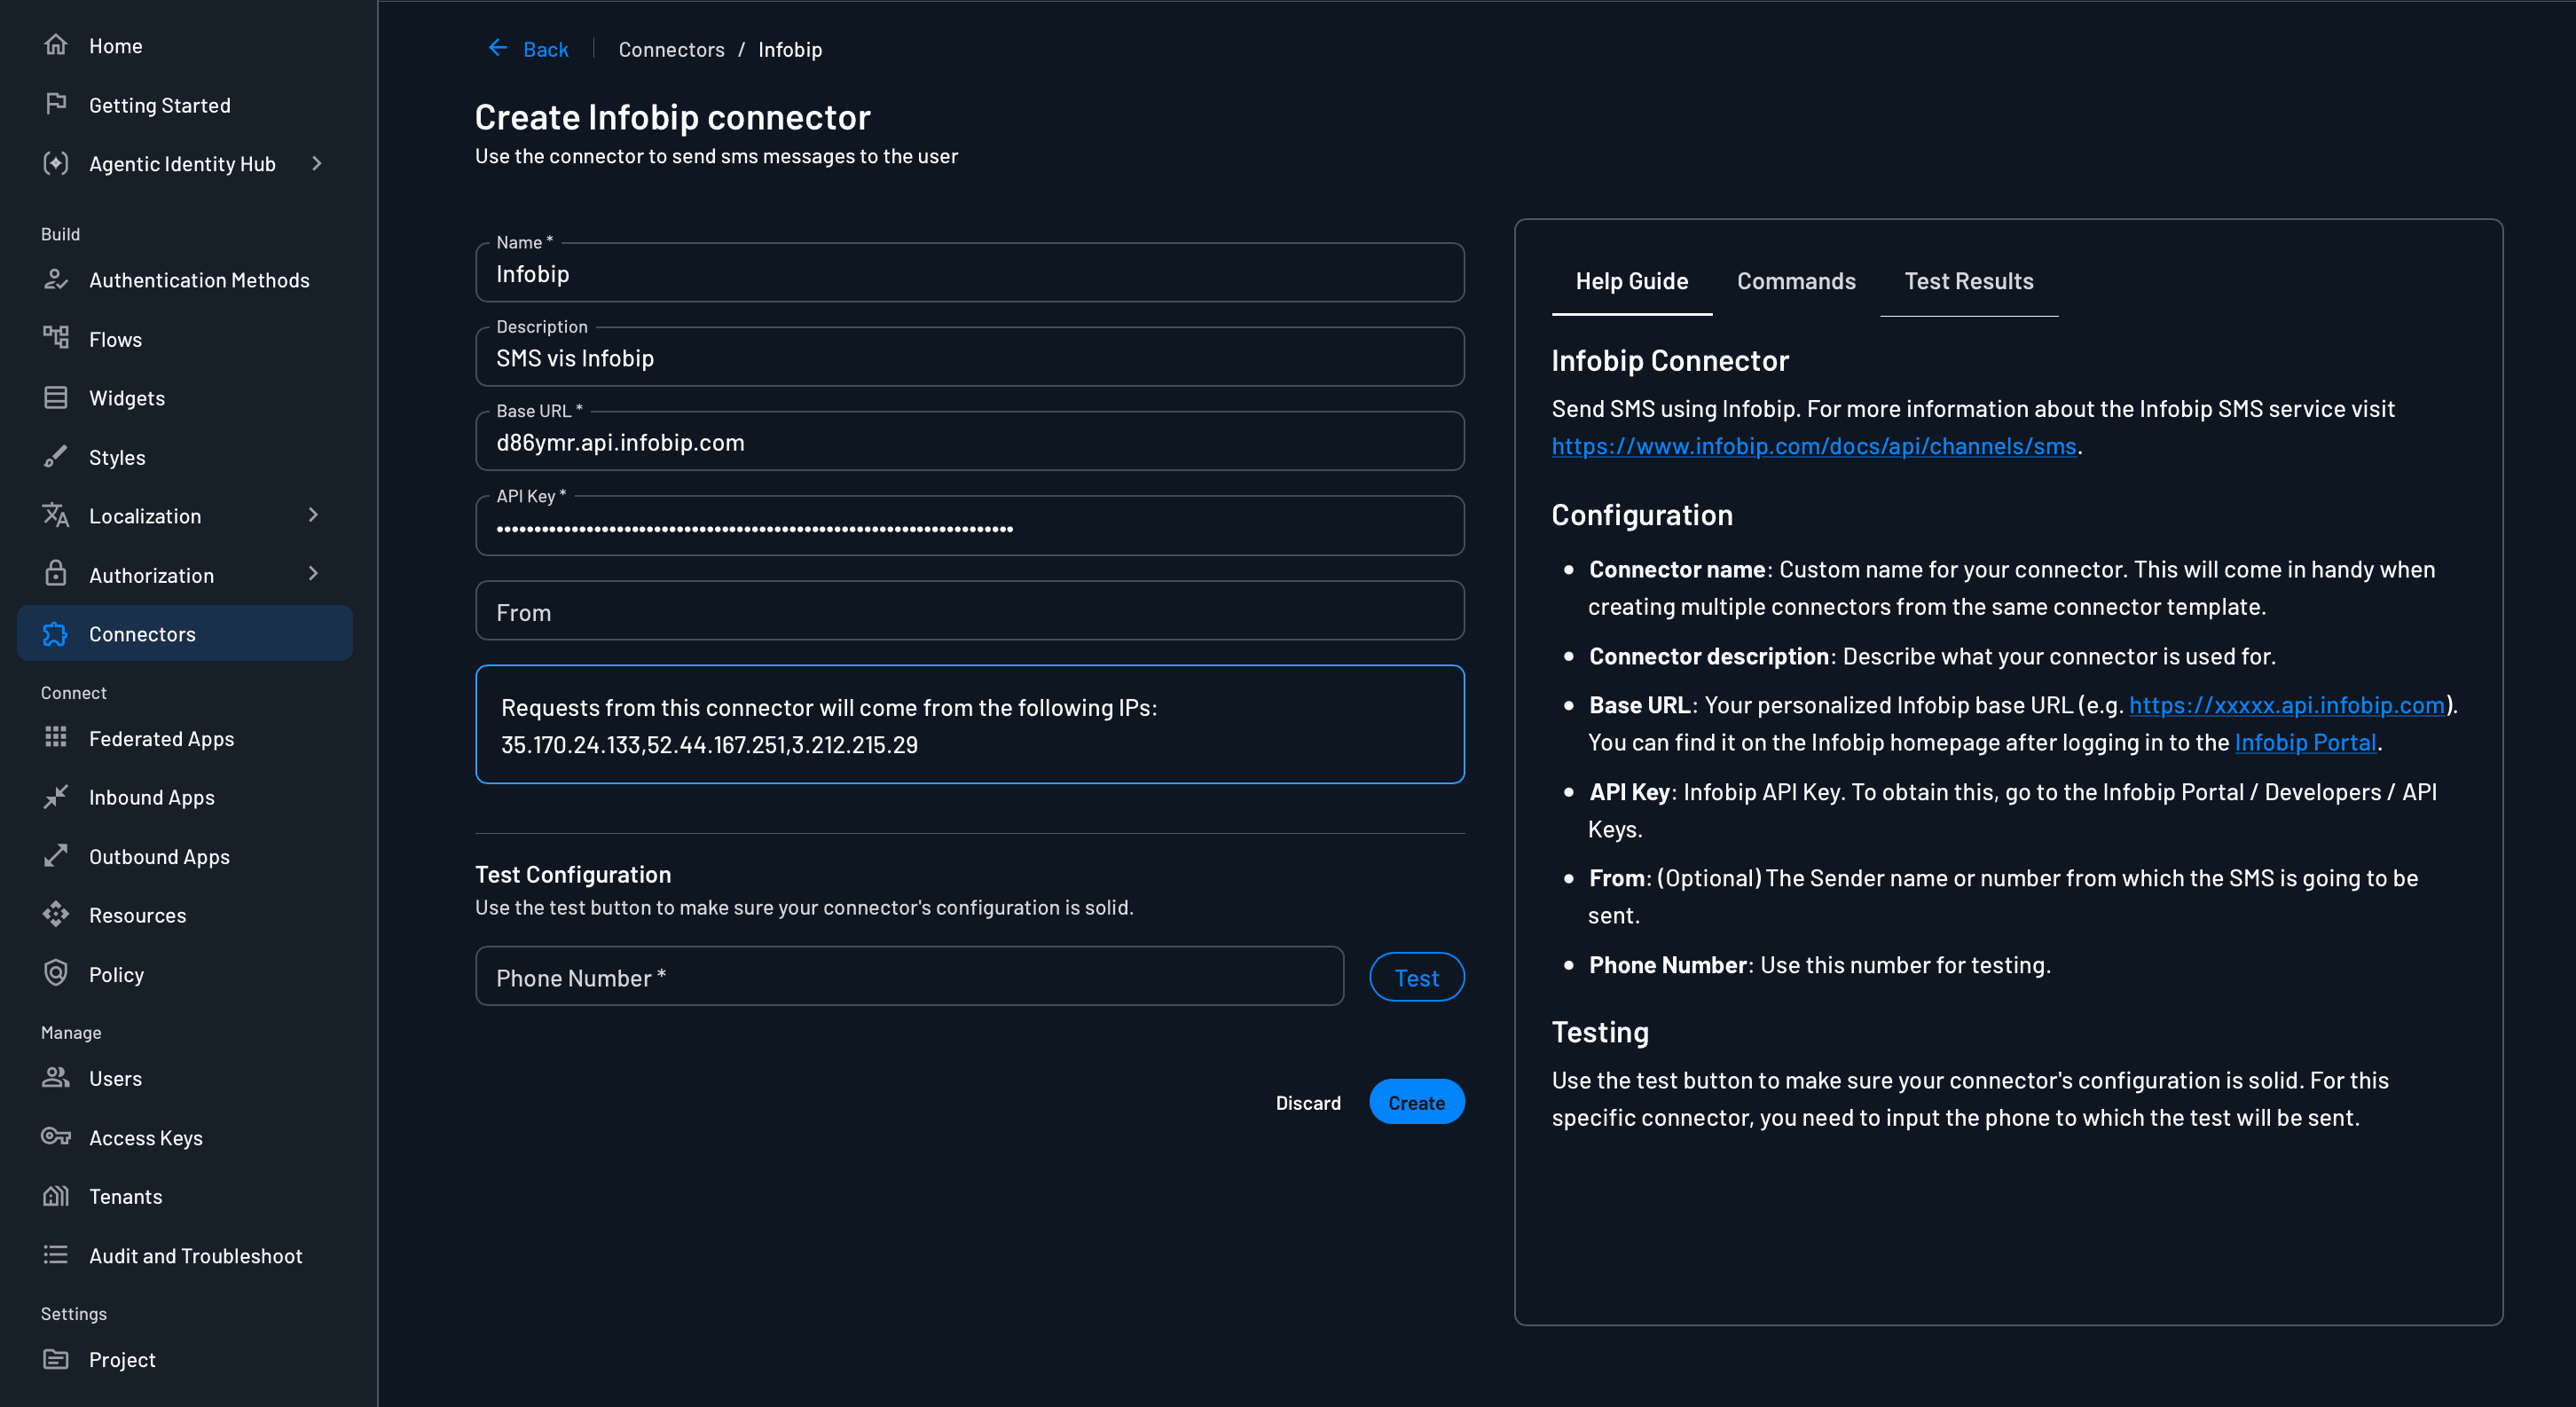
Descope uses your Infobip Base URL and API Key for integration.
To configure an Infobip connector, go to the Connectors page within the Descope Console, search for Infobip, and select the connector tile.
Settings
Below is a list of applicable settings for the Infobip connector.
- Connector name: Custom name for your connector. This will come in handy when creating multiple connectors from the same connector template.
- Connector description: (Optional) Briefly describe the purpose of this connector.
- Base URL: Your personalized Infobip base URL. Log in to the Infobip Portal and find your account-specific base URL on your homepage/dashboard (e.g.
xxxxx.api.infobip.com). You don't need to include a scheme —https://is added automatically if omitted. - API Key: Infobip API Key, used to authenticate Infobip's services. To obtain this, go to the Infobip Portal and navigate to API Keys.
- From: (Optional) The sender ID or number that the end user sees at the top of an incoming message on their phone.
Testing
You can test if your connector's configuration is working properly by hitting the Test button and viewing the Test Results panel.
Save your configuration by hitting Create.
Using the Connector in Authentication Methods
The Infobip connector can be used to send OTP codes and Magic Links in your authentication methods.
One-time Password (OTP)
To use the Infobip connector for SMS OTP messages:
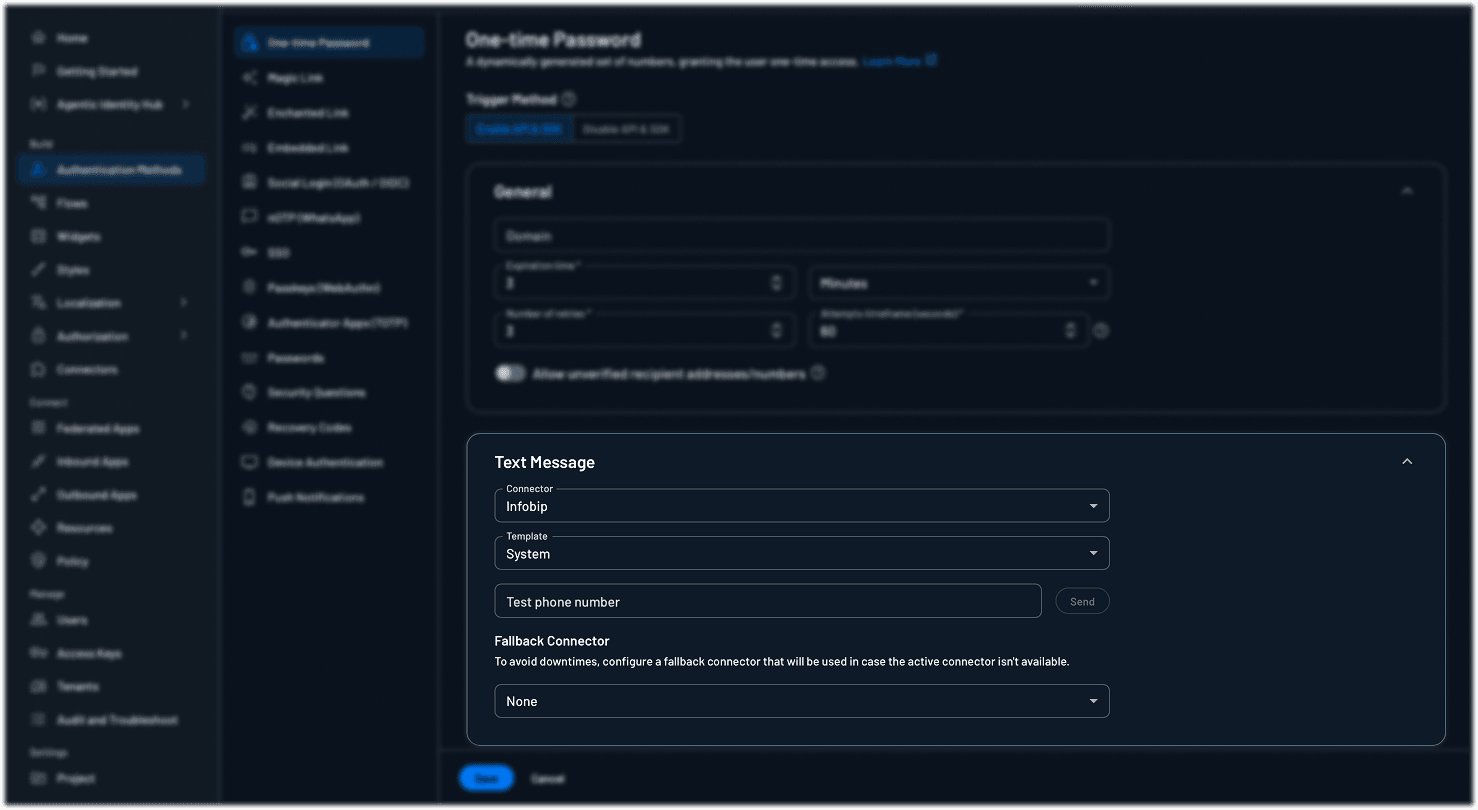
- Navigate to Authentication Methods -> One-time Password
- In the SMS section, select your configured Infobip connector from the dropdown
- Customize your SMS template if needed
Your OTP SMS will now be sent through Infobip.
Magic Link
To use the Infobip connector for Magic Link SMS:
- Navigate to Authentication Methods -> Magic Link
- In the SMS section, select your configured Infobip connector from the dropdown
- Customize your SMS template if needed
Your Magic Link SMS will now be sent through Infobip.
Using Infobip Explicitly in Flows
To override the default OTP connector within your flow to utilize Infobip, navigate to Flows and choose your flow. Once you are in the flow that you'd like to use Infobip, select and edit the action that starts the OTP process, such as Sign In, Sign Up, or Sign Up or In with OTP via SMS.
If you have not yet added the OTP action:
- Click the blue
+icon at the top left - Search for the SMS OTP action and select it
- Select it, then select and edit the initiating action
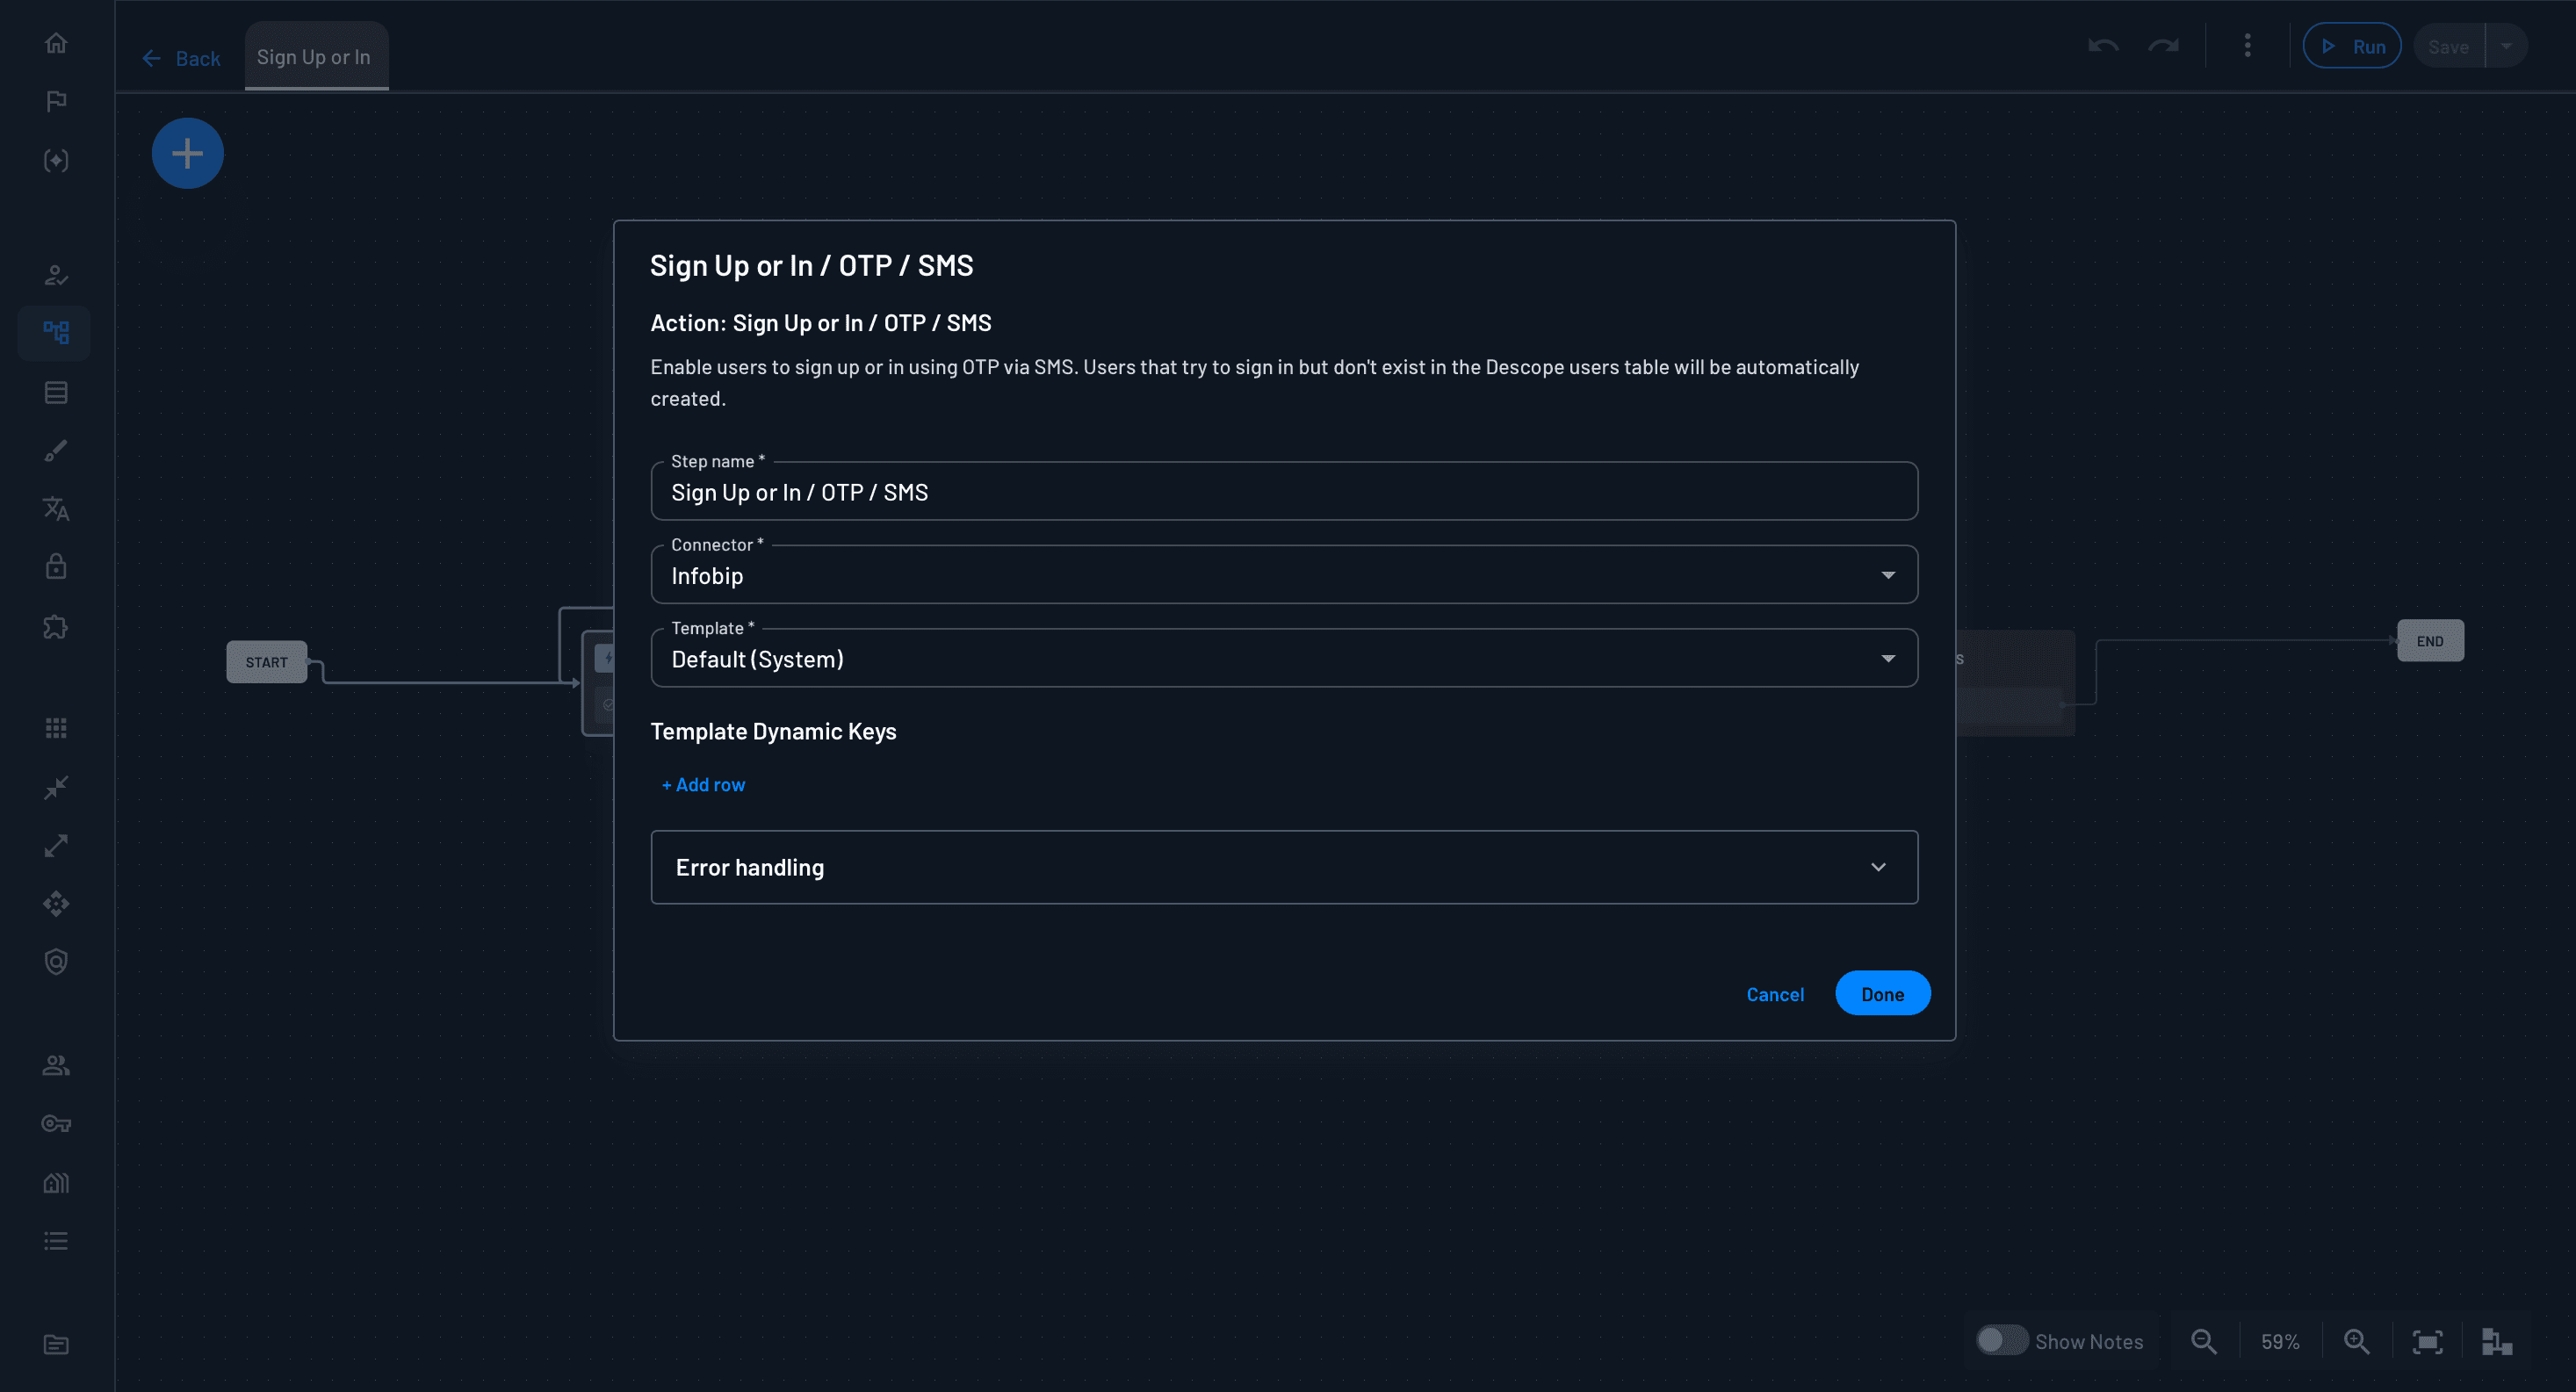
In this example, we will update the Sign Up or In / OTP / SMS action to utilize the Infobip connector and override the configured default for the SMS OTP auth method.
Once in edit mode for the initiating OTP action:
- Select the dropdown for the connector and choose your Infobip connector
- Click
Done, and save your flow
You can also select a customized template; for more details, see our guide for Using SMS Templates. This action within your flow will utilize the Infobip connector and override the configured default SMS OTP connector.
Sending Custom Messages via Infobip in Flows
There may be a use case where you want to send a text message as part of your Descope flow that is not directly related to the OTP Auth flow; this section will describe how to use Infobip to send custom messages.
Navigate to: Flows, choose your flow. Then, tap the create button
(designated via the + icon), select Connector, and choose Infobip connector.
Click to place the connector in your flow editor and double click the action to add required fields:
- To: Who the message should be sent to. Setting this dynamically based on previous attributes is recommended (eg.
{{user.phone}}). As you type in the input field, options appear. - Message: Enter the message content of the SMS.
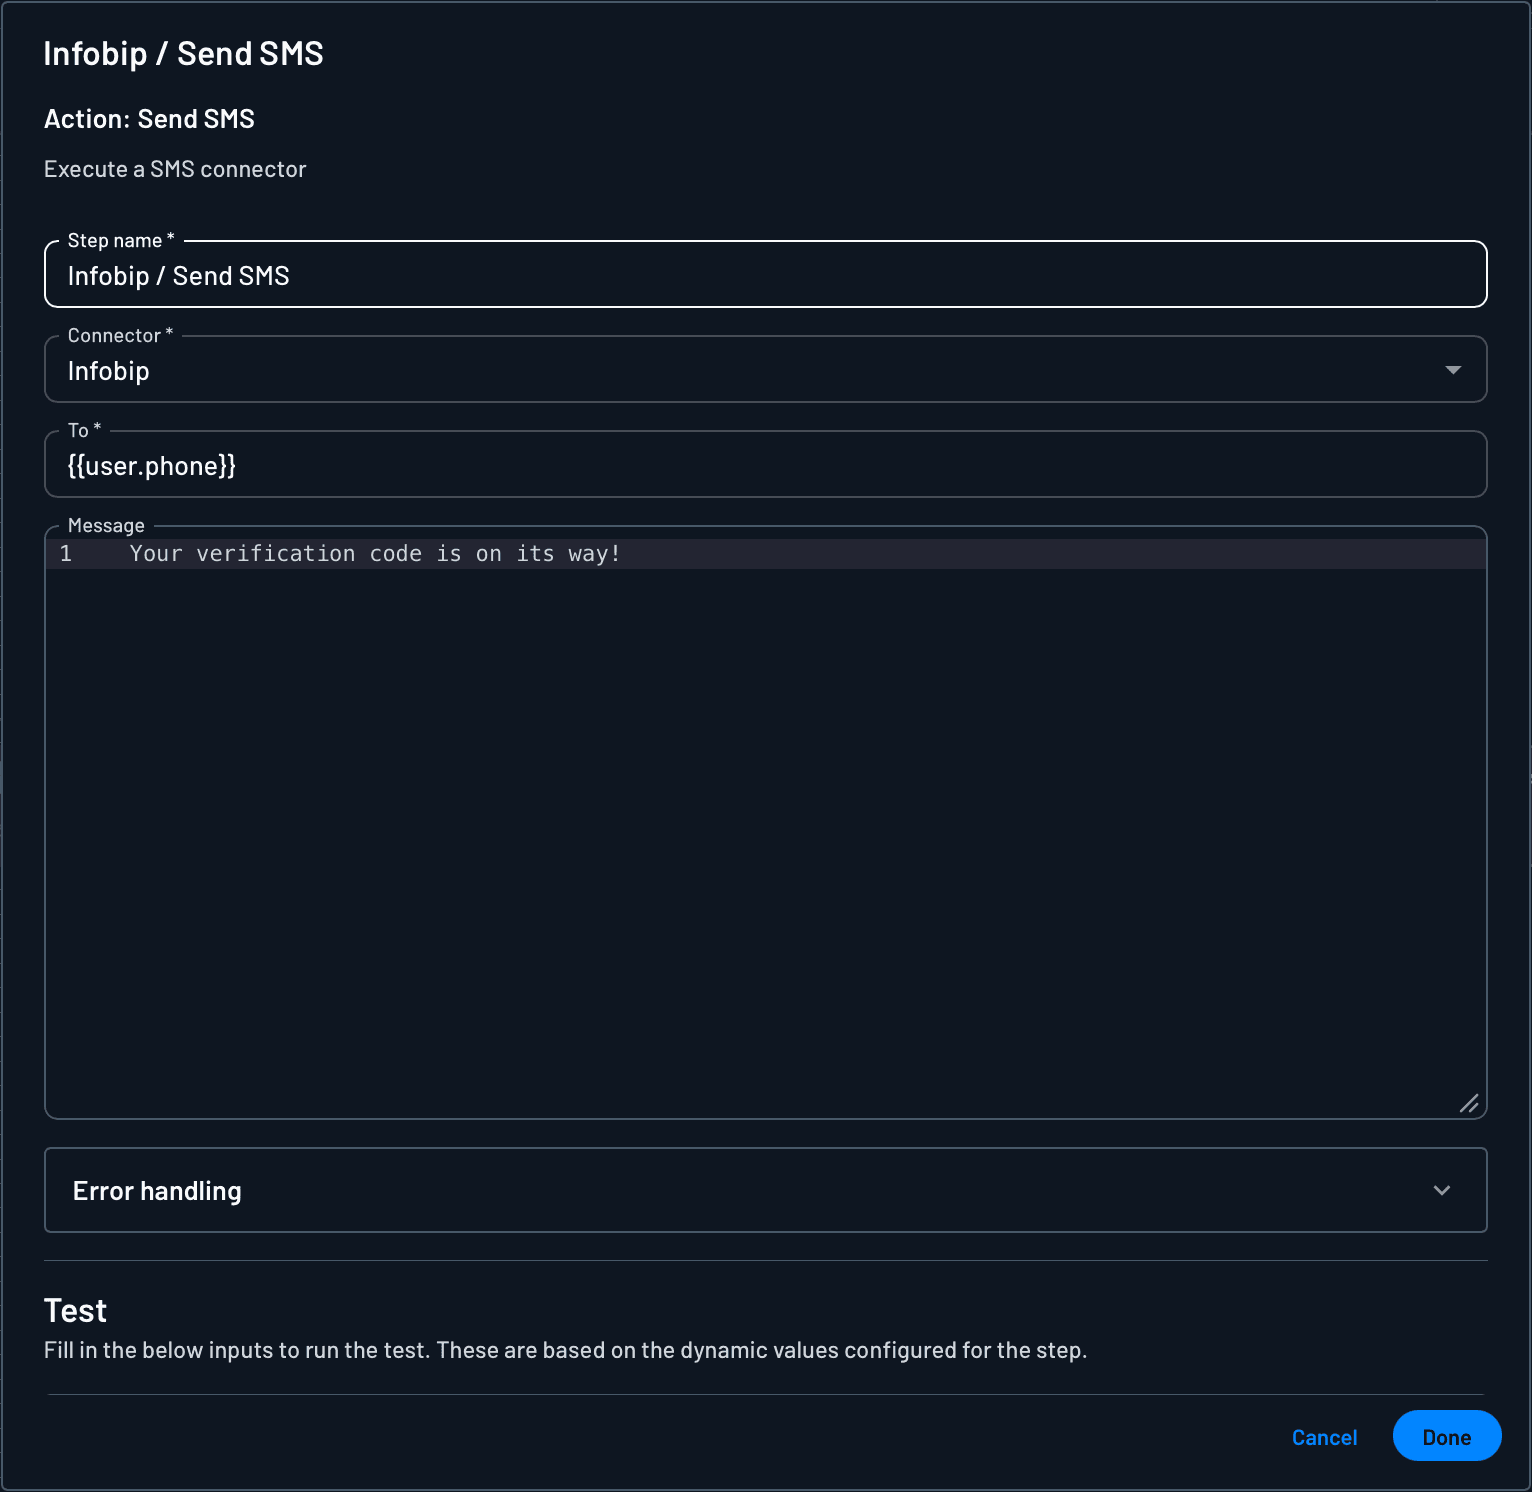
Now, link your connector at a logical point in your authentication flow, likely at the end of the flow after the phone number has been submitted by the user.