Klaviyo Connector
The Klaviyo connector lets you send authentication emails, such as OTP codes and Magic Links, through your existing Klaviyo account. Before you begin, review the prerequisites below.
Prerequisites in Klaviyo
Before authentication emails can be delivered, your Klaviyo flow must meet Klaviyo's own requirements:
- The flow must be triggered by a custom metric (for example
Descope OTP). Klaviyo only allows emails in metric-triggered flows to be marked transactional. - Author the email in that flow using
{{ event.token }},{{ event.username }},{{ event.customerName }}, and any dynamic keys you define in Descope. - Set the flow email's sender to an address on your Klaviyo-verified sending domain.
- Mark the flow email as transactional and wait for Klaviyo to approve it. This requires a paid Klaviyo account — until approval completes, Klaviyo skips suppressed and never-subscribed profiles, so most users will not receive the email.
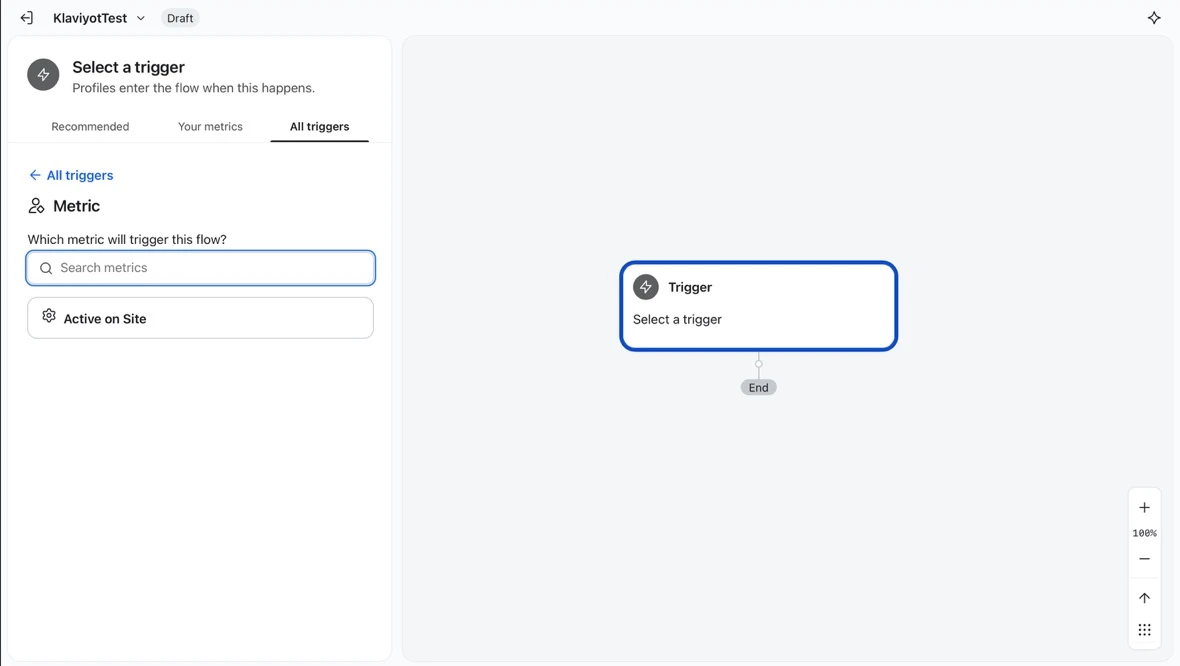
Klaviyo only sends auth emails to every user after your flow is approved as transactional. Until then, Klaviyo skips anyone who is suppressed or has never subscribed. For those users, the sign-in looks successful, but the email never arrives.
After approval, users don't need to opt in. Klaviyo only skips profiles that have a hard bounce, 7 soft bounces in a row, or a past spam report. For details, see Understanding transactional messages.
Configure the Klaviyo connector
Settings
From the Descope Console, navigate to Connectors and add a new Klaviyo connector. You will need the following:
- Name: Custom name for your connector. This will come in handy when creating multiple connectors from the same connector template.
- Description: (Optional) Describe what your connector is used for.
- Private API Key: Your Klaviyo private API key, used to authenticate requests to Klaviyo's Events API. This is required.
- From Email: The email address Klaviyo will send from. This is optional and can also be set on the Klaviyo side.
- From Name: The display name Klaviyo will send from. This is also optional.
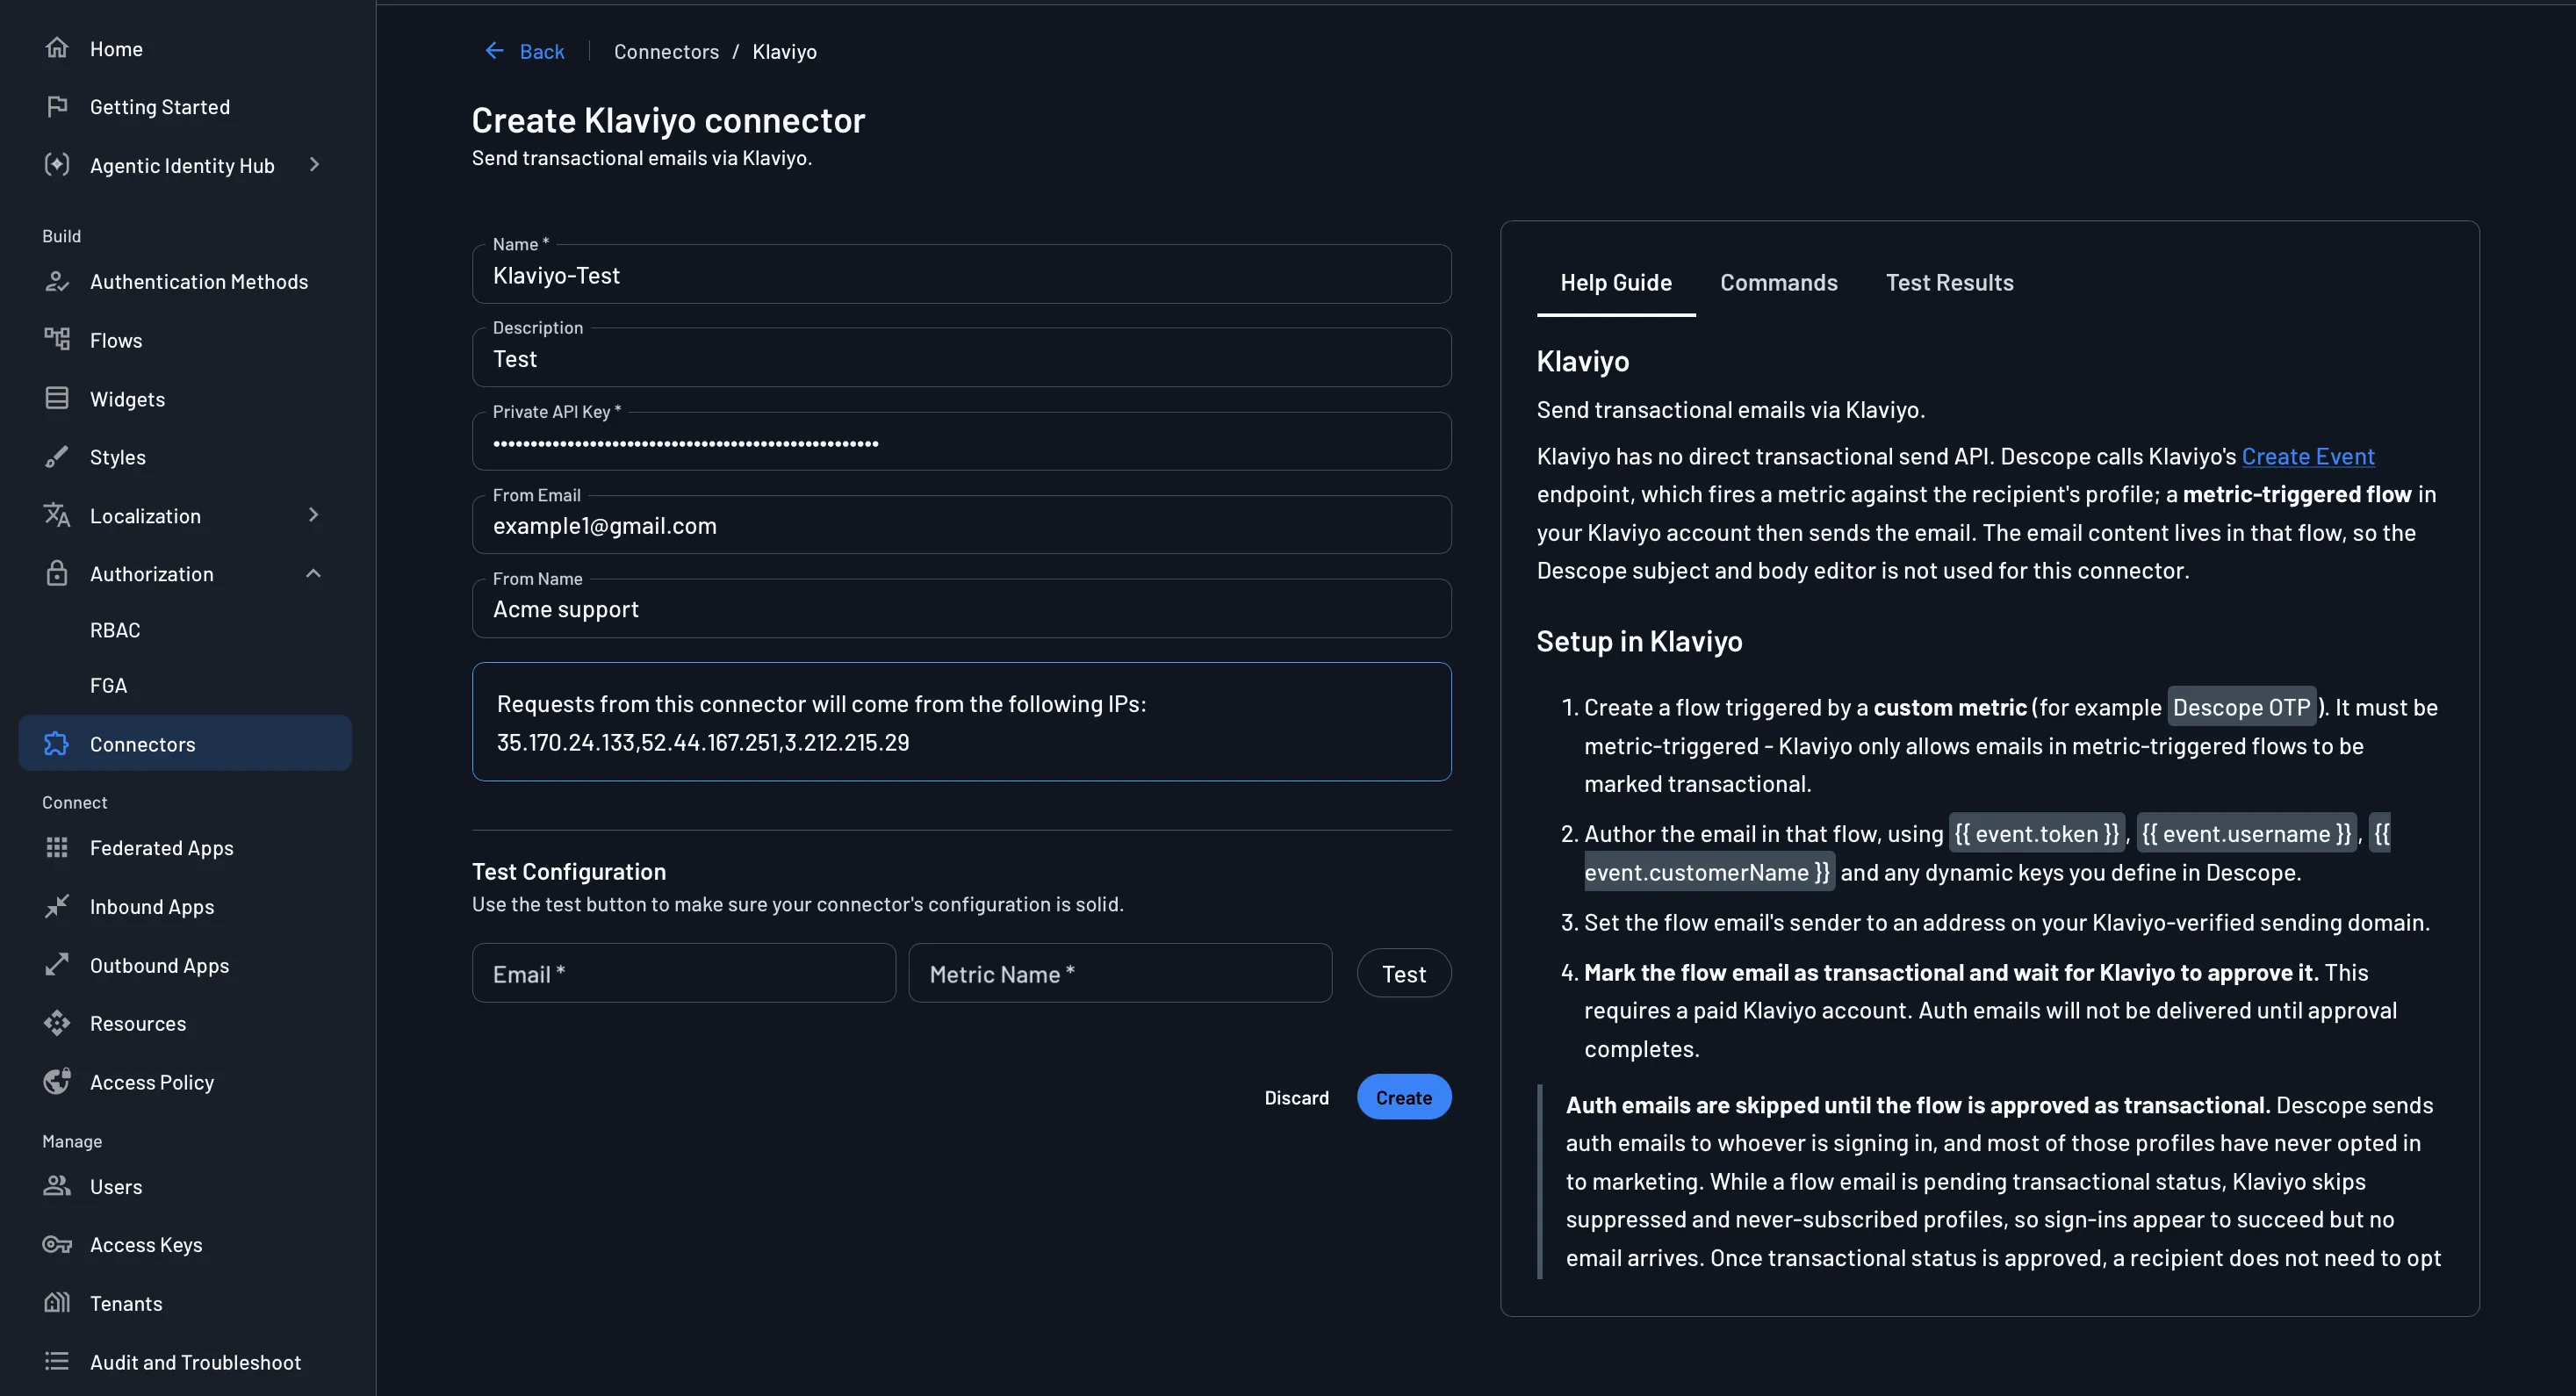
Descope calls Klaviyo's Create Event endpoint, which fires a metric against the recipient's profile; a metric-triggered flow in your Klaviyo account then sends the email. The email content lives in that flow, so the Descope subject and body editor is not used for this connector.
Testing
Before creating your connector, verify that the configuration works. In the Test Configuration section, enter an Email and the Metric Name to test against, then click Test and review the Test Results panel.
After successful tests, click Create.
Using the Connector in Authentication Methods
With Klaviyo, you don't write the email subject or body in Descope. Instead, Descope sends a named event (Klaviyo calls it a metric), and your Klaviyo flow decides which email to send in response.
To set this up, you enter a Klaviyo Metric (Event) Name for each authentication method that uses the connector. This name must match the trigger event in your Klaviyo flow.
OTP
To use Klaviyo for one-time code delivery:
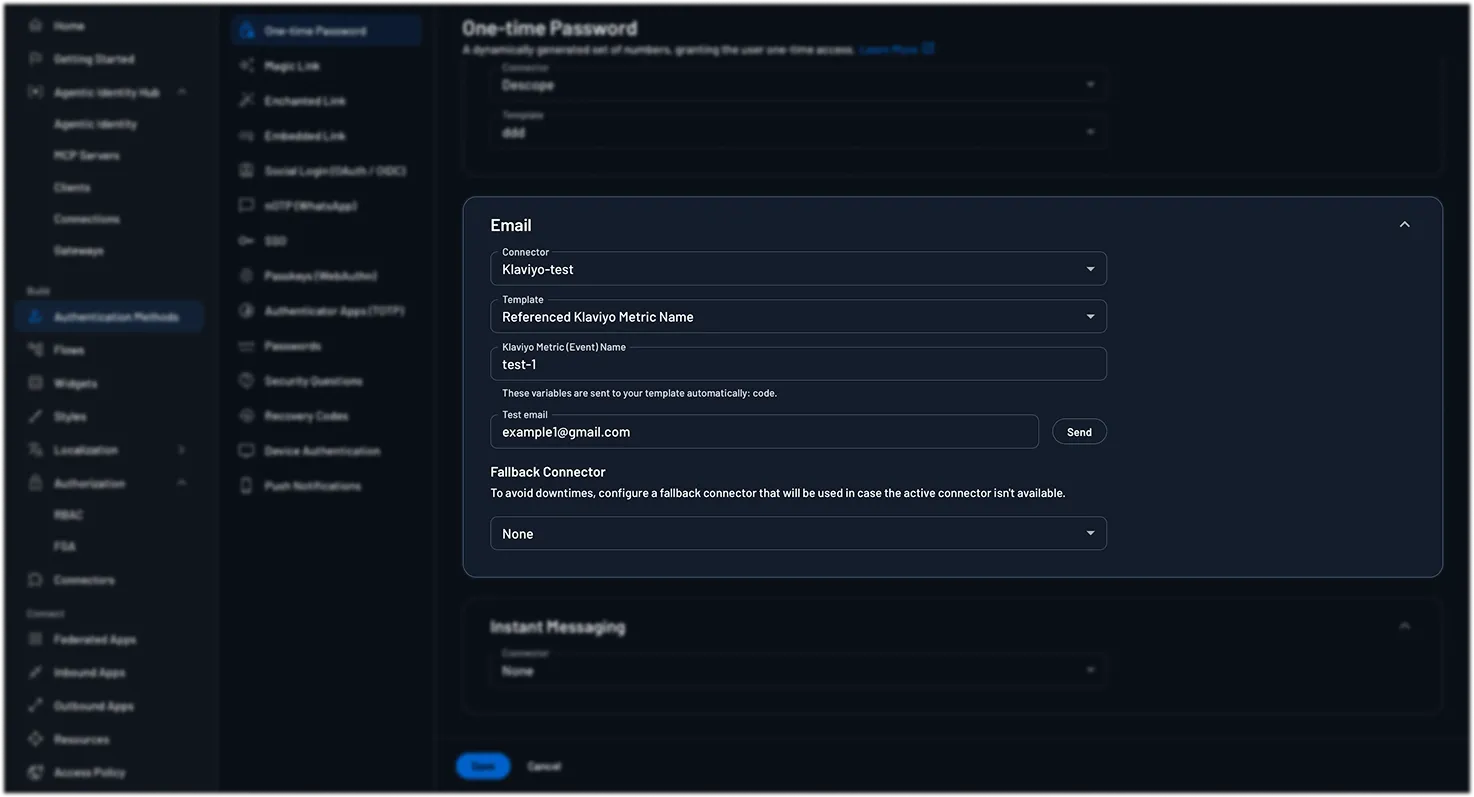
- Navigate to Authentication Methods -> One-time Password.
- In the Email section, select your configured Klaviyo connector from the dropdown.
- The Template field automatically shows Referenced Klaviyo Metric Name, since Klaviyo templates can't be composed in Descope.
- The Klaviyo Metric (Event) Name field then appears. Fill it in to match the trigger event configured in your Klaviyo flow.
Magic Link
The same applies to Magic Link:
- Navigate to Authentication Methods -> Magic Link.
- In the Email section, select your configured Klaviyo connector from the dropdown.
- The Template field automatically shows Referenced Klaviyo Metric Name, since Klaviyo templates can't be composed in Descope.
- Set the Klaviyo Metric (Event) Name field to match the trigger event configured in your Klaviyo flow.
In both cases, Descope forwards the relevant authentication data, such as the OTP code or Magic Link URL, as event properties, so your Klaviyo flow can reference them in the email it sends.
Implementing the Klaviyo Connector in Your Flow
Once configured, add an OTP or Magic Link step to your flow and select Klaviyo as the delivery method.
- In the Flow Builder, open the OTP or Magic Link step you want Klaviyo to handle.
- Set the Connector field to your Klaviyo connector.
- The Template field automatically shows Referenced Klaviyo Metric Name, since Klaviyo templates can't be composed in Descope.
- Enter the event name your Klaviyo flow listens for in the Klaviyo Metric (Event) Name field.
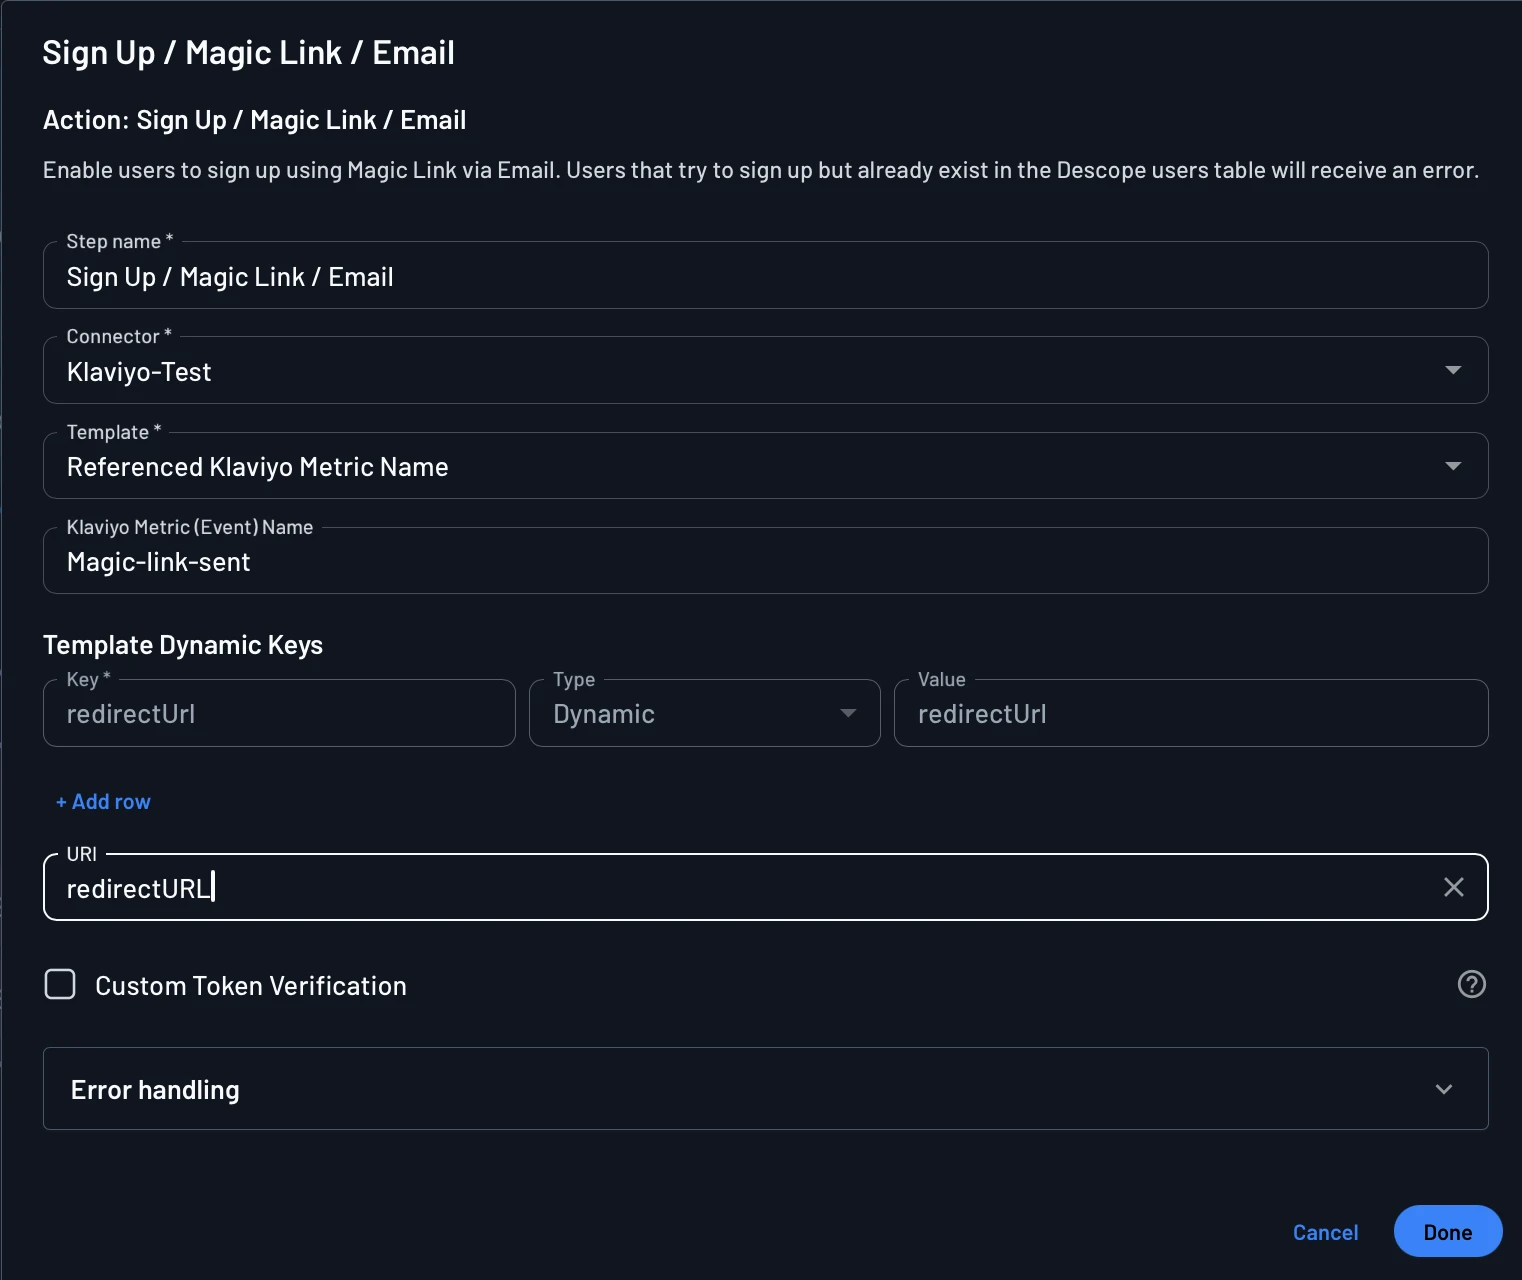
- For Magic Link steps, Descope automatically populates a
redirectUrlrow under Template Dynamic Keys. Reference it in the URI field as{{redirectUrl}}so Klaviyo receives the correct redirect destination. - Click Done, then save your flow. Descope will now send the configured event to Klaviyo whenever this step runs, and your Klaviyo flow takes over delivery from there.
Note
These steps apply the same way to both OTP and Magic Link steps, with the exception of the redirectUrl dynamic key, which only appears for Magic Link.