OneSignal Connector
Using Descope's connectors allows you to use OneSignal, a customer engagement platform, to send email and SMS messages in your authentication flow. This article will guide you through setting up the connector and incorporating it into your flow.
Configure OneSignal connector
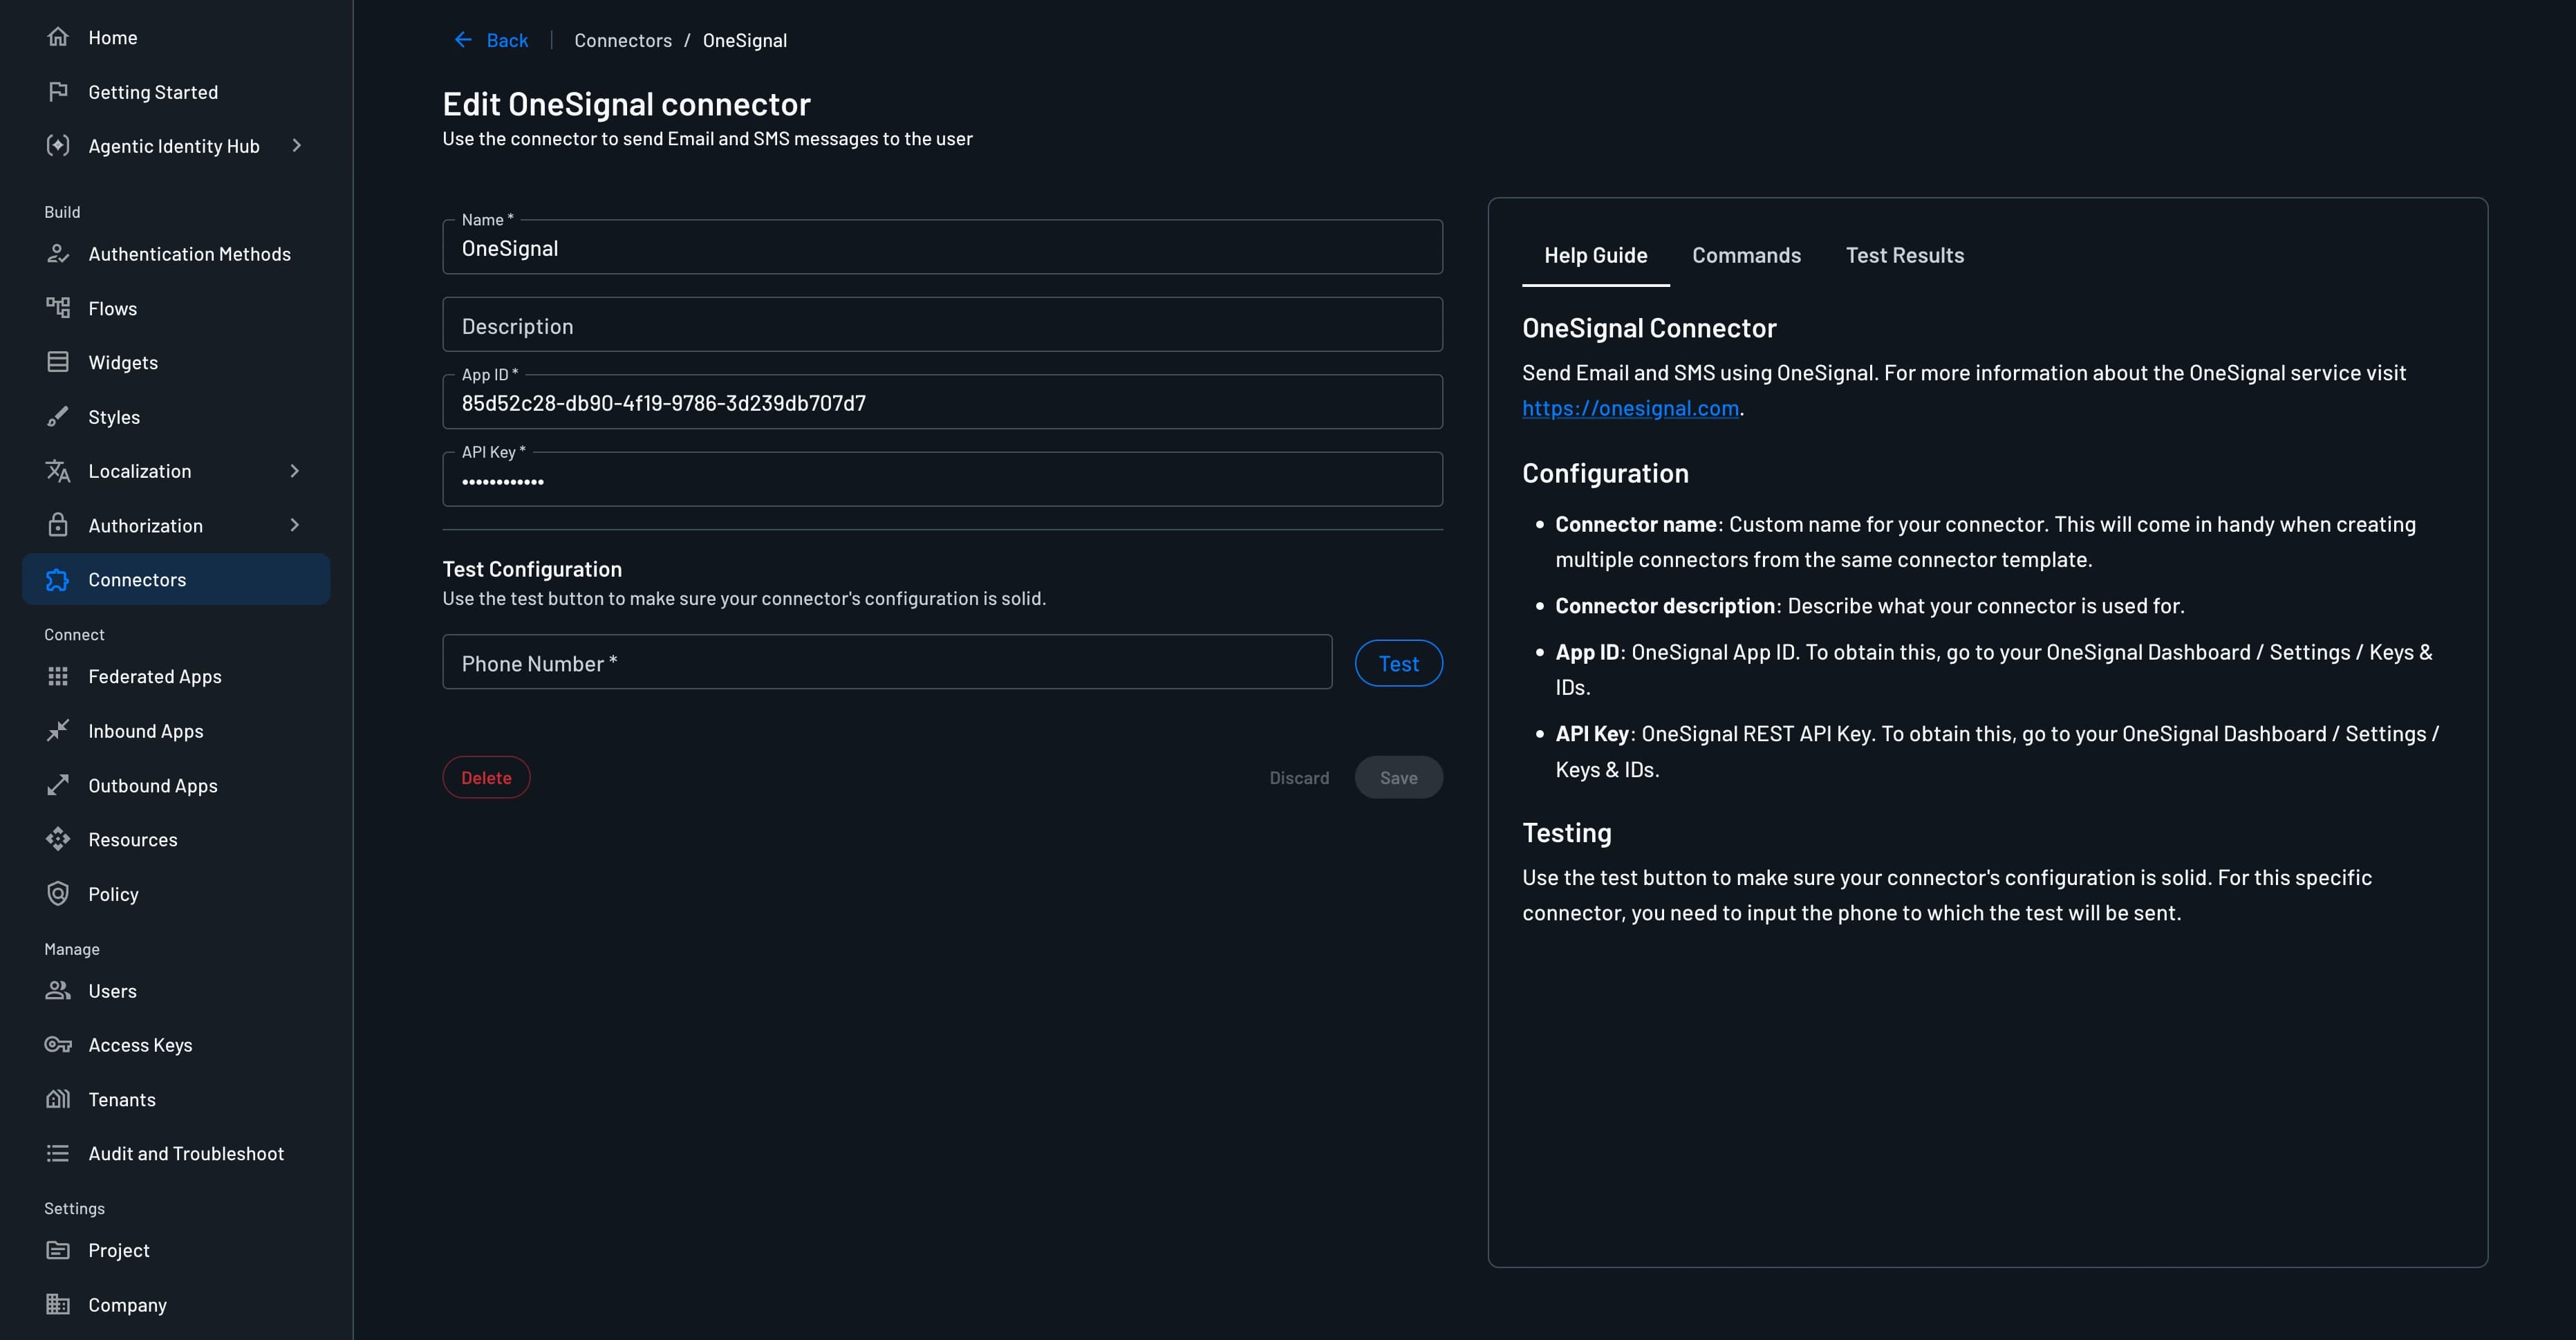
To integrate the OneSignal connector into your project, head to the Connectors page, select the OneSignal connector, and configure the following parameters:
- Connector name: Custom name for your connector. This will come in handy when creating multiple connectors from the same connector template.
- Connector description: (Optional) Describe what your connector is used for.
- App ID: Your OneSignal App ID. You can find this in your OneSignal dashboard under Settings -> Keys & IDs.
- API Key: Your OneSignal REST API Key. You can find this in your OneSignal dashboard under Settings -> Keys & IDs.
Testing
Before creating your connector, it is important to verify that the configuration works. Click Test and review the Test Results panel. When it succeeds, click Create.
Using the Connector in Authentication Methods
The OneSignal connector can be used to send OTP codes and Magic Links over email, and OTP codes over SMS, in your authentication methods.
One-time Password (OTP) via Email
To use the OneSignal connector for email OTP messages:
- Navigate to Authentication Methods -> One-time Password
- In the Email section, select your configured OneSignal connector from the dropdown
- Customize your email template if needed
Your OTP emails will now be sent through OneSignal.
One-time Password (OTP) via SMS
To use the OneSignal connector for SMS OTP messages:
- Navigate to Authentication Methods -> One-time Password
- In the SMS section, select your configured OneSignal connector from the dropdown
- Customize your SMS template if needed
Your OTP SMS messages will now be sent through OneSignal.
Magic Link
To use the OneSignal connector for Magic Link emails:
- Navigate to Authentication Methods -> Magic Link
- In the Email section, select your configured OneSignal connector from the dropdown
- Customize your email template if needed
Your Magic Link emails will now be sent through OneSignal.
Implementing the OneSignal connector in your flow
You can also use the OneSignal connector to send custom email and SMS messages within your flows.
1. Select or Create a flow
- Access your Dashboard -> Flows.
- Select an existing flow or create a new one.
2. Add the OneSignal connector to the flow screen
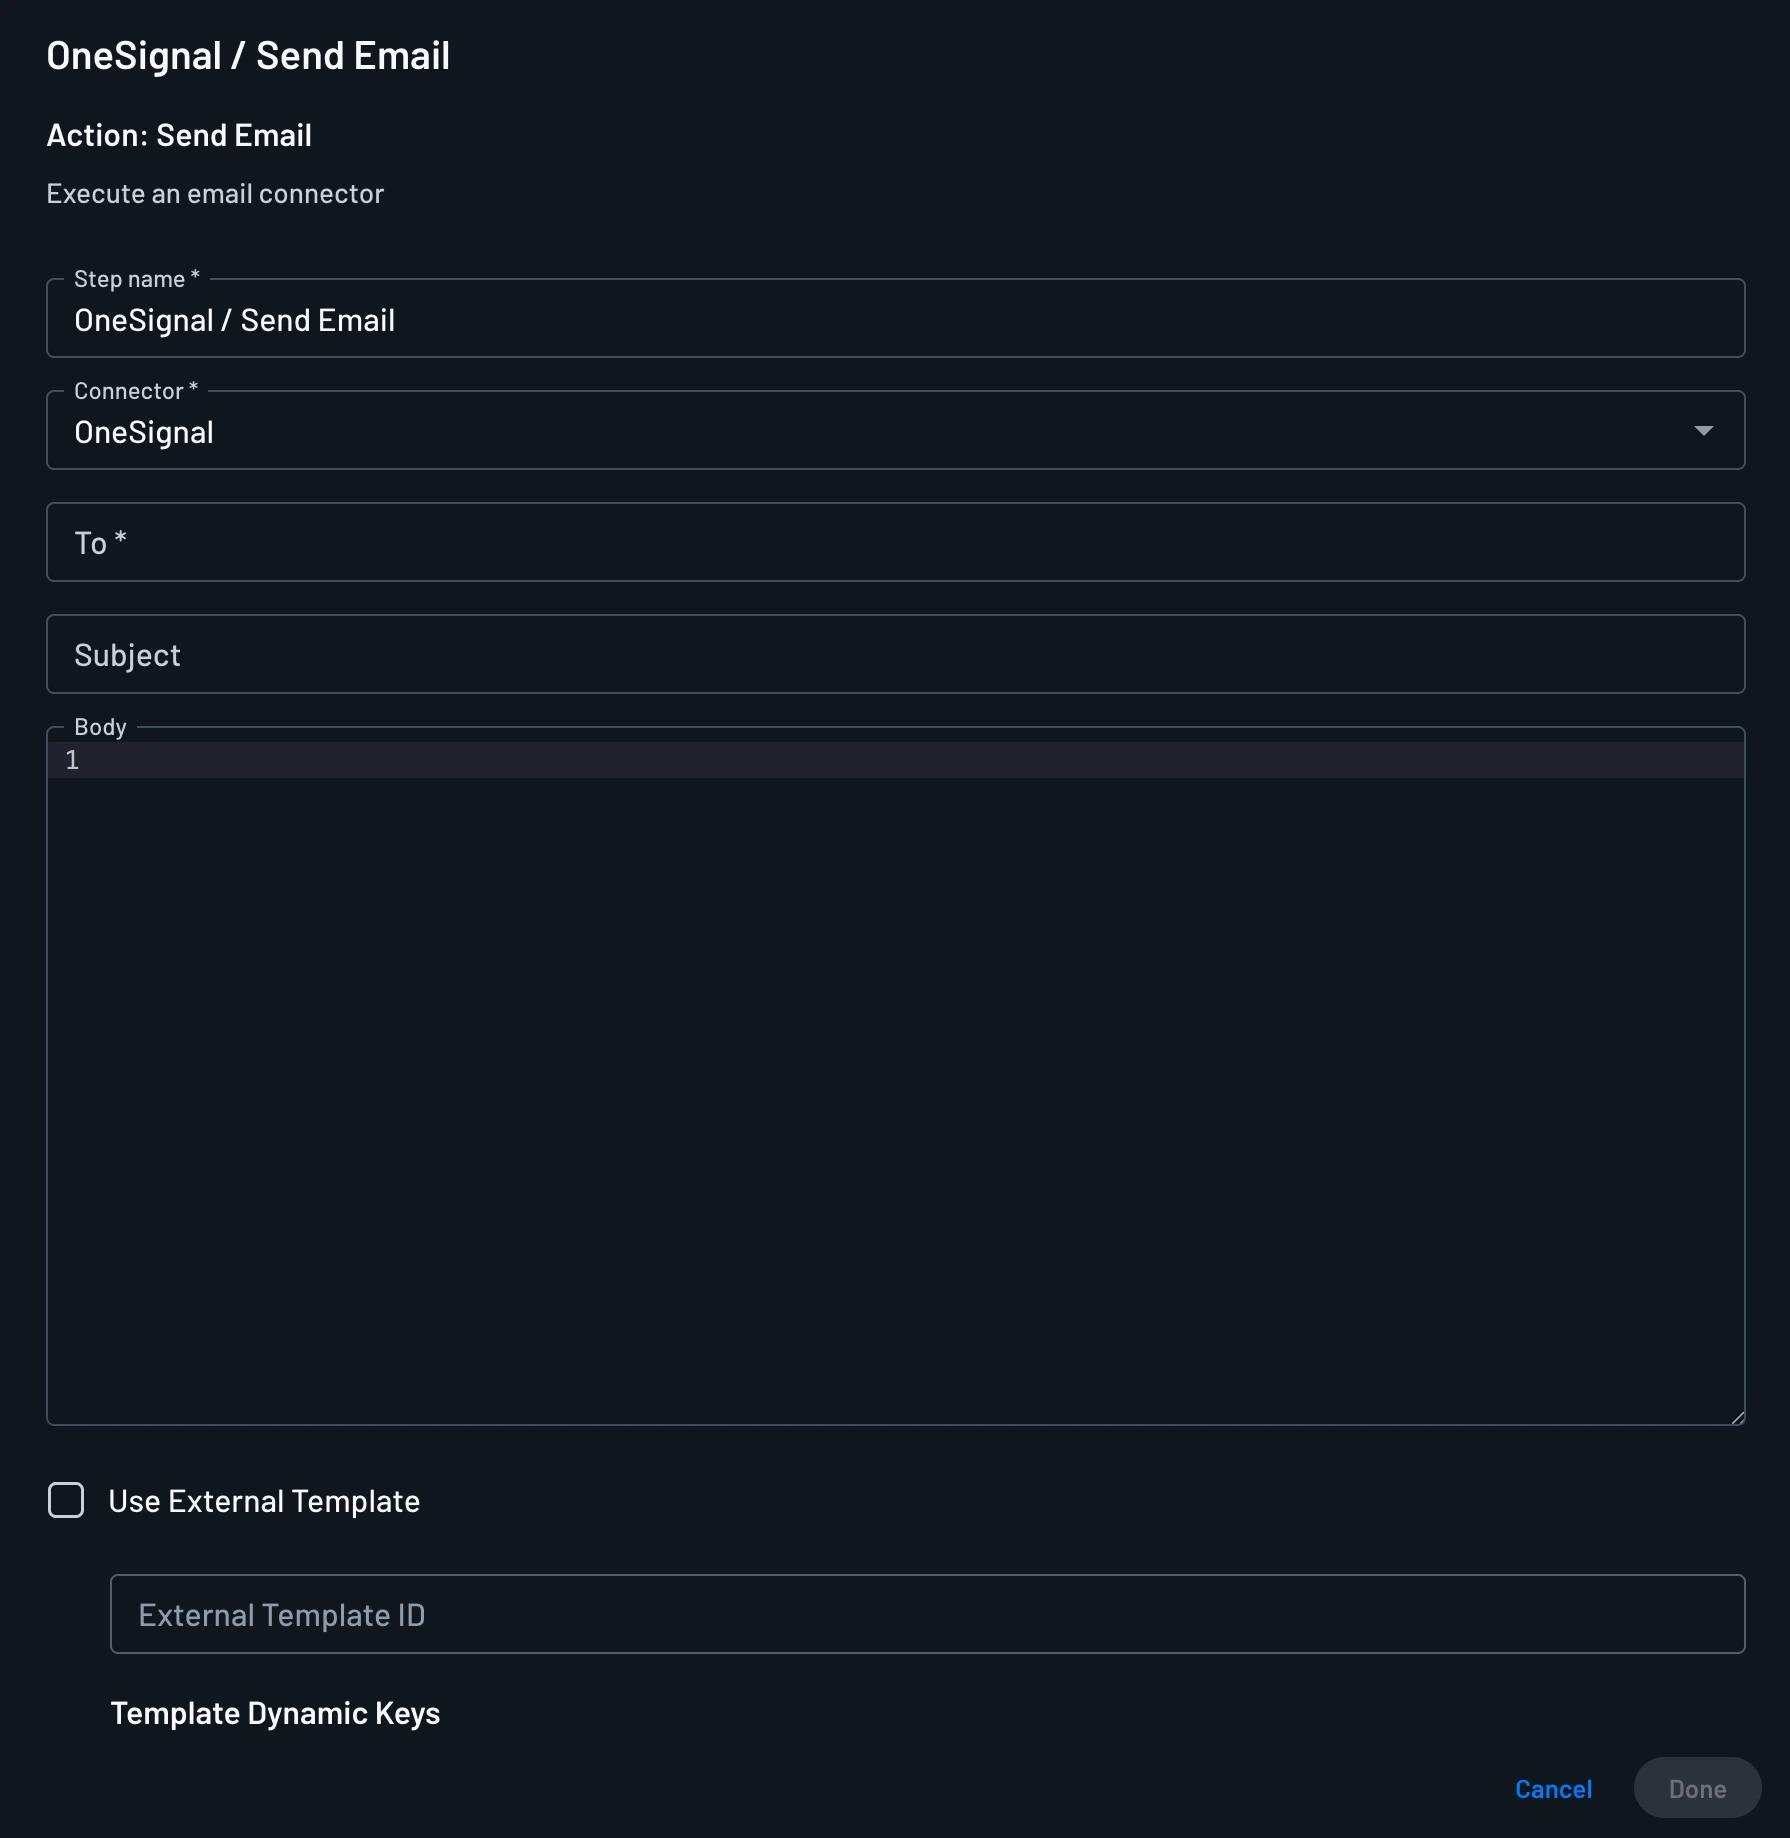
- In the flow editor, tap the
+icon, select Connector, and choose OneSignal / Send Email or OneSignal / Send SMS. - Click to configure the connector and fill out the fields:
For Send Email:
- To: Who the email should be sent to. Setting this dynamically based on previous attributes is recommended (eg.
{{user.email}}). - Subject: Enter the subject of the email.
- Body: Enter the body text of the email.
For Send SMS:
- To: Who the SMS should be sent to. Setting this dynamically based on previous attributes is recommended (eg.
{{user.phone}}). - Message: Enter the content of the SMS.