Vonage Connector
The Vonage connector lets you send SMS messages through your Vonage account as part of your Descope flows, such as for one-time passwords or notifications. This article covers how to set up and test the connector.
Configuration
To configure the Vonage connector, you'll need your Vonage API credentials and a sender ID or phone number. Go to the Connectors page in the Descope Console, search for Vonage, and select it.
Settings
- Connector name: Custom name for your connector. This will come in handy when creating multiple connectors from the same connector template.
- Connector description: Describe what your connector is used for.
- API Key: Your Vonage API key. To obtain this, go to the Vonage API Dashboard.
- API Secret: Your Vonage API secret, found next to the API key in the Vonage API Dashboard.
- From: The sender ID or number the SMS is sent from. An alphanumeric sender ID is not supported in every country.
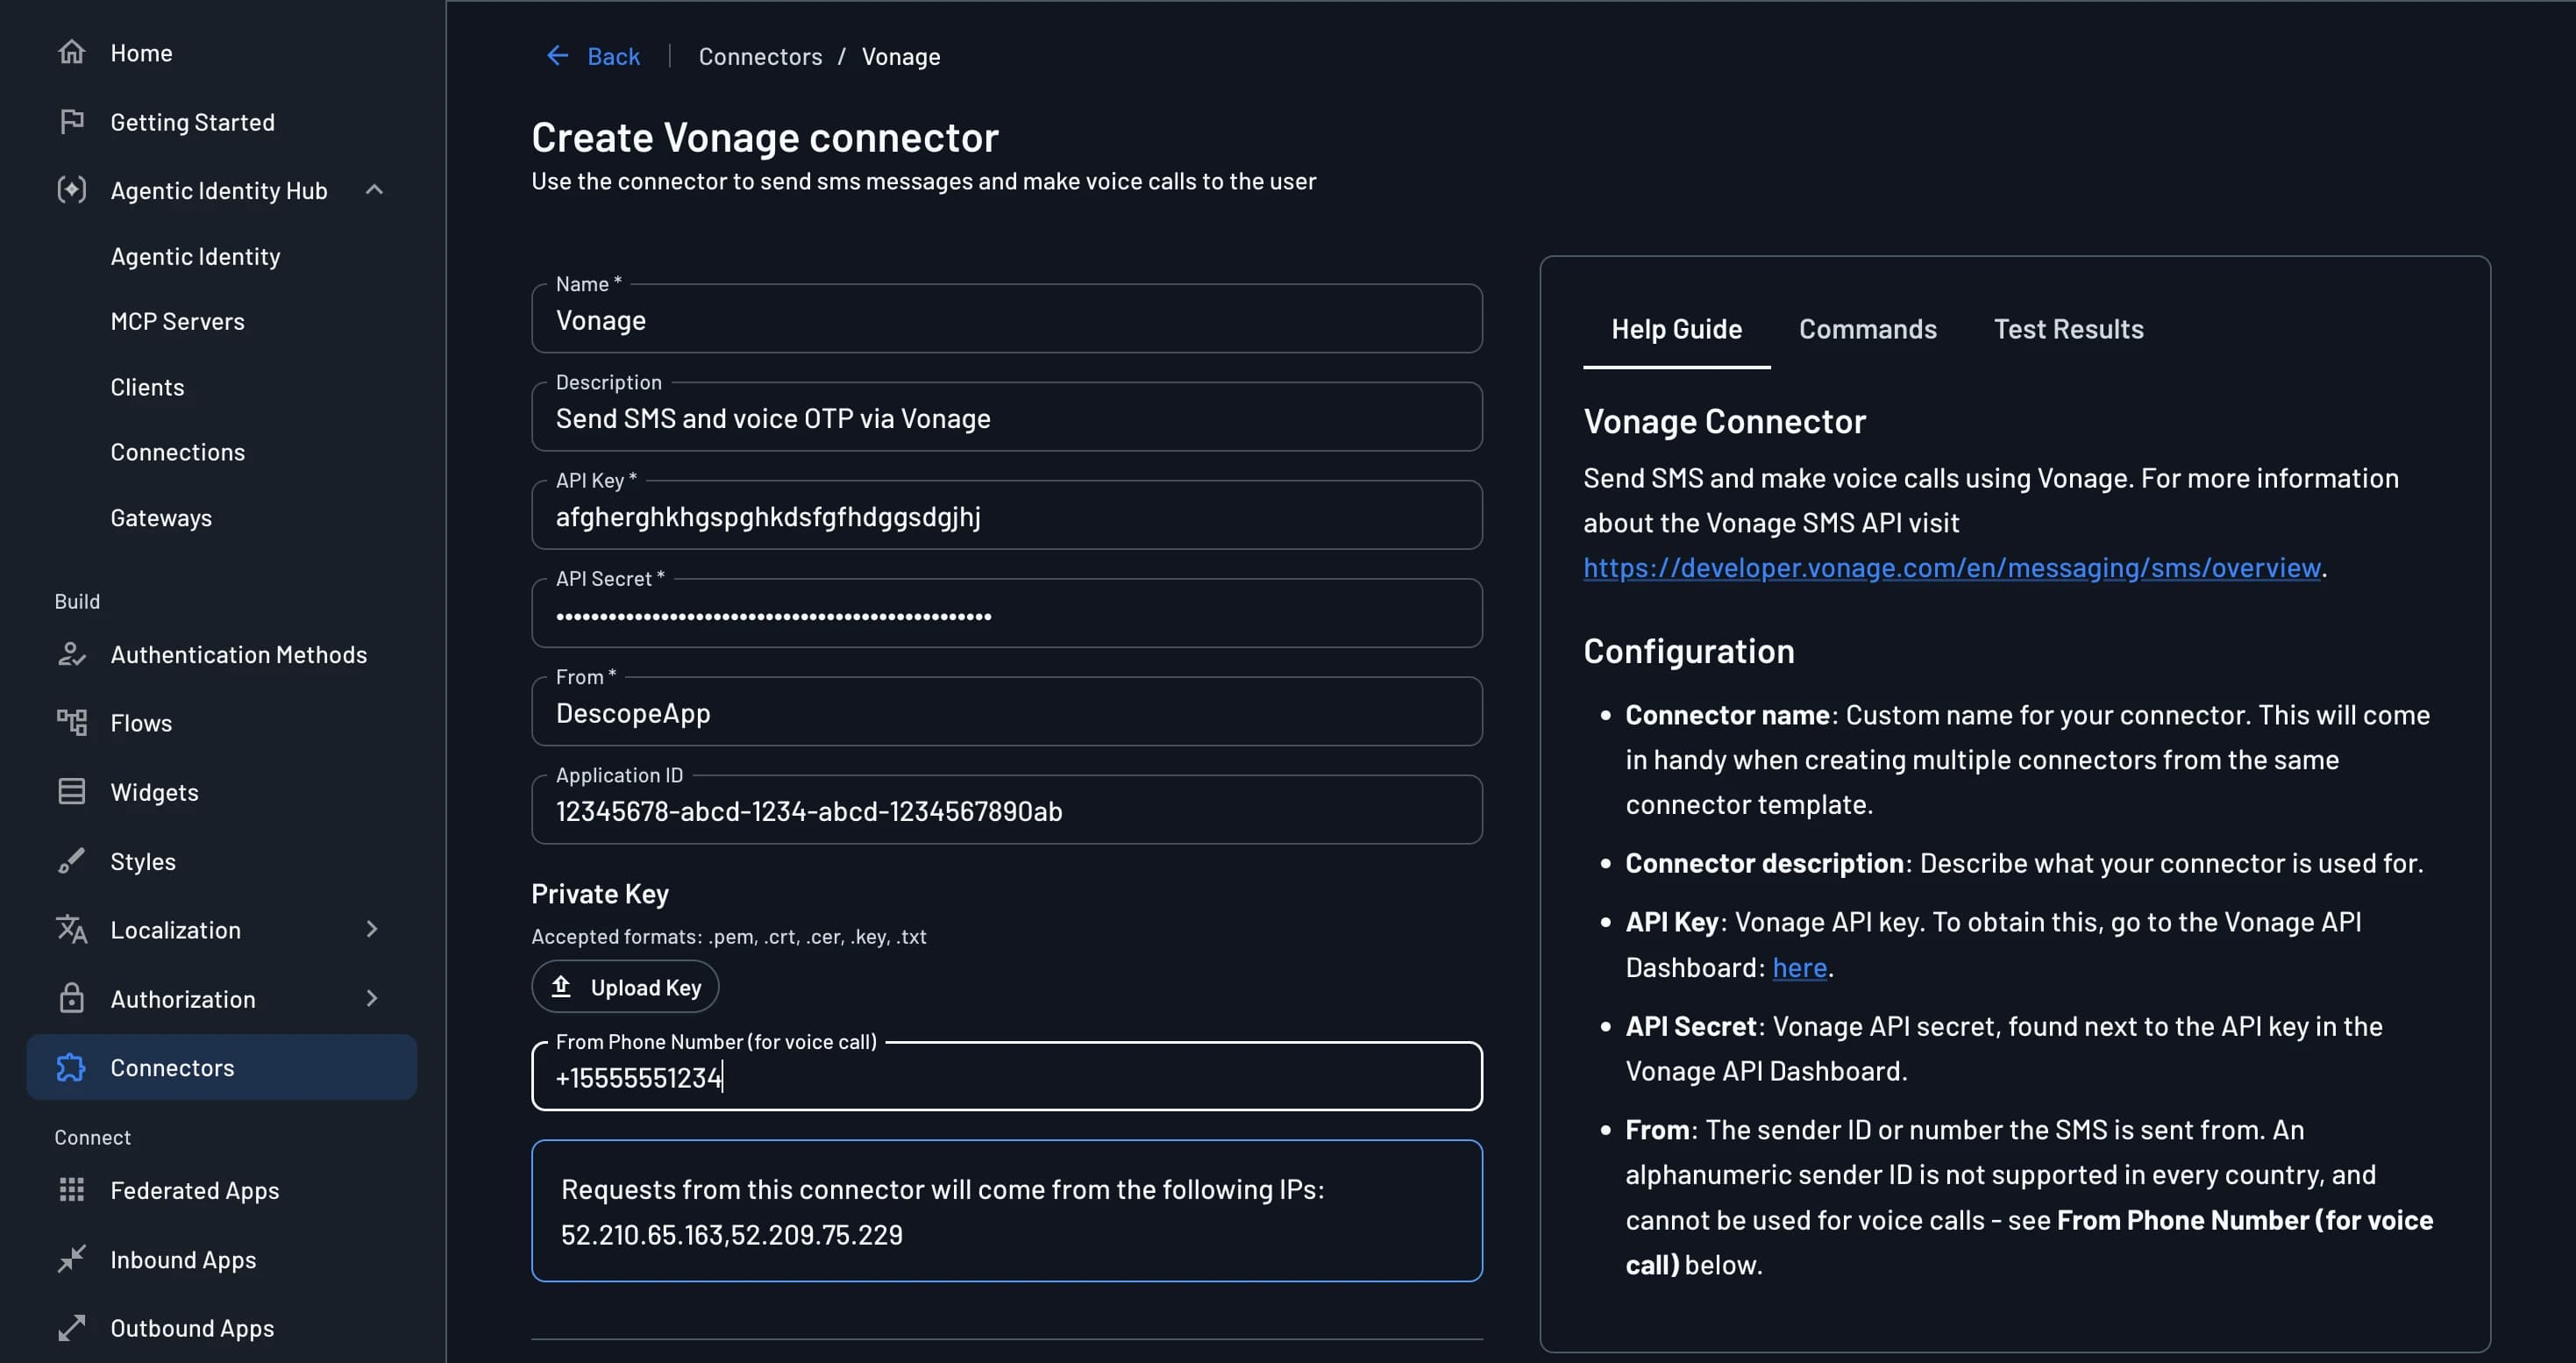
The connector's configuration screen in the Console shows the exact IPs your requests originate from, for example:
Requests from this connector will come from the following IPs: 52.210.65.163, 52.209.75.229
See Public Static IPs for the full, region-specific list. For Vonage, allowlist the Project Static IPs for your project's region; messaging connectors do not use the Connector static IPs.
Testing
Before deploying your connector, it's crucial to verify its configuration:
- Enter a phone number to which the test SMS should be sent.
- Use the Test button to initiate a test SMS message.
This test ensures that your connector is properly set up and can send SMS messages successfully.
For further assistance or troubleshooting, refer to the Vonage SMS API documentation or contact Descope support.
Using the Connector in Authentication Methods
The Vonage connector can be used to send OTP codes in your authentication methods.
One-time Password (OTP)
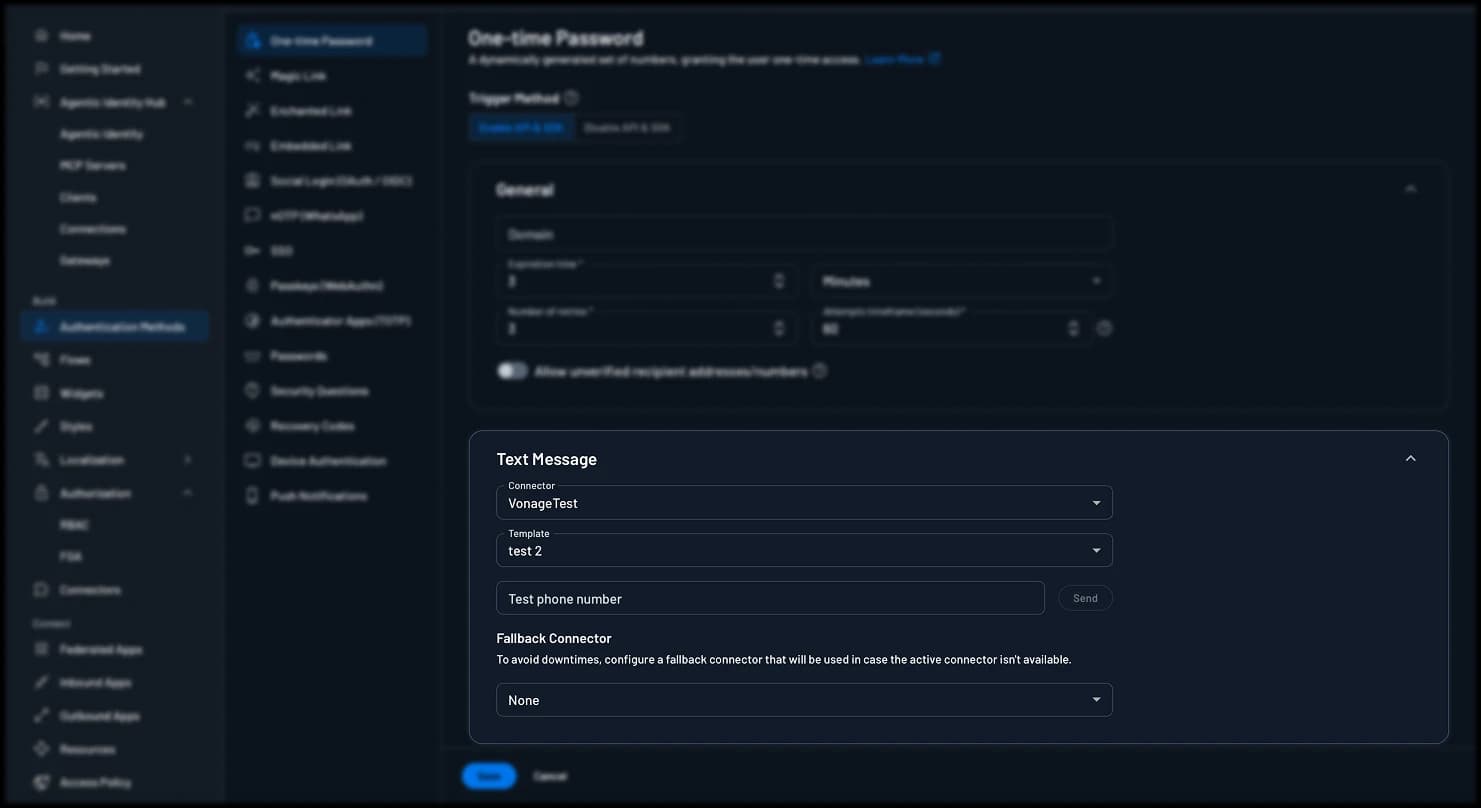
- Navigate to Authentication Methods → One-time Password.
- In the SMS section, select your configured Vonage connector from the dropdown.
- Customize your SMS template if needed.
Your OTP SMS will now be sent through Vonage.
Using Vonage Explicitly in Flows
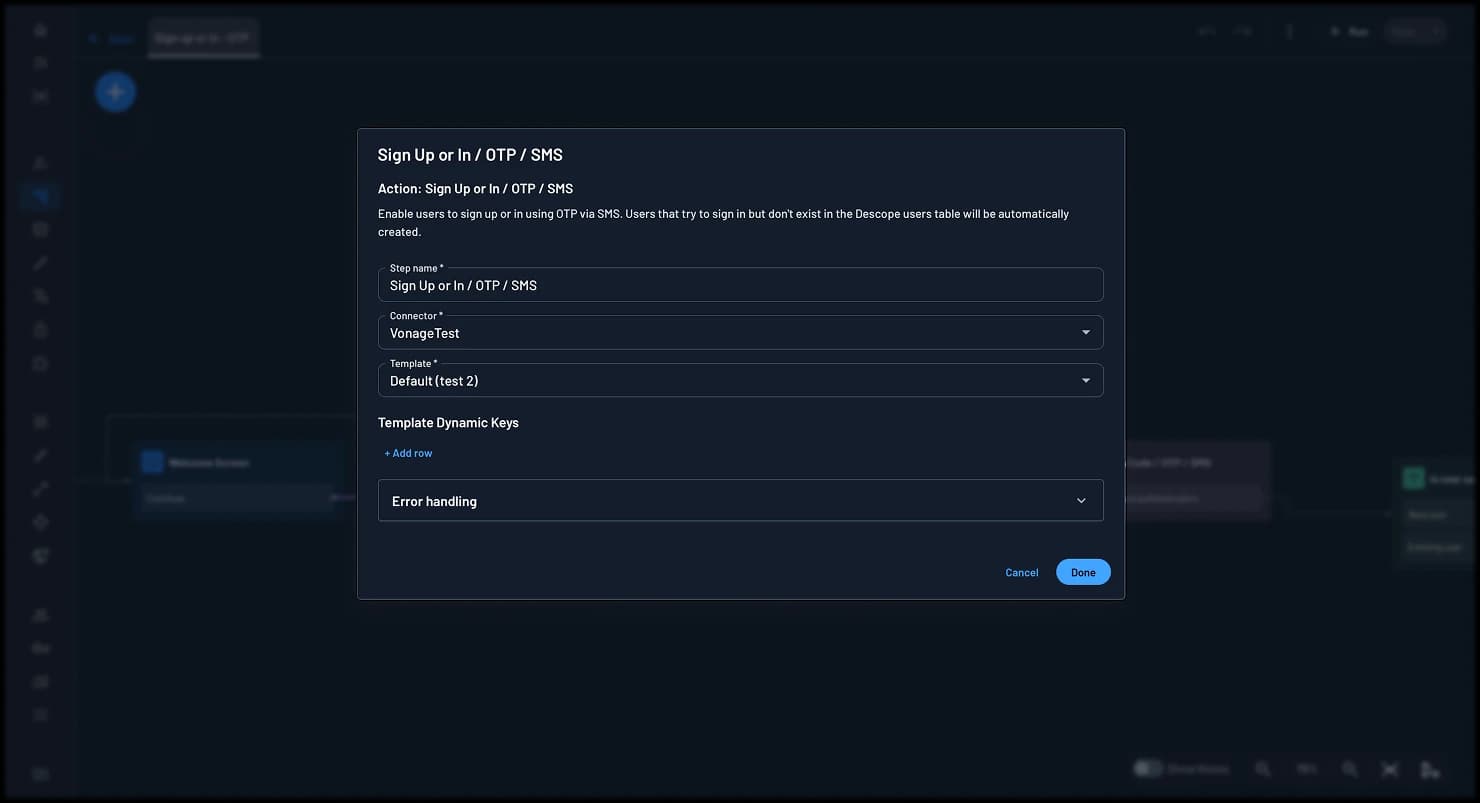
You can also override the default SMS OTP connector inside a specific flow action, to use Vonage for that action regardless of your default connector setting. Open the flow, select the OTP action (or add a new one), and choose Vonage as the connector for that step.
Sending Custom Messages via Vonage in Flows
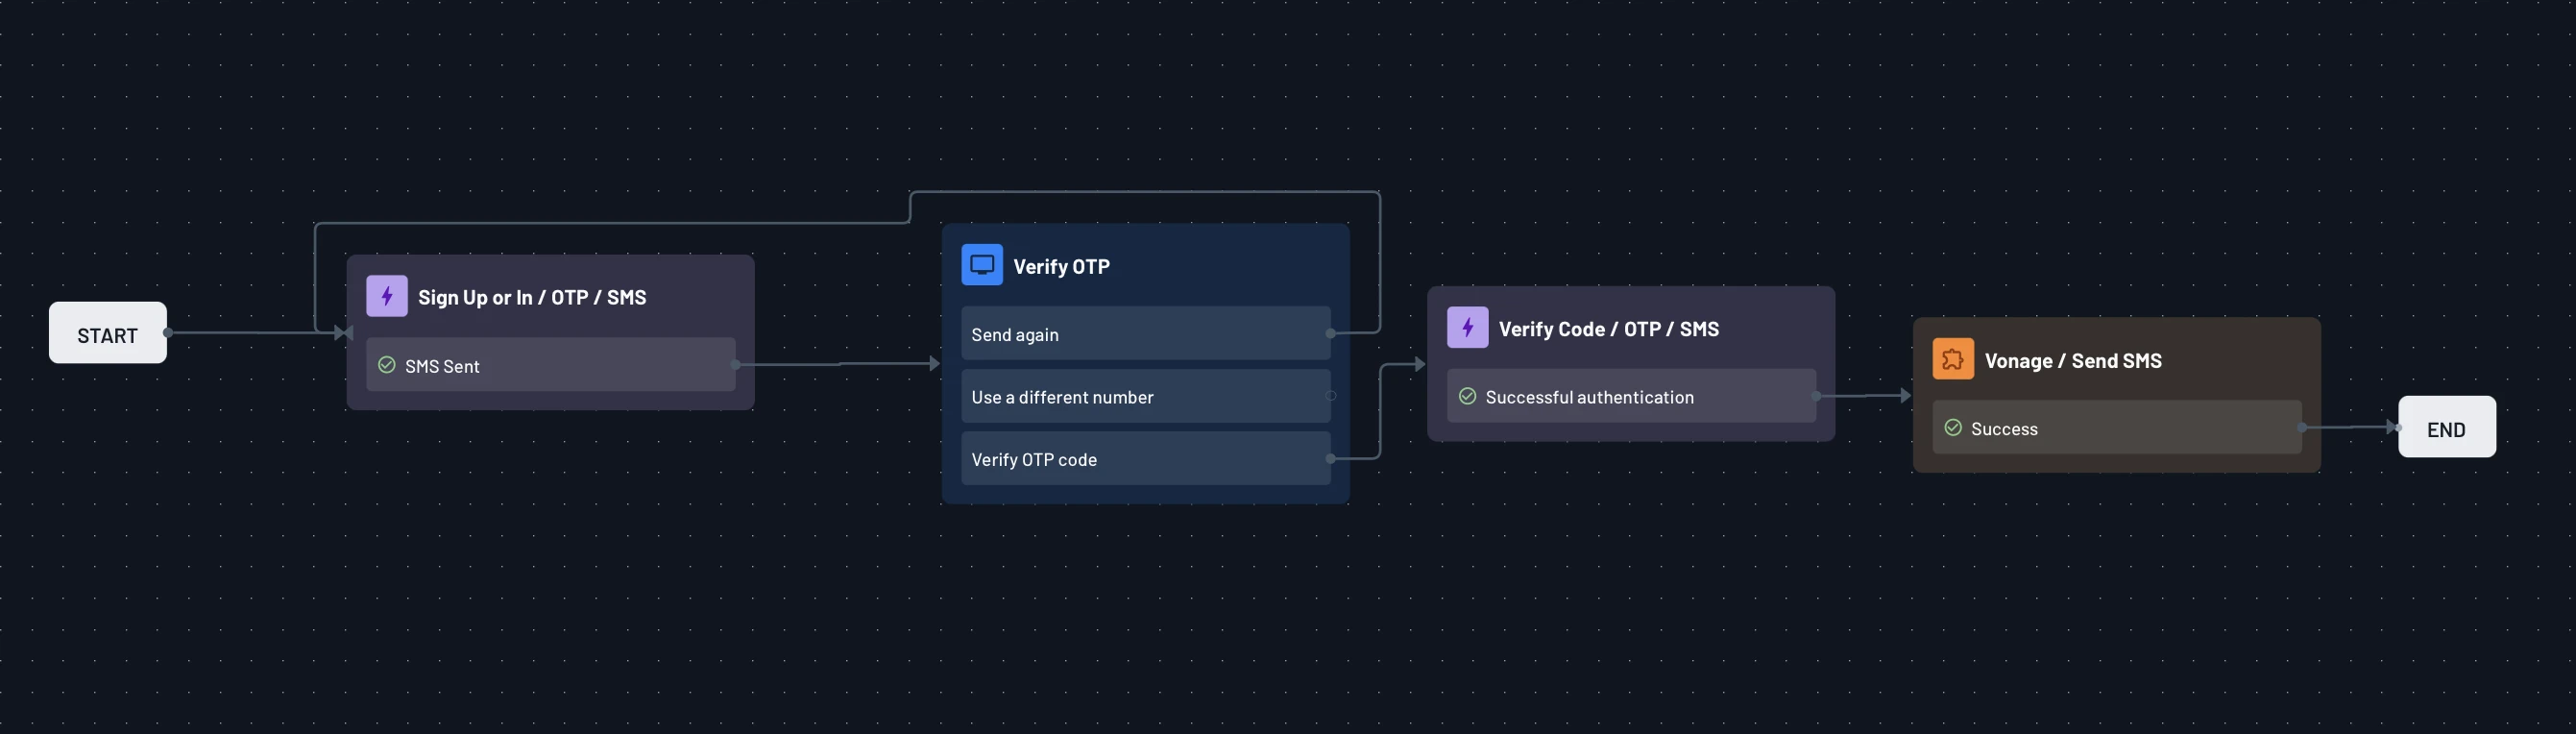
You can also use the Vonage connector to send a custom SMS message outside of the OTP flow, for example as part of a notification step in a flow.
- Go to Flows, choose the flow you want to edit, and select + to add a step.
- Select Connector, then choose Vonage, and place the node in your flow.
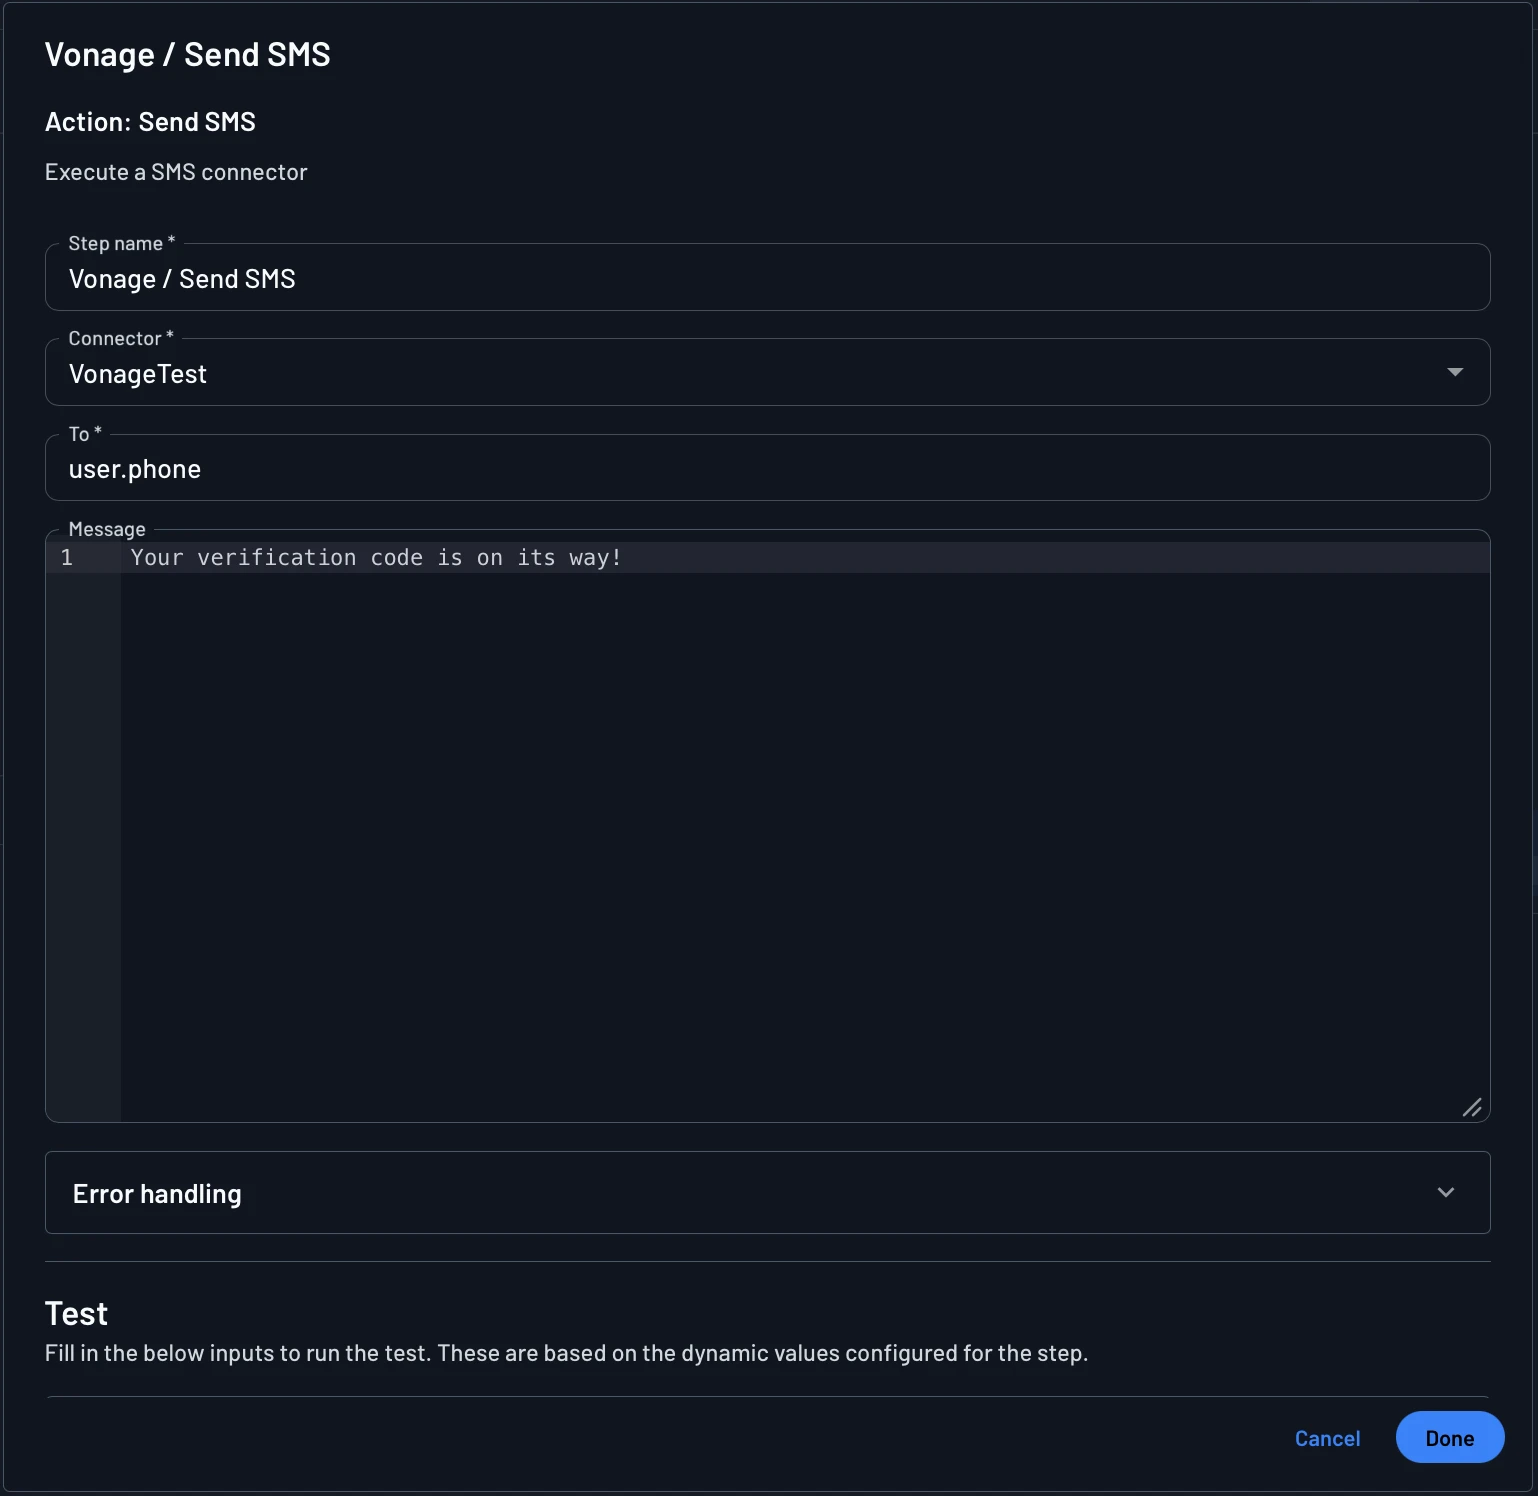
- Double-click the node to configure it:
- To: The phone number the message should be sent to. We recommend using
{{user.phone}}. - Message: The content of the SMS message.
- To: The phone number the message should be sent to. We recommend using
Voice Channel
In addition to SMS, the Vonage connector can deliver one-time codes as a voice call. Voice is not a separate connector. It's an extension of your existing Vonage connector configuration, so you'll need Vonage SMS configured first; voice-only setup is not supported.
Setup
When creating or editing your Vonage connector, fill in the following fields in addition to the existing SMS fields:
| Field | Description |
|---|---|
| Application ID | Your Vonage Application ID, used for voice calls only. |
| Private Key | Upload your Vonage application's private key (accepted formats: .pem, .crt, .cer, .key, .txt). |
| From Phone Number (for voice call) | A real, dialable Vonage phone number capable of placing calls. Unlike SMS, an alphanumeric sender ID cannot be used for voice calls. |
Voice message content
The default voice OTP message is:
The authentication code is: {{code}}.
This code will expire in {{expirationTime}}.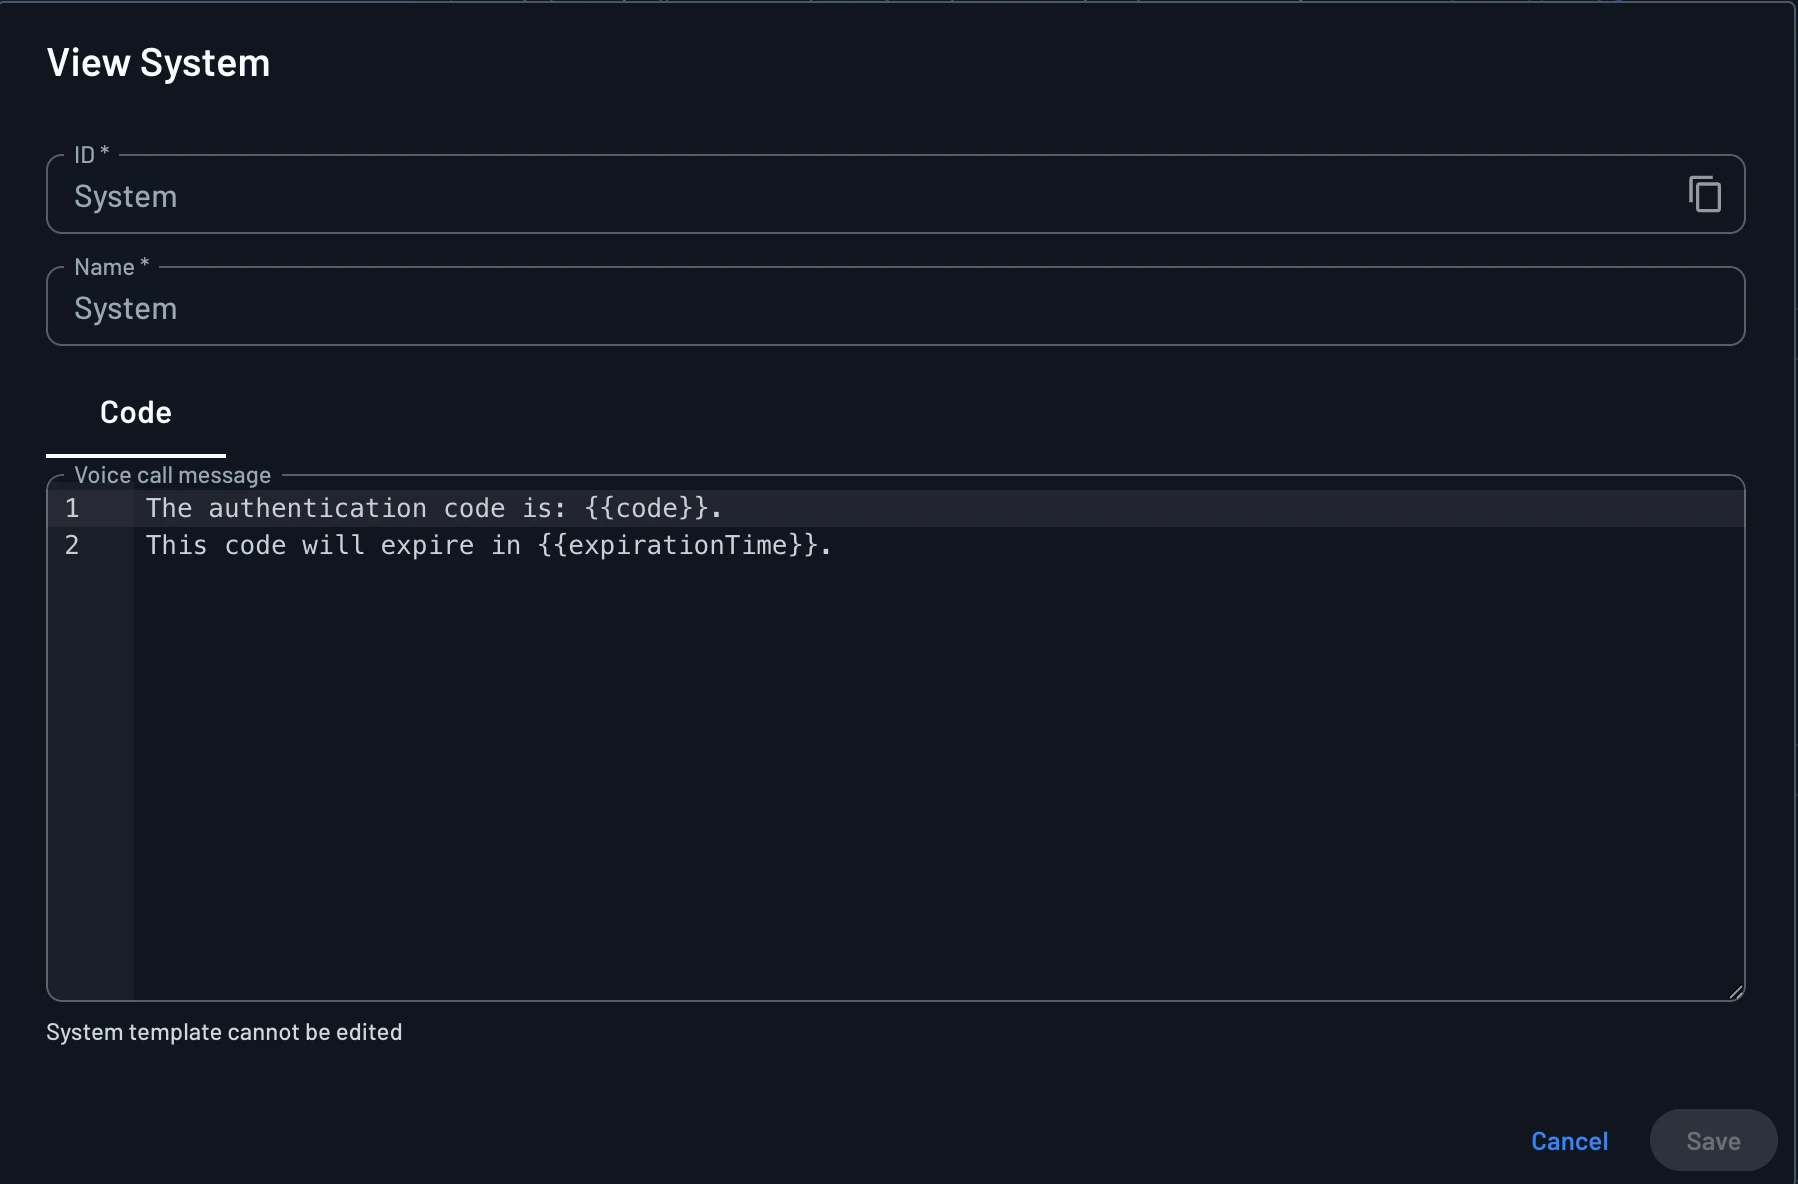
This default is a system template and can't be edited directly. To customize the wording, create a new OTP template instead; the same placeholders ({{code}}, {{expirationTime}}) are available there too.
Note
The voice message is plain text, read aloud via text-to-speech. The code is automatically read back digit-by-digit with brief pauses for clarity.
Using voice in a Flow
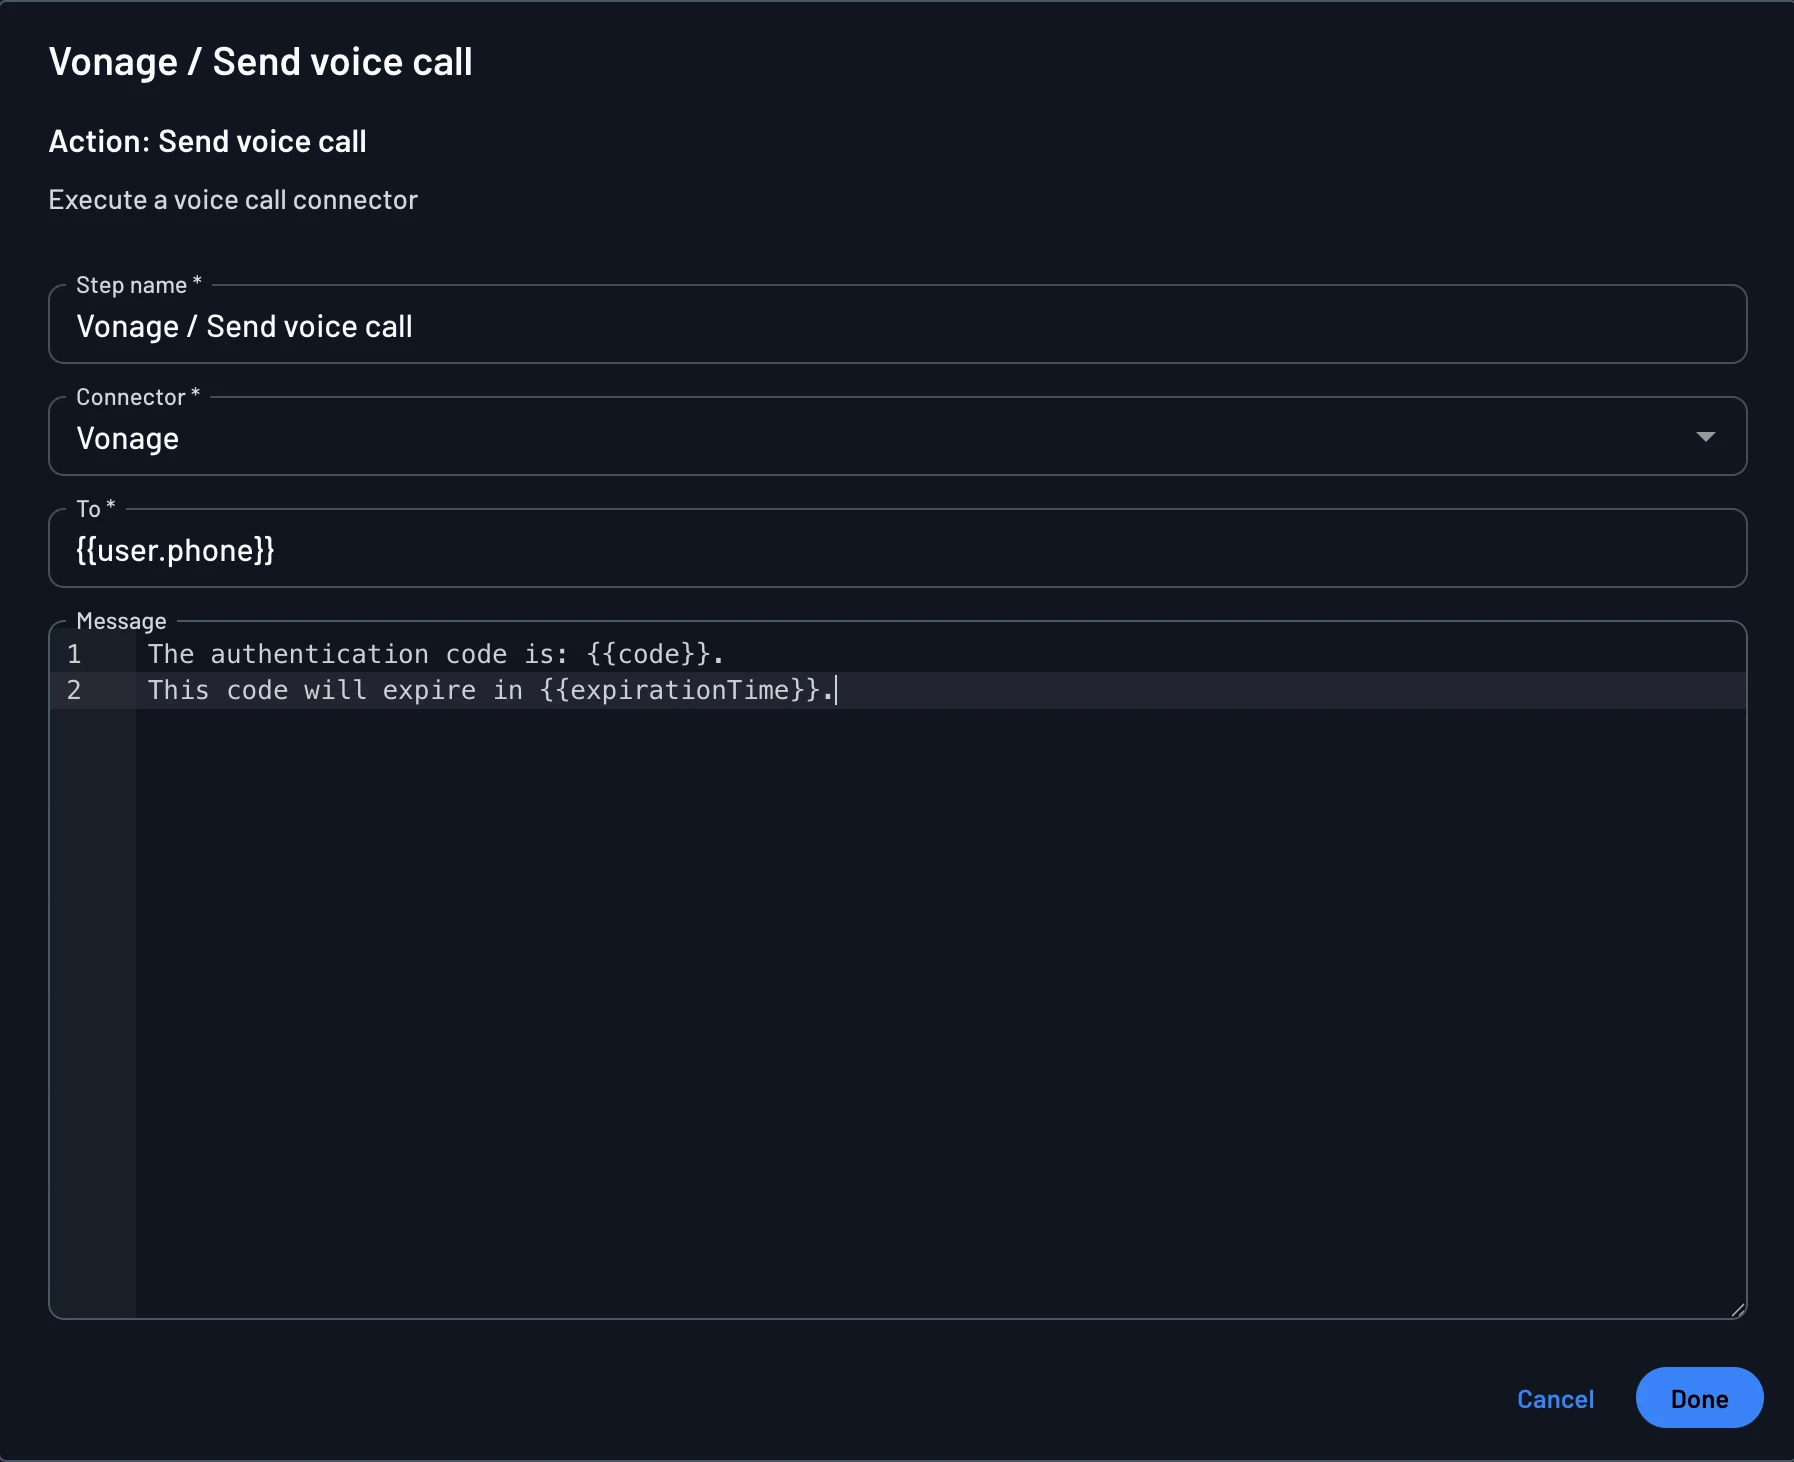
To send a voice call from a Flow, add a new step and select the Vonage connector with the Send voice call action.
| Field | Description |
|---|---|
| To | The recipient's phone number, e.g. {{user.phone}}. |
| Message | The message to read aloud. Supports the same placeholders as the OTP template, e.g. {{code}} and {{expirationTime}}. |
Handling failed or unanswered calls
Descope considers a voice call sent as soon as Vonage accepts the call request. Whether the call was actually answered, went to voicemail, or was dropped is not tracked, so there's no automatic fallback if a user doesn't pick up.
If you want resilience against this:
- Fallback voice provider: configure a second voice provider as a backup under Authentication Methods -> OTP -> Voice. This only helps if Vonage's API rejects the call outright (e.g. an outage), not if the call goes unanswered.
- Fallback to another channel: to fall back to SMS when Vonage rejects the call request, add an error-outcome branch from the voice step to an SMS step yourself; this isn't wired automatically. Like the fallback provider, this does not trigger for calls that are accepted but go unanswered.
Terraform
Terraform support for the Vonage connector (SMS and voice) is not yet available.